
Set it up
-
To use the Magic Eye, please make sure that you connect it to your machine using a USB cable before you launch Booth Junkie.
-
In the WORKFLOW tabs, select the workflow you wish to use the Magic Eye with: Single shot, Multishot, or Strip Print.
-
Now decide at which step you want to control the Magic Eye.
-
Select FUNCTION and then MAGIC EYE, then choose either ON or OFF.
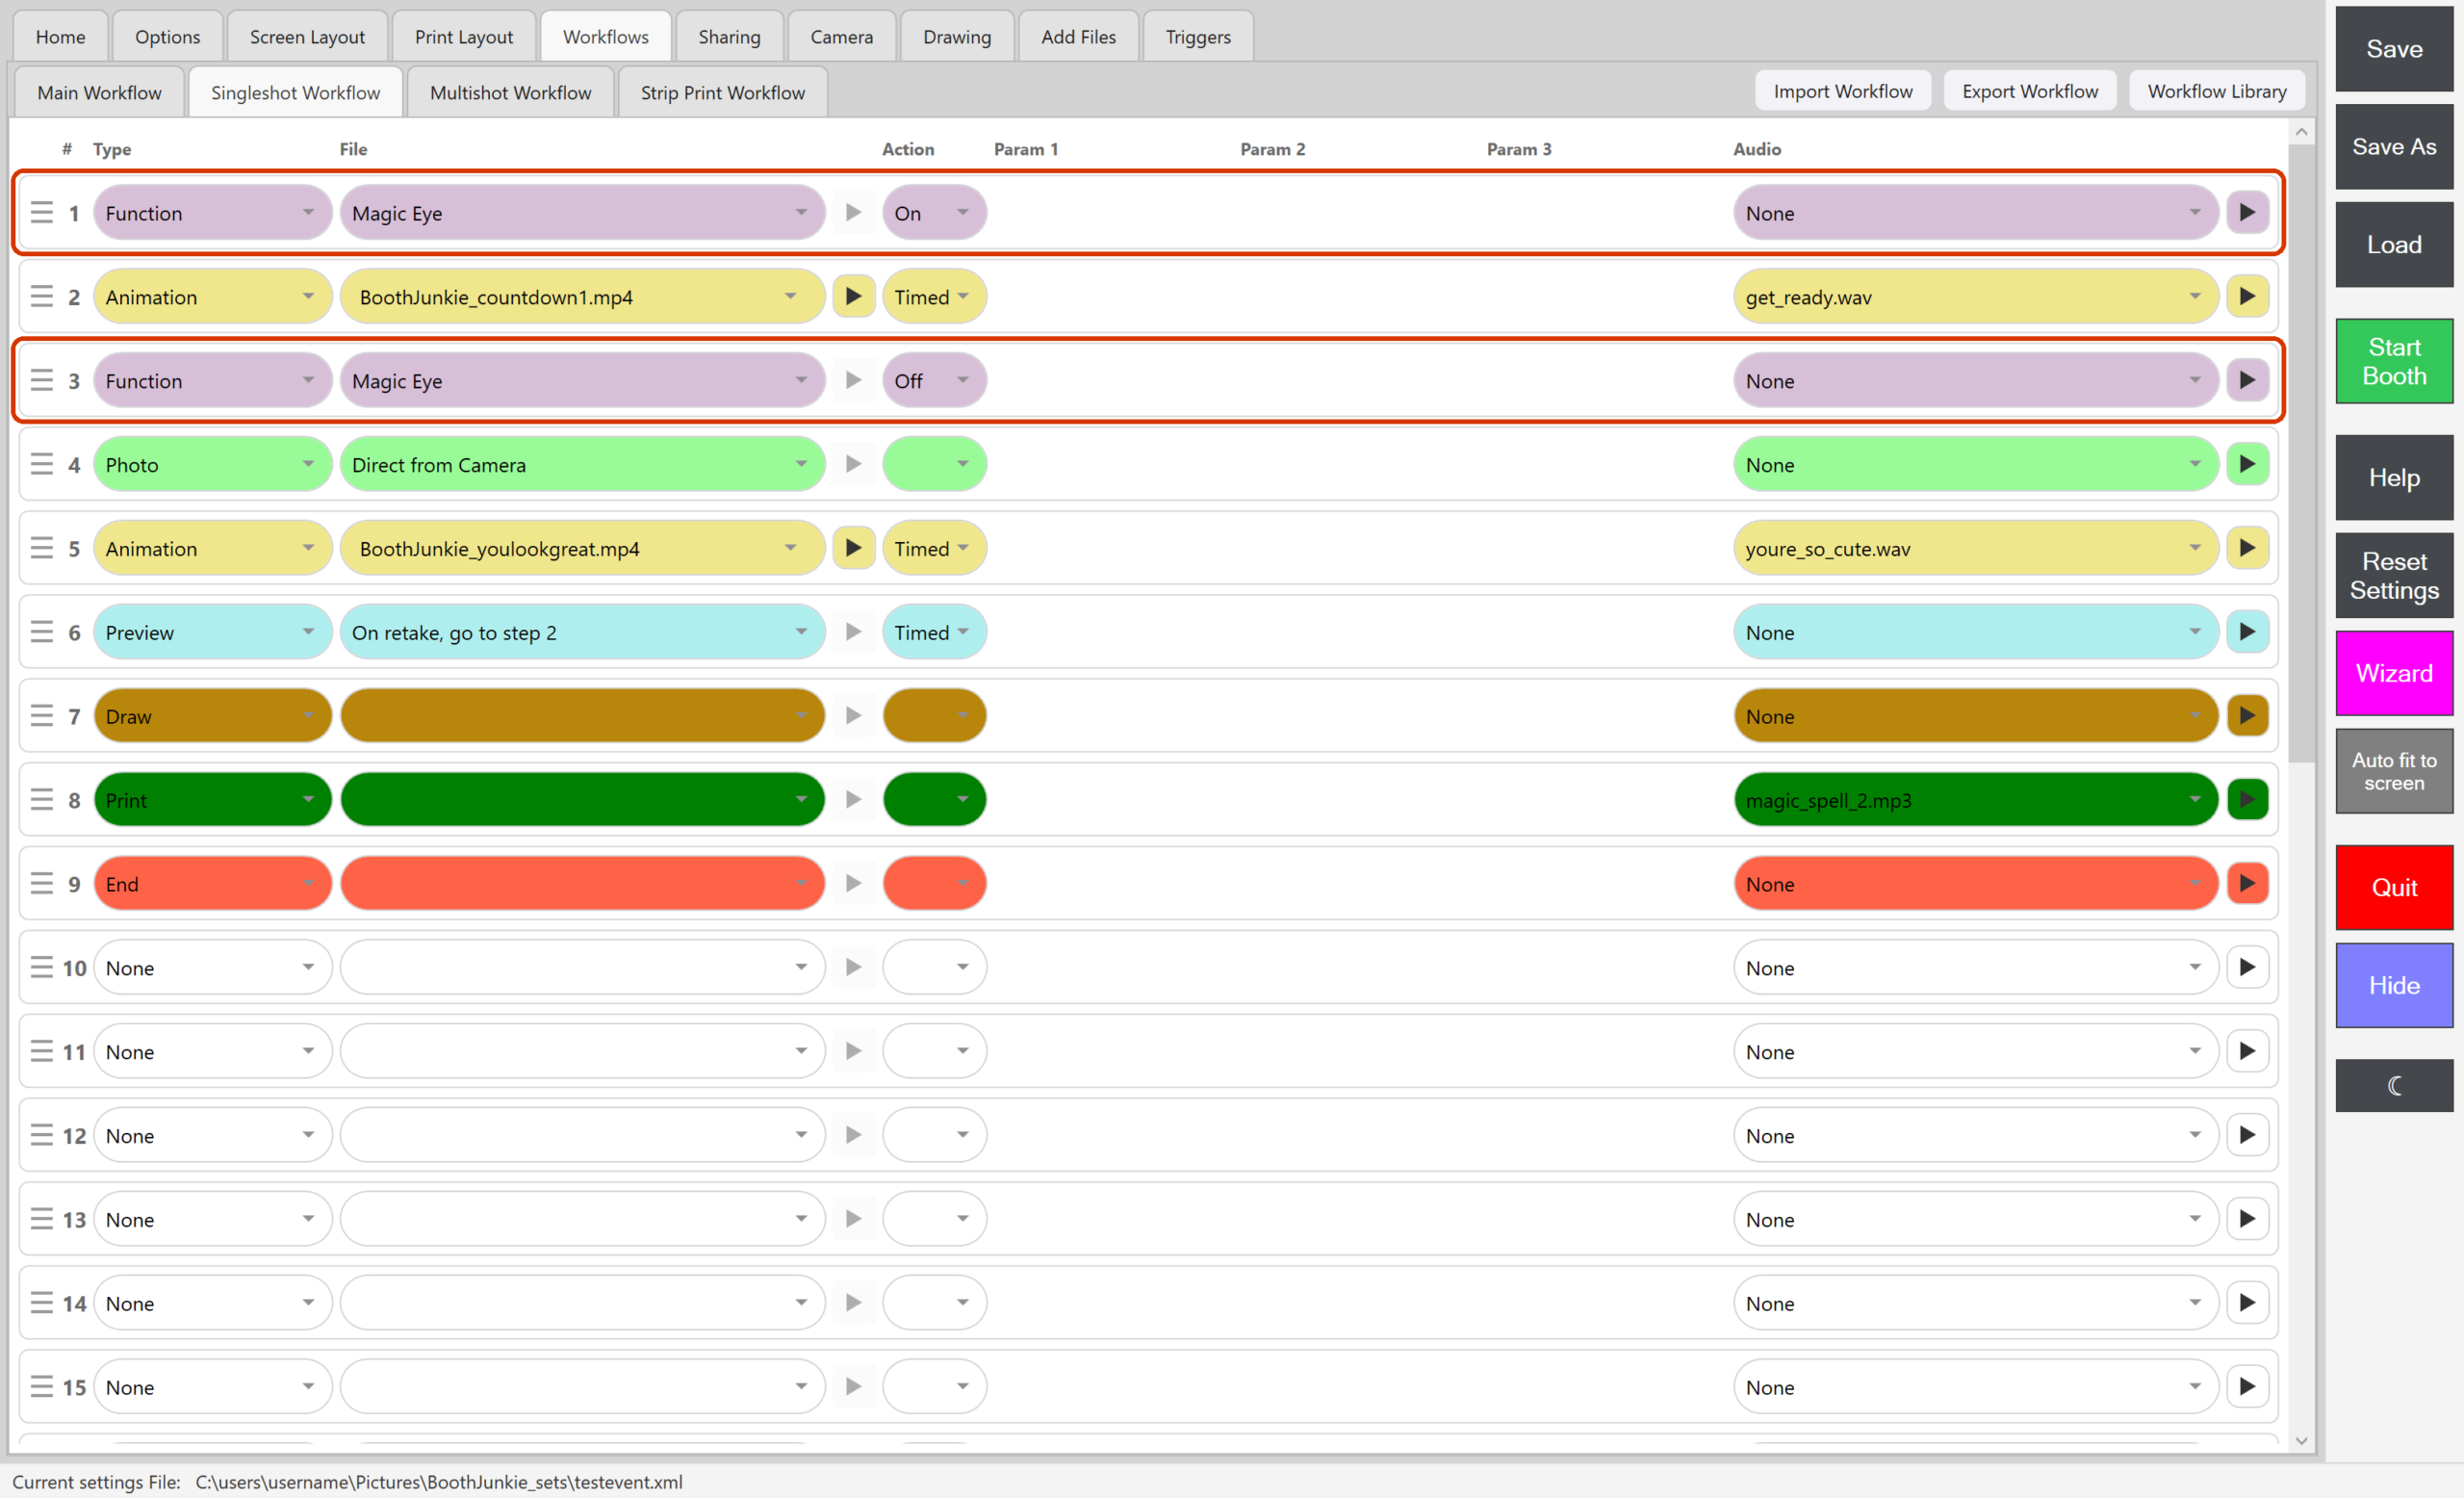
Result: The Magic Eye should now activate and/or deactivate at the chosen times.
Tip: Mirror booths: turn it off before the photo
If you are using a mirror type photobooth, it is best practice to turn off the Magic Eye before you trigger the camera to take a photo, otherwise the LED’s on the Magic Eye may reflect off the inside of the glass and appear in the photos.
Good to know: The Magic Eye and the Light Ring are different products
The Magic Eye is made by photobooths.co.uk, and Booth Junkie can only switch it on and off.
The Animated LED Light Ring, usually just called the Light Ring, is Booth Junkie’s own product. It can be switched on and off too, and it can also change colour, pattern and speed. It has its own Light Ring entry in a Function step’s File list, with its own pattern, colour and speed choices.
This guide is from Booth Junkie, photo booth software for Windows that has supplied the photo booth industry for 10 years. It runs enclosed booths, selfie pods and magic mirror booths with a Canon DSLR or a webcam, prints to any Windows printer, and sends photos to guests by WhatsApp, SMS and email.