
Where to find them
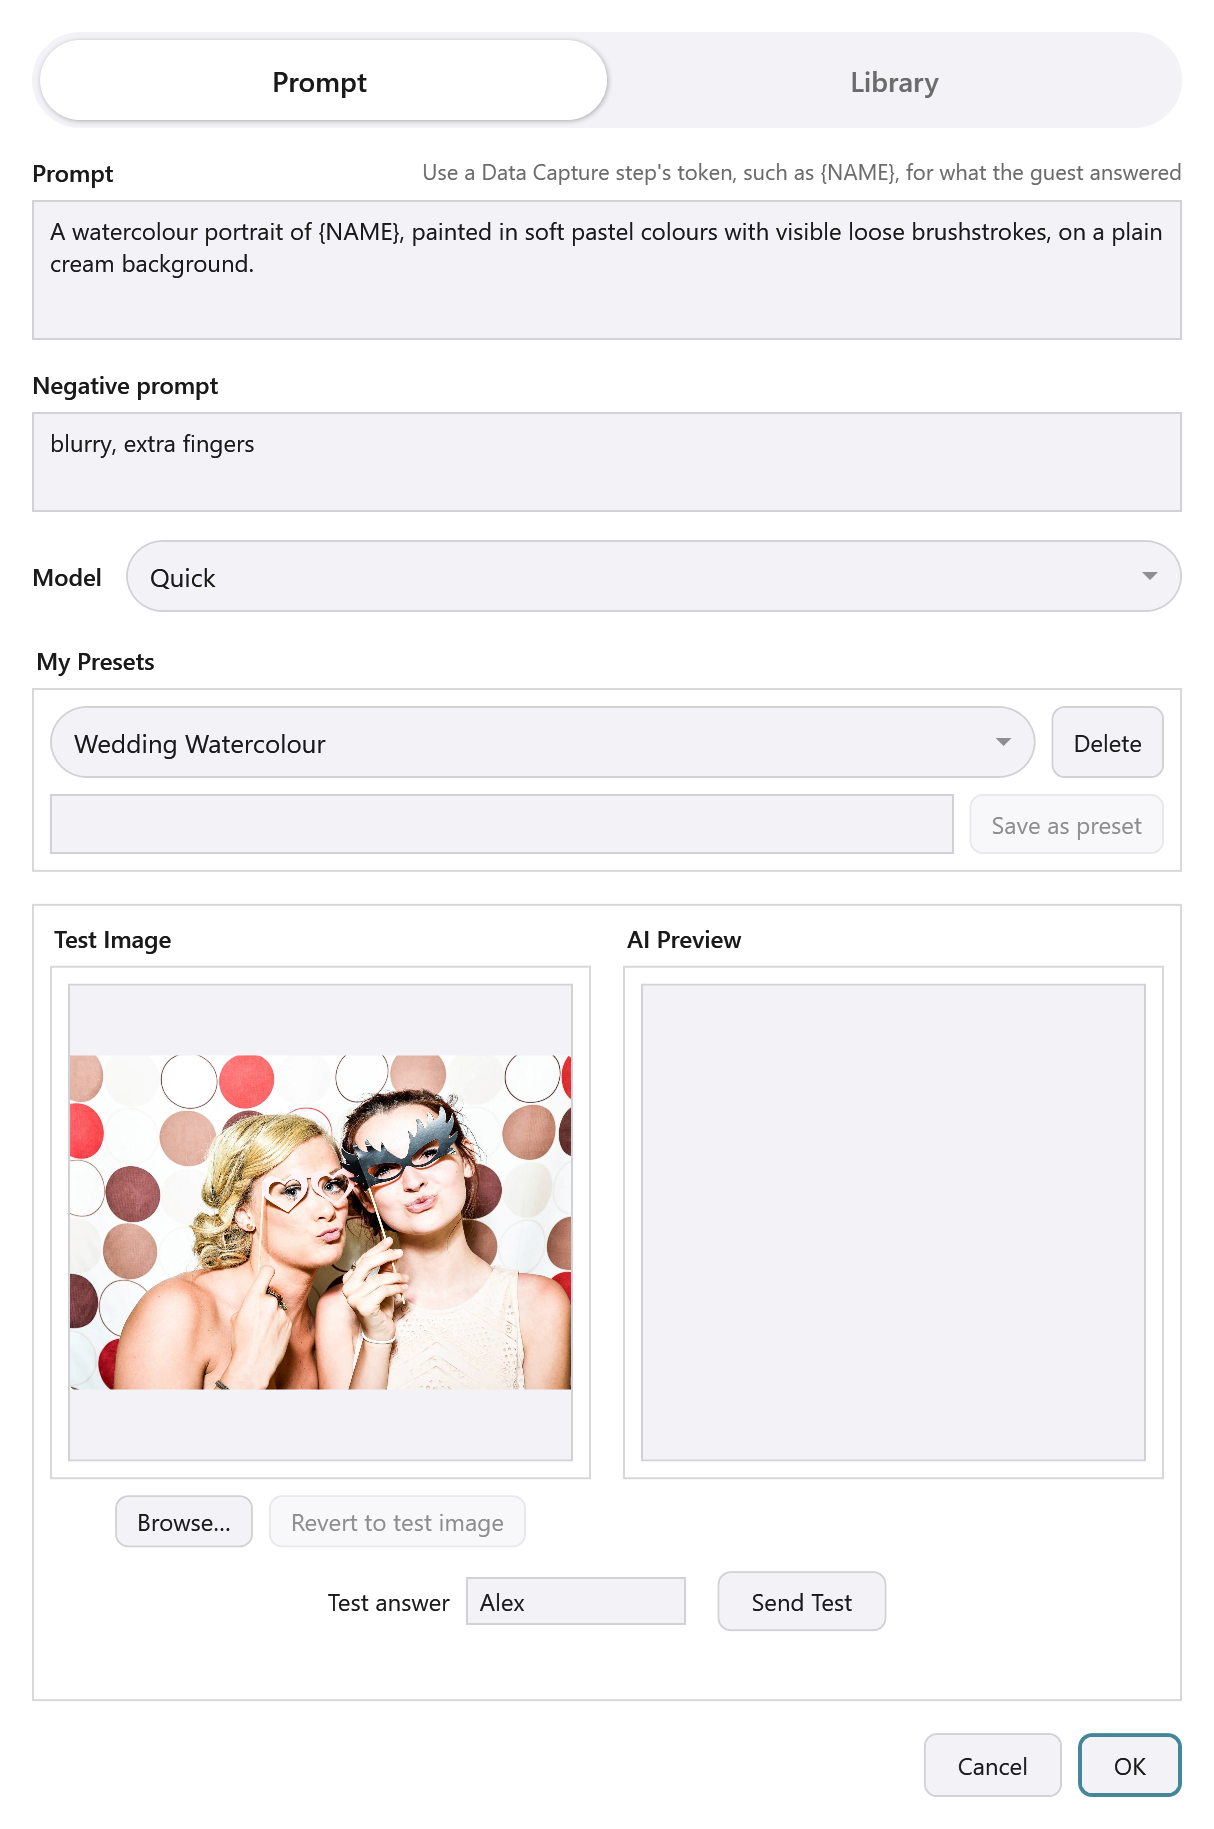
Presets aren’t a separate screen of their own – they live in the My Presets section of the Configure AI Processing window you already use to set up an AI step. See Using AI Processing: Your Own Prompt or the Style Library for how to open it.
Save a preset
Inside that dialog, in Prompt mode, the My Presets section holds a dropdown of everything you’ve saved so far, plus name/save/delete controls.
-
Fill in your Prompt, Negative Prompt, and Model as normal.
-
Give it a name.
-
Select Save as preset.
Good to know: Same name, same preset
Saving under a name that already exists overwrites it rather than creating a duplicate.
Presets are shared globally – one saved while configuring a step in your Single-shot workflow is immediately available from every other AI Processing step, in any workflow.
Edit after applying a preset
Selecting a preset copies its Prompt/Negative Prompt/Model into that step’s own fields – it doesn’t lock them. You’re free to tweak the wording afterward for that specific step; it simply won’t match the preset anymore (there’s no “modified” warning).
If you reopen the dialog later, it re-highlights whichever preset you last picked, unless that preset has since been deleted – in which case it just opens with nothing selected.
See also How the AI Credit System Works for what each AI model actually costs per photo.