
This article covers connecting and configuring your camera in Booth Junkie. For getting sharp, correctly-focused photos once your camera is connected, see How to focus your photobooth camera correctly – a related article, not a replacement for the setup steps below.
Where to find it
Admin Panel → Camera.
Choose your camera type
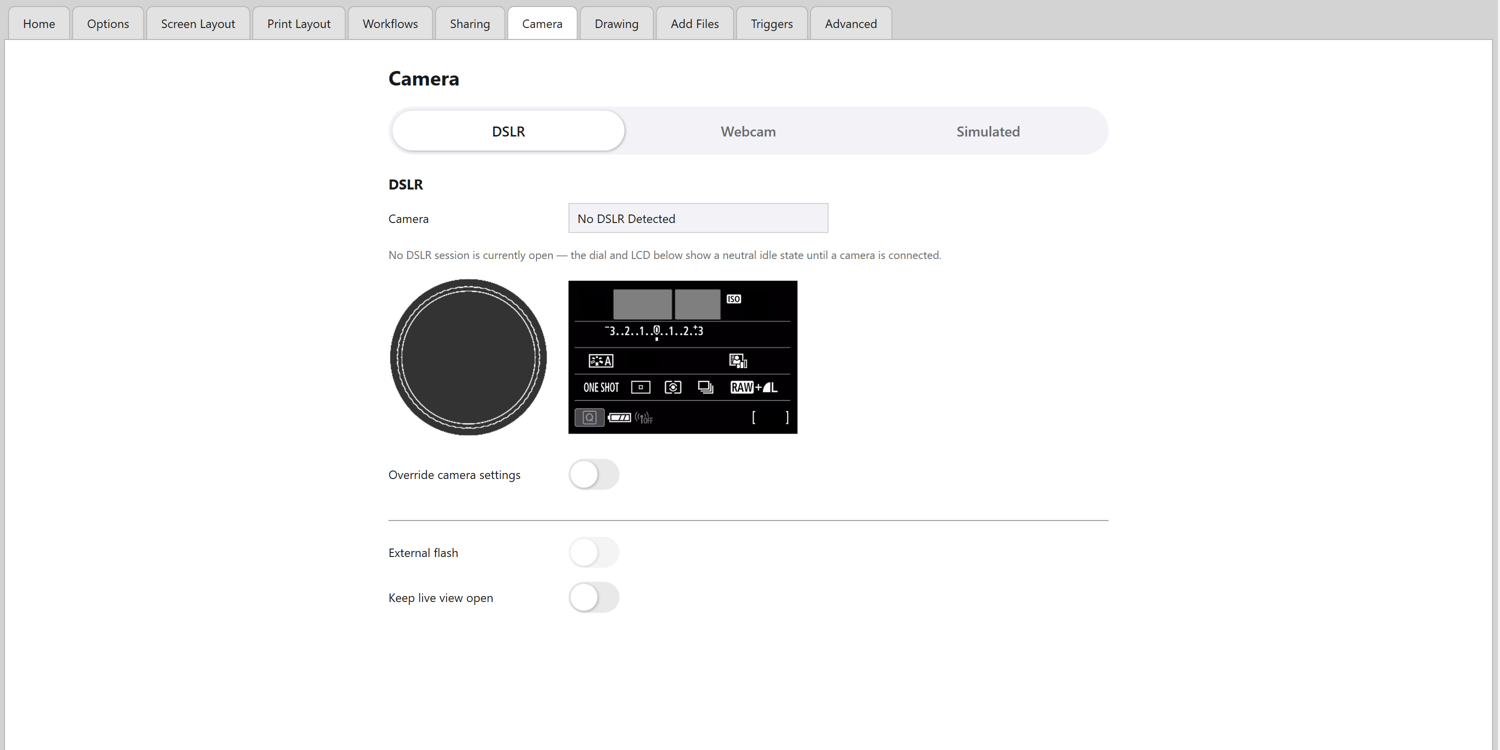
At the top of the tab is a sliding switch with three positions: DSLR, Webcam and Simulated. Slide it to the kind of camera you’re using and the tab shows only that type’s settings.
| Type | What it is |
|---|---|
| DSLR | A Canon camera connected by USB. The rest of this article describes its settings. |
| Webcam | A USB webcam – see “Setting up a webcam” below for its two settings. |
| Simulated | Uses no camera at all. It shows an animated placeholder live view and clearly marked placeholder photos, for demos, training and trying out layouts. See Using the Simulated Camera for Demos, Training and Testing. |
Important: Never use Simulated at a real event
Guests never see a real photo of themselves while it’s on.
The others are hidden, not lost: slide back to a type you used earlier and its settings are just as you left them. Only one type is used at a time, so the booth never tries to use a webcam and a DSLR together.
Setting up a webcam
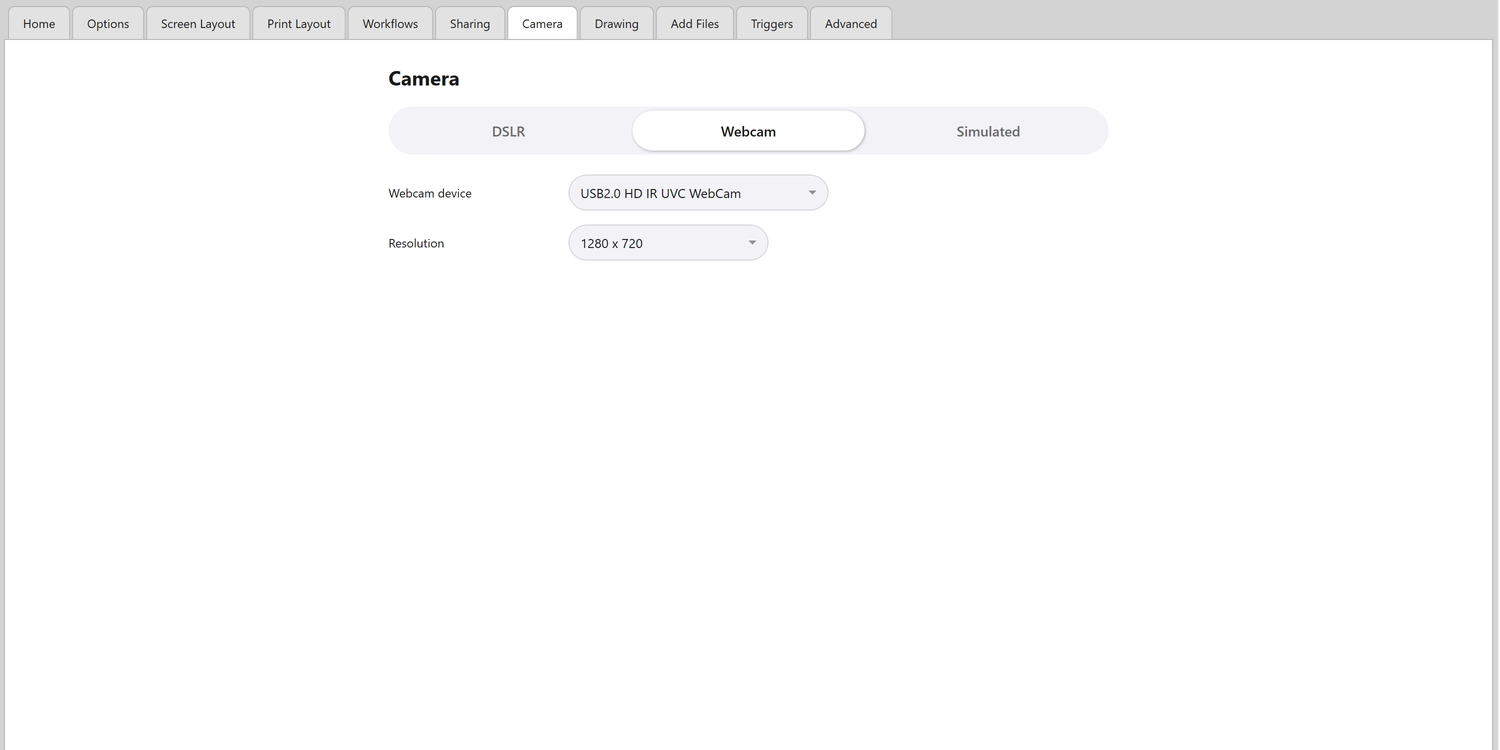
- Webcam device lists every camera Windows can see, by whatever name Windows gives it – so pick carefully if more than one is listed.
- Resolution lists the resolutions your selected webcam supports.
Choose the right camera
A laptop or tablet often has more than one built-in camera – typically a front-facing one, above the screen, and a rear-facing one on the back – and both can show up in the Webcam device dropdown. Windows doesn’t always label them helpfully: the name might just be the camera’s model, or something generic like “Integrated Camera” for one and “IR Camera” for a Windows Hello face-recognition camera some laptops also carry.
The one you want is whichever camera is on the same side as the screen – the one that can actually see your guests while they’re using the booth.
There’s no live preview on this tab to test with (see “Checking your camera is connected” below), so if the names in the dropdown don’t make it obvious which is which:
- Select one, then check Booth Junkie’s own live view – either start the booth, or use the Setup Wizard’s camera step – to see whether it’s the right camera.
- Or open Windows’ own Camera app first and switch between cameras there (usually with a camera-flip icon in the app) to see what each one looks like and what it’s called, before matching that name in Booth Junkie.
Resolution
Pick a resolution your webcam and PC can keep a smooth live view at. A higher resolution gives a sharper photo, but asks more of your webcam and computer – some cheaper webcams slow down or drop frames at their highest setting.
Tip: Live view stuttering?
If guests see the live view stutter or lag, try a lower resolution.
What you’ll typically only set once
Your camera device/resolution choice (webcam), and the DSLR-side External Flash and Live View Values settings.
What’s worth adjusting per venue
This is the control meant for compensating for different lighting at different venues.
-
Turn on “Override camera settings”.
Result: Manual Tv (shutter speed), Av (aperture), ISO, and White Balance dropdowns appear for your DSLR.
-
Choose the values for this venue’s lighting.
-
Press Apply.
Important: Changes need Apply
Changing these dropdowns only updates what’s saved here – you need to press Apply separately to actually push the values to the camera. The one exception is “Keep live view open,” which takes effect on the camera immediately, no Apply needed.
Checking your camera is connected
A read-only “Camera” field shows your DSLR’s model name, or “No DSLR Detected,” updating live the moment you plug or unplug it.
Along with it is a live dial and status overlay mirroring your camera’s actual shutter speed, aperture, ISO, focus mode, drive mode, white balance, and image quality as you change them on the camera body itself.
Good to know: Not an image preview
This is a live values dashboard, not an image preview – there’s no video/photo preview on this screen for either a webcam or a DSLR.
For which DSLRs and webcams Booth Junkie supports, see photo booth cameras.