
Choosing a shot type
Each shot type appears as its own looping video button – Single, Multi, and Strip – though only for shot types that actually have a workflow configured, and haven’t been hidden here in Screen Layout. Whichever one a guest taps determines both the rest of their session’s steps and which print layout is used at the end.
Choosing a background (greenscreen only)
If Greenscreen or Bluescreen mode is turned on in Admin Panel → Options → Green Screen, with at least one background image configured, this same screen also shows a live camera feed with that background already composited in – guests see themselves against it in real time, before taking a single photo.
| Backgrounds configured | What guests see |
|---|---|
| More than one | Previous and Next buttons let guests step through them one at a time. Whichever background is showing when they move on is the one that’s actually used for the rest of their session. |
| None, or greenscreen mode is off | Their plain live camera feed here, with no cycling controls. |
Position this screen
The buttons, live view, and Previous/Next controls are all laid out from Admin Panel → Screen Layout → Selection Screen.
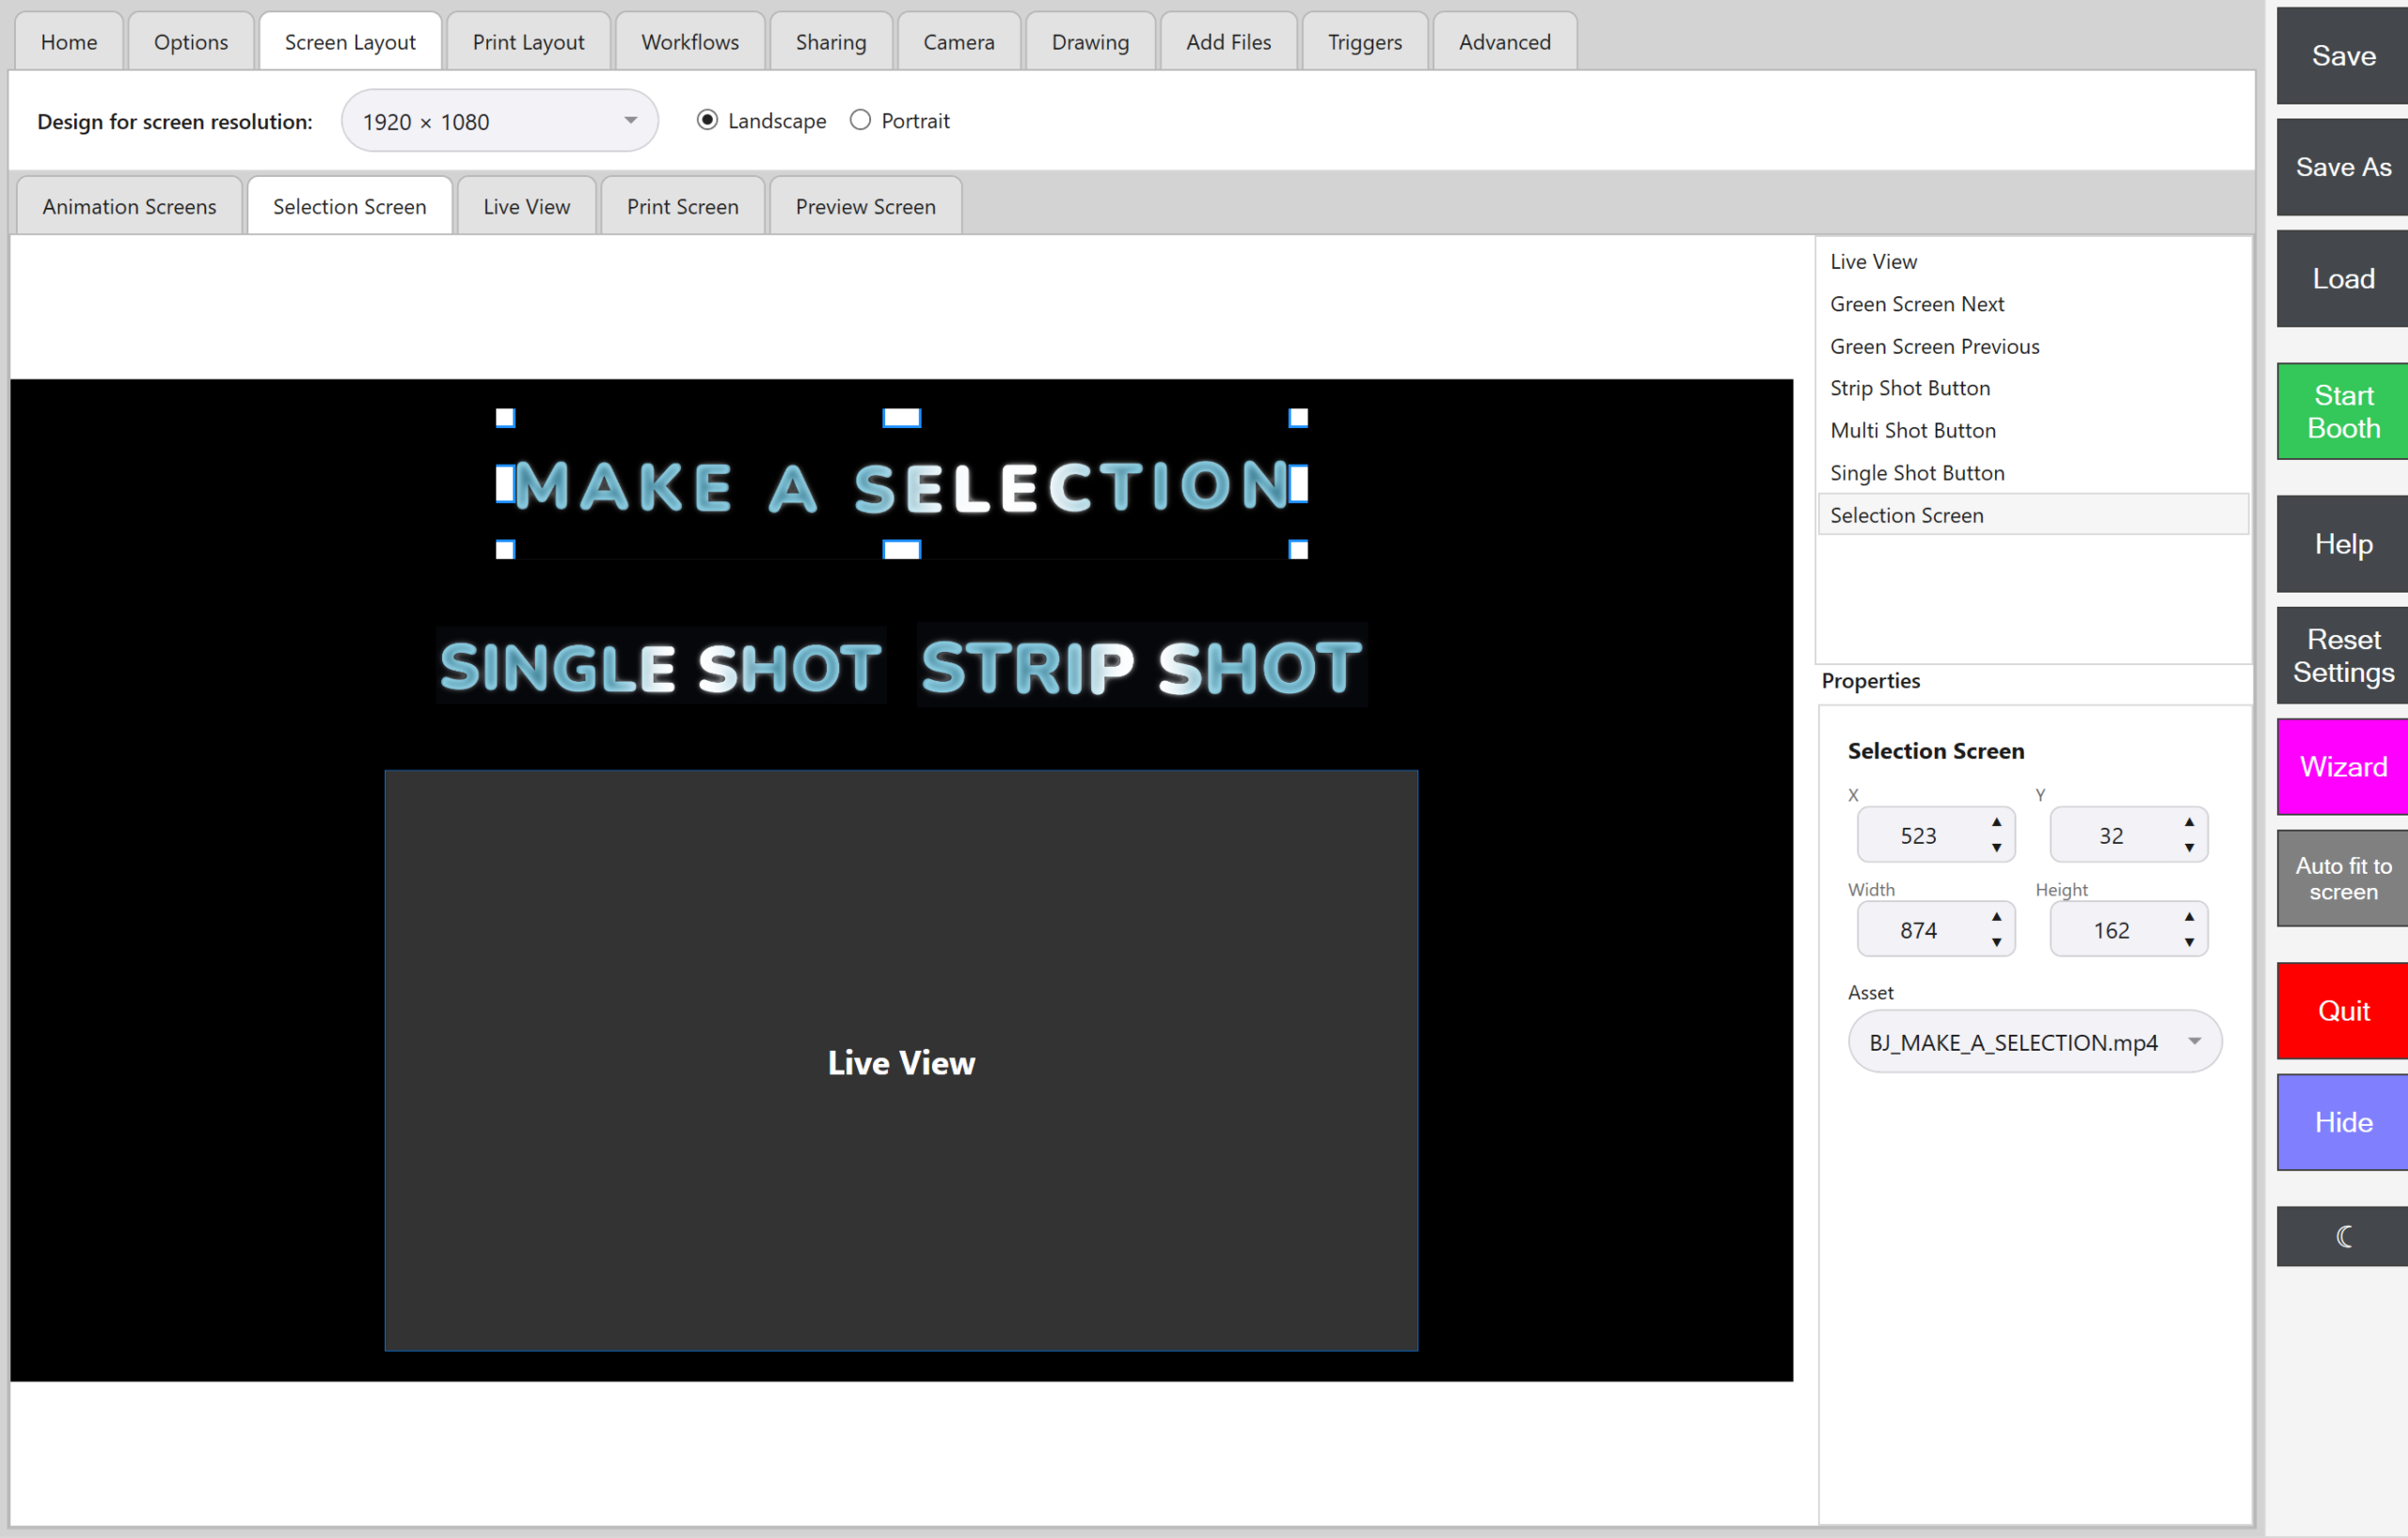
See The Screen Layout Editor: Positioning On-Screen Elements for how dragging, resizing, and showing/hiding elements works on this screen.
Choose the animation above the buttons
The header animation that plays above the shot-type buttons is chosen on the same tab.
-
Go to Admin Panel → Screen Layout → Selection Screen.
-
Select the Selection Screen element.
-
Pick the animation from its Asset list under Properties.
Good to know: Not on the Workflows tab
The File on the Selection row of Admin Panel → Workflows → Main Workflow doesn’t choose it, and is left empty. An animation picked there in an older settings file is carried over to Asset automatically, so there’s nothing to choose again.
If nobody taps anything
If Selection Timeout is enabled in Admin Panel → Options → General, 30 seconds of no interaction resets the whole session back to the idle screen. There’s no Cancel button on this screen – the timeout is the only way back.