
Every DSLR has a small number of exposure settings that control how bright a photo comes out – and each one has a side effect beyond brightness that matters for a photo booth specifically. Getting a consistent, sharp result across a whole event means understanding what each setting actually does, not just turning a dial until the preview looks right.
Program mode vs Manual mode
Canon is the most common DSLR brand used in photo booths, and its shooting mode dial is the first decision. Program (P) mode is a “set and forget” option – the camera assumes the light in the scene won’t change, and picks the shutter speed, aperture, and ISO for you on every shot. It works well with a constant light source (see Photo booth lighting explained: constant LED vs flash), where the light genuinely is the same for every guest.
Most professional operators using a flash instead use Manual (M) mode, setting shutter speed, aperture, and ISO themselves, fixed the same for every shot. A flash fires for a fraction of a second regardless of what the camera thinks the ambient light is doing, so letting the camera guess per shot in P mode doesn’t suit it the way it suits constant light.
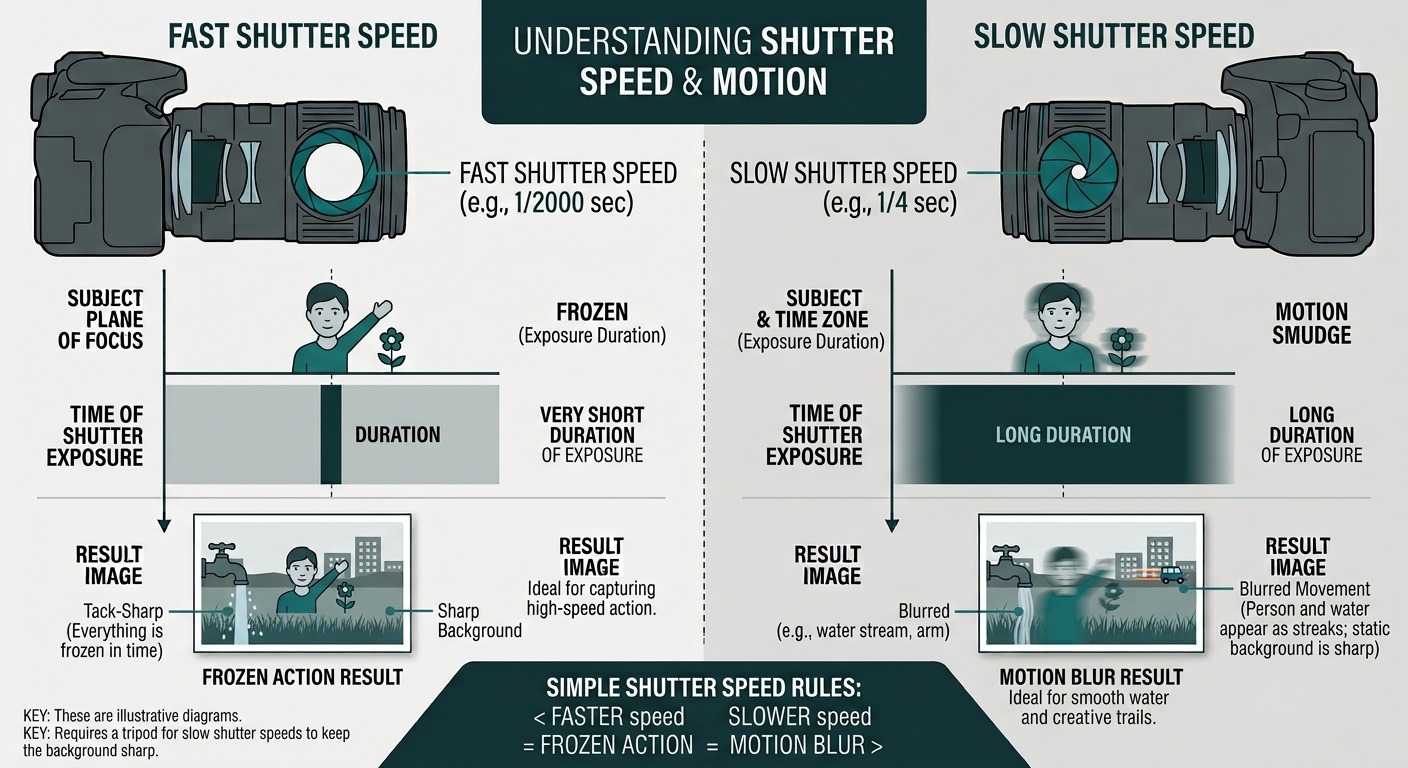
Shutter speed: how long the shutter stays open
The classic “cha-chick” sound a DSLR makes is the shutter opening and then closing. For the entire time it’s open, even partially, the camera is exposing – taking in light.
- Longer shutter speed – the shutter stays open longer, taking in more light for a brighter photo, but any movement during that window shows up as motion blur. Photograph a racing car with a long shutter speed and the spinning wheels blur, giving an impression of speed. That effect is exactly what you don’t want when photographing a guest.
- Shorter shutter speed – less time to gather light, so a darker photo, but it freezes motion. The same racing car photographed with a short shutter speed looks almost parked, wheels perfectly sharp. For a photo booth, that’s close to ideal: no motion blur, and the exact moment captured cleanly.
Long shutter speed -> more motion blur, brighter photo. Short shutter speed -> less motion blur, darker photo.
Aperture: how wide the lens opens, and what stays in focus
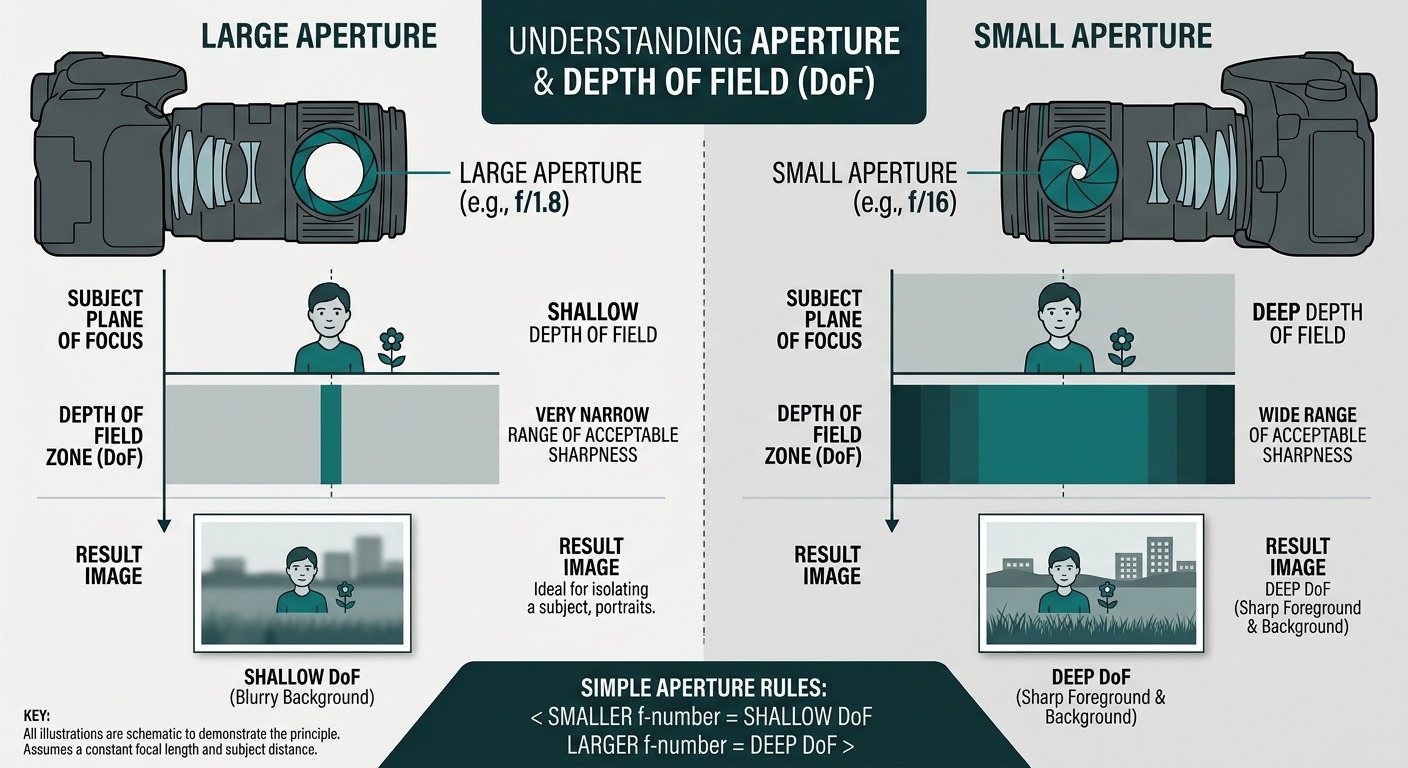
Aperture also controls how much light reaches the sensor, and works like the pupil of your eye. In a dark room, your pupils open wide to let more light in – that’s an open aperture, shown as a low f-number like f/1.8. Step outside into bright sun and your pupils close down – that’s a closed aperture, shown as a high f-number like f/20.
Aperture has a second effect: depth of field, the range of distance that’s actually in focus.
- Low f-number (open aperture) – a shallow depth of field. If the camera focuses on someone six feet away, only a few inches in front of and behind that exact distance stay sharp – everything else blurs. That keeps a single subject sharp against a soft, out-of-focus background.
- High f-number (closed aperture) – a deep depth of field. The same person at the same distance is still in focus, but now several feet in front of and behind them are in focus too, so nothing stands out from the background the way it would with a shallow depth of field.
High f-number (closed aperture) -> more of the background in focus, darker photo. Low f-number (open aperture) -> less of the background in focus, brighter photo.
ISO: how sensitive the sensor is
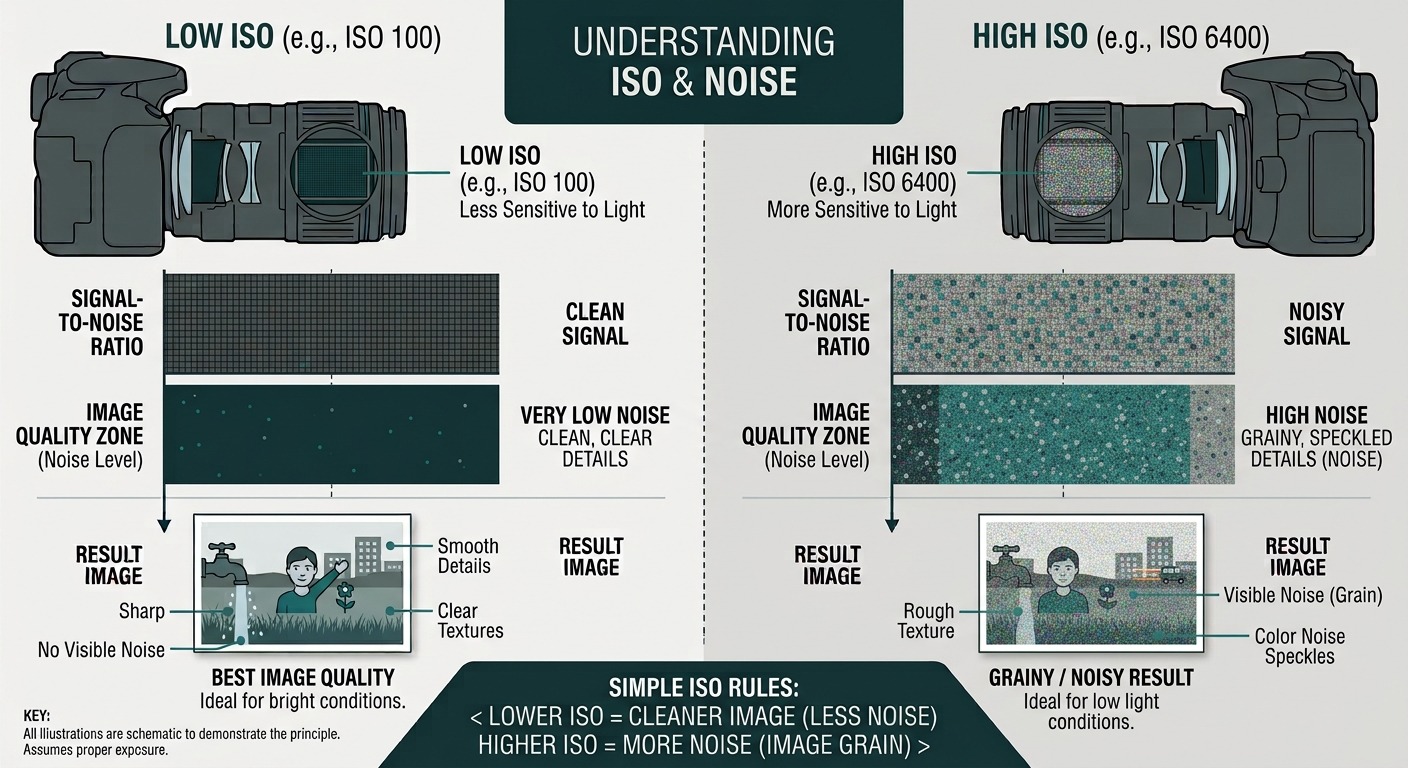
ISO is the simplest of the three. It controls how sensitive the camera’s sensor is to the light actually reaching it. Push it higher (ISO 6400, for example) and the photo gets brighter, but you start to see noise – coloured speckles that reduce quality. Keep it lower (ISO 100, for example) and you get a cleaner, higher-quality image, at the cost of a darker photo.
High ISO -> more noise, less quality, brighter photo. Low ISO -> less noise, more quality, darker photo.
Why this is a balancing act
Every one of these three settings changes brightness, but each also has its own separate side effect – motion blur, depth of field, or image noise – that has nothing to do with brightness at all. Push one setting to fix brightness and you’ve usually changed one of those side effects along with it, which is why getting a booth’s exposure right in Manual mode means adjusting all three together rather than one at a time.