


What you’ll see
A thin strip of bare white paper runs along one long edge of the print, at the top or the bottom when you hold the print the right way up. The rest of the picture is fine, and the strip is the same on every print.
Good to know: A white line through the picture is a different problem
This article is only about a strip of bare paper at the edge. A thin white line running right through the picture, across the whole print, usually means the print head is dirty or faulty. Cleaning the print head may fix it. If it doesn’t, the print head needs replacing, or the printer needs servicing by an authorised Mitsubishi service technician. The adjustment tool won’t fix a white line.
If the strip shows on only one of your print layouts, look at that layout first: the printer adjustment moves every print, not just one layout.
Why it happens
The printer places the picture slightly too far towards one end of the paper, so a sliver of paper at the other end gets no picture. Mitsubishi’s tool moves the picture back into place by changing the printer’s vertical position setting.
If your printer has two decks, adjust the lower deck and the upper deck separately.
Download the tool
Mitsubishi made this tool for the CP-D70DW and CP-D707DW. It may also work with other Mitsubishi printers.
Download Mitsubishi CP-D70 Vertical Alignment ToolUnzip the file. On 64-bit Windows, which includes every Windows 11 PC, use the PrintPAdj_x64_Ver120 folder; on 32-bit Windows, use PrintPAdj_Ver120.
Fix the strip
Before you start, make sure the printer has paper and ribbon, shows no error and isn’t printing. Close Booth Junkie, so nothing prints while you adjust.
-
Connect the printer to the PC with its USB cable and turn it on.
-
In the folder, right-click PrintPAdj.exe and choose Run as administrator.
-
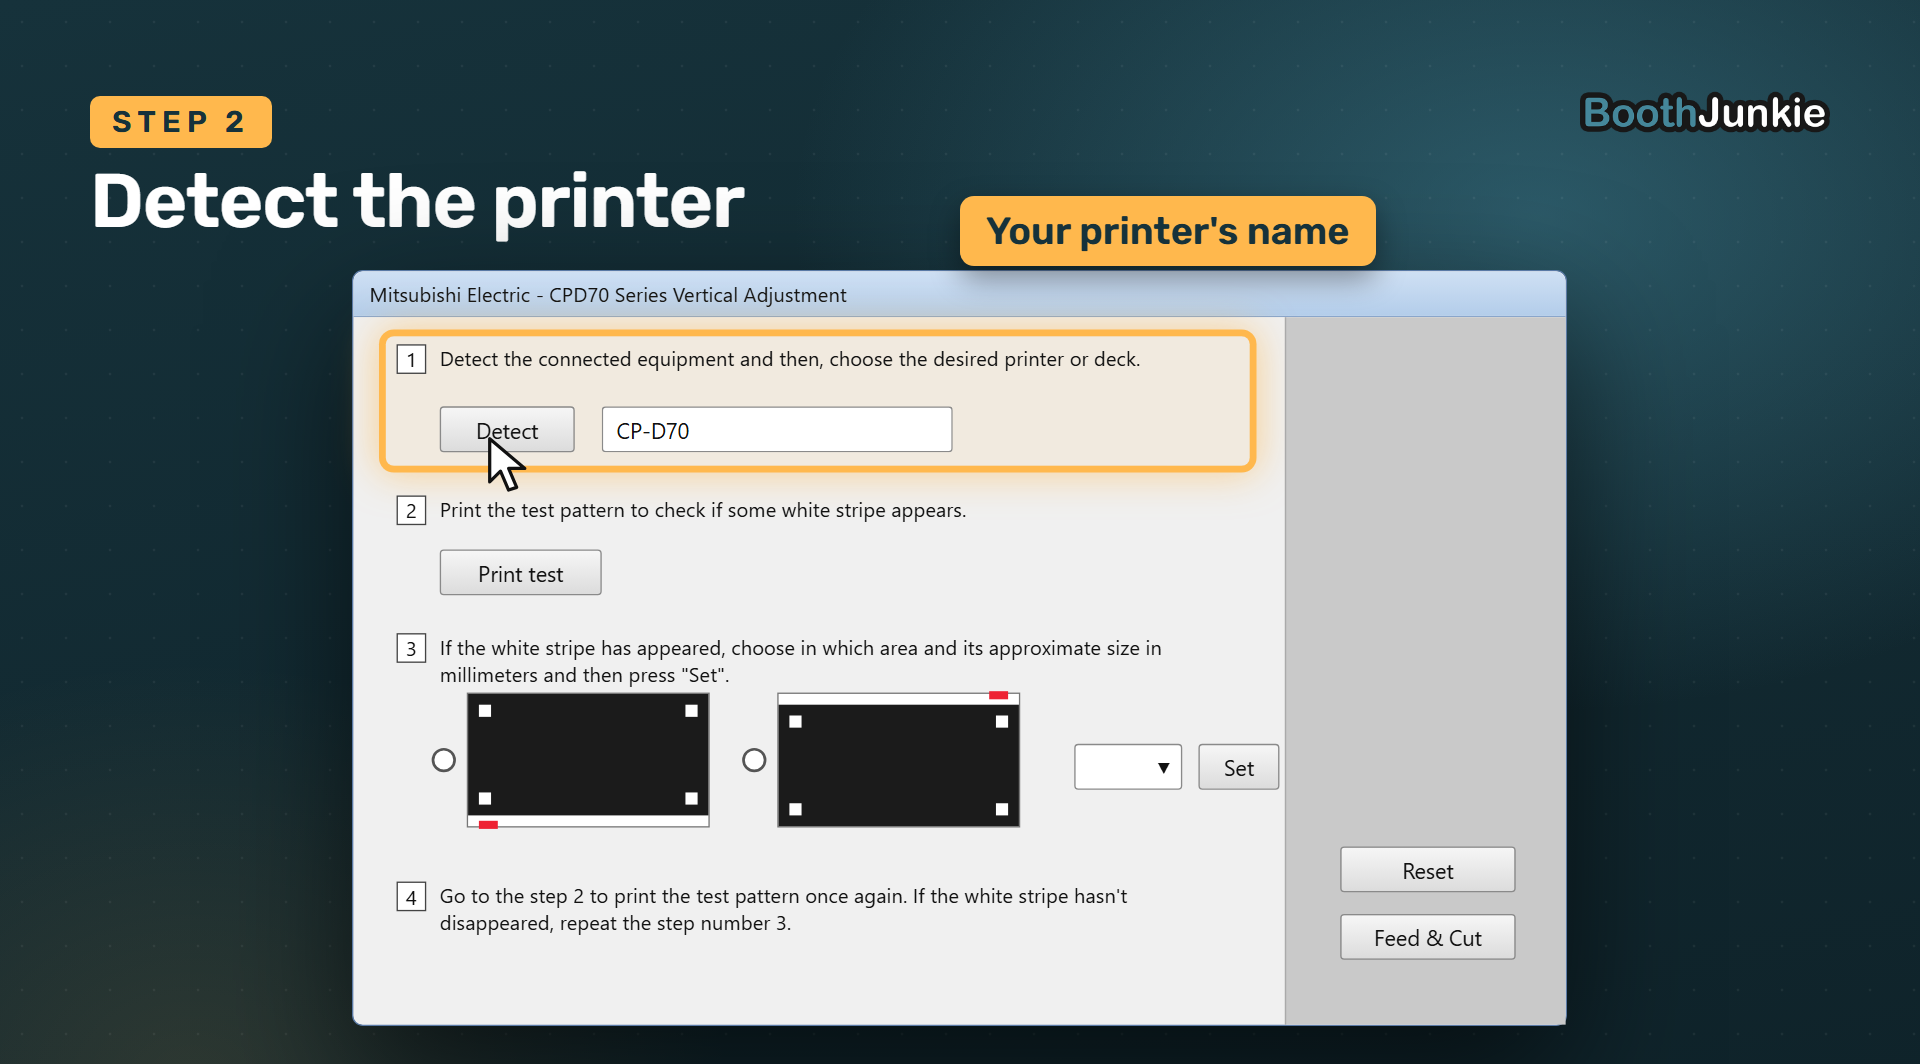
Press Detect, and check your printer appears in the box next to it. On a printer with two decks, choose the Lower or Upper entry for the deck you’re adjusting.
-
Press Print test.
-
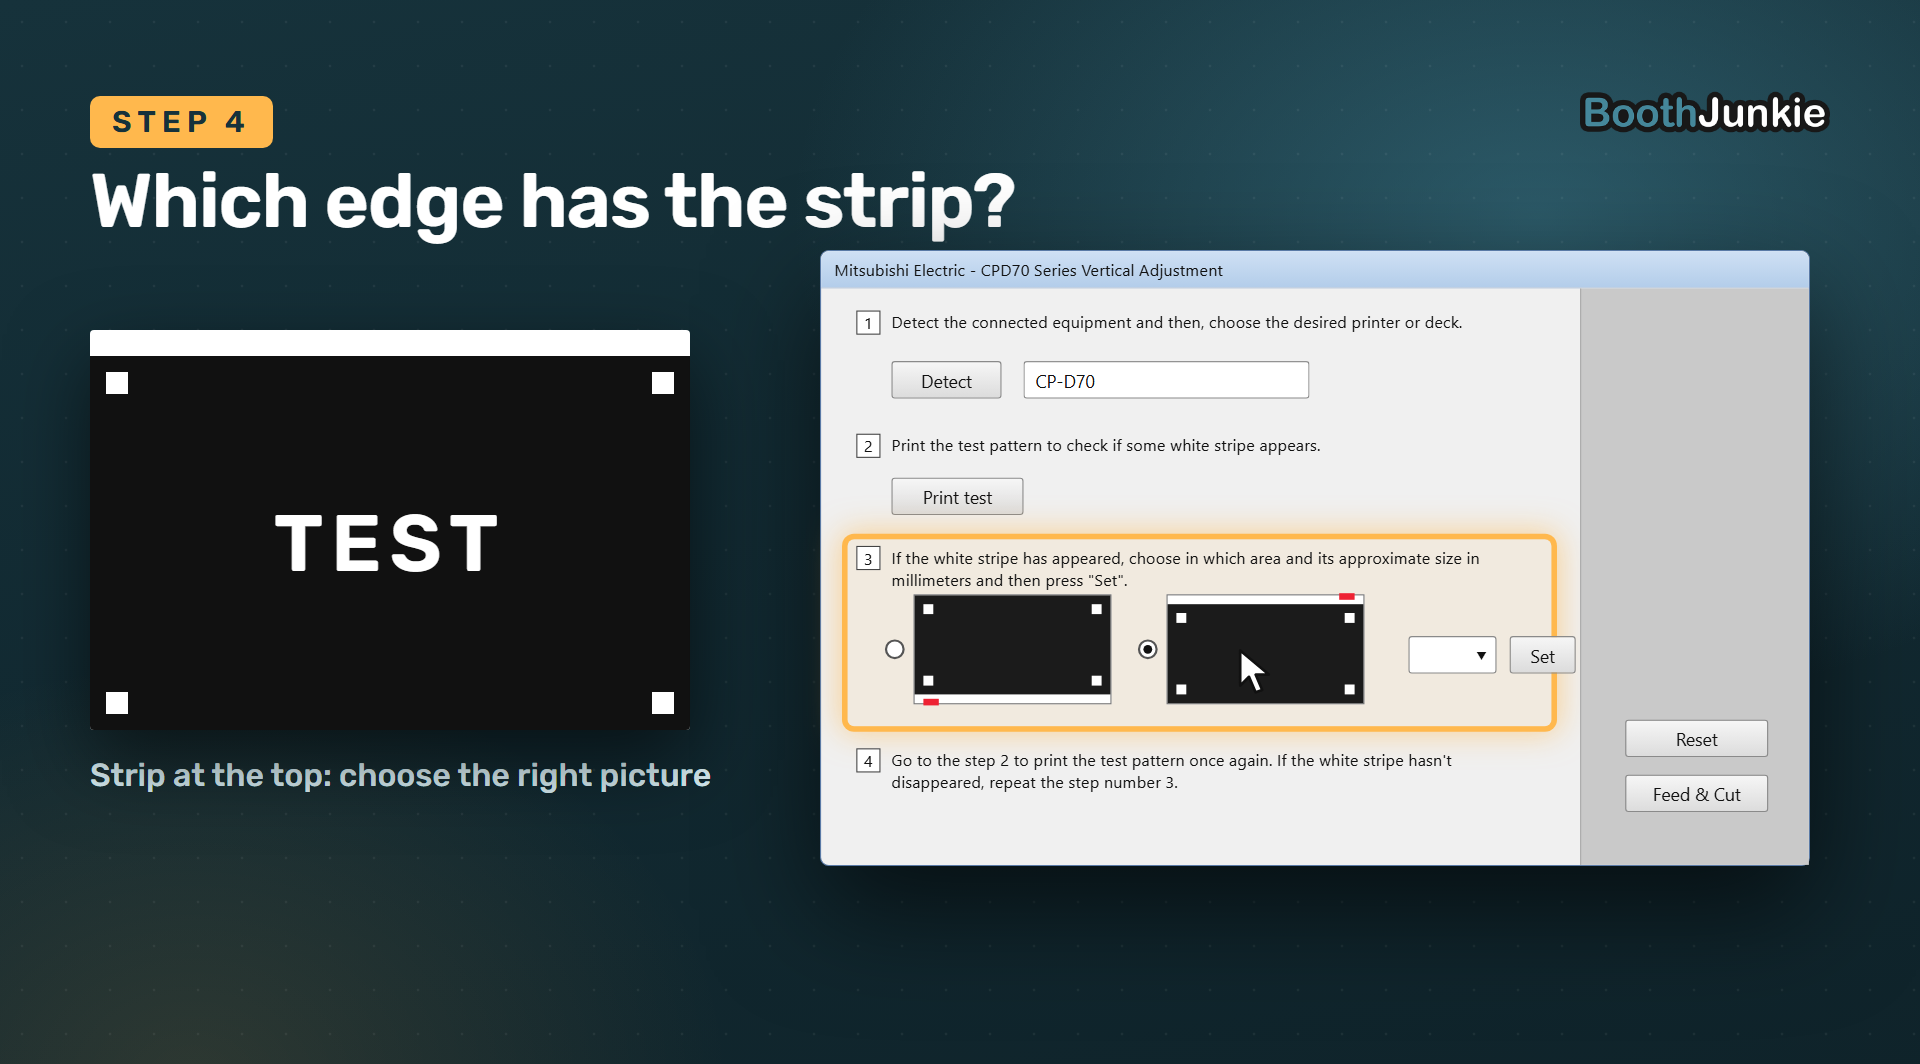
Hold the test print with the writing in the middle the right way up. If the white strip is at the bottom, choose the left picture in the tool; if it’s at the top, choose the right picture.
-
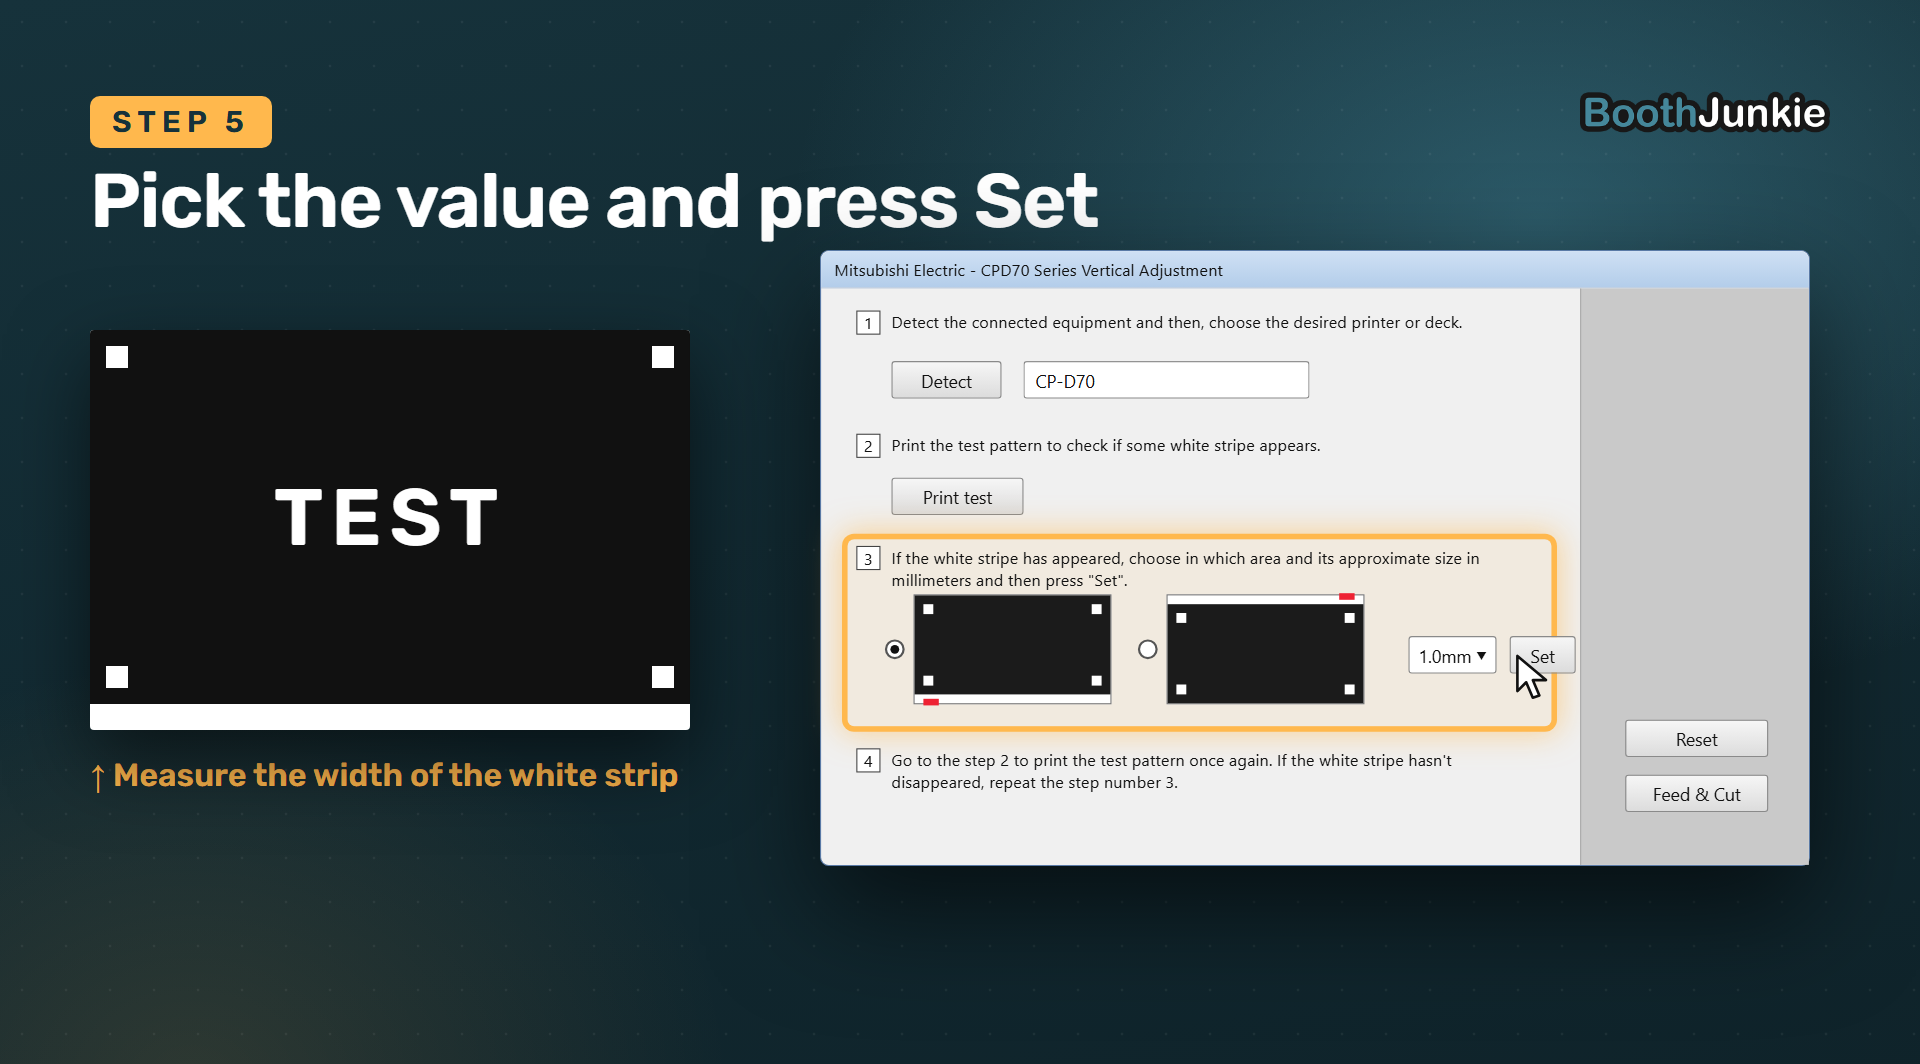
Measure how wide the strip is, choose the nearest value in millimetres from the list, and press Set.
-
Press Print test again. If there’s still a strip, repeat steps 5 and 6 until it’s gone.
Result: The test print has no white strip.
-
Close the tool, then print a normal photo to check it.
Important: No strip on the test print? Don’t press Set
If the test print has no white strip, leave the tool without pressing Set. Setting a value when there’s no strip moves the picture and makes a strip appear.
If something goes wrong
- Your printer isn’t found: check the USB cable and that the printer is on with no error, then press Detect again. Don’t change the printer’s connection while the tool is open.
- You went too far: press Reset to put back the printer’s standard setting, then start again from Print test.
- The tool was closed part-way through: turn the printer off and on again before you print.
- A strip is still there after adjusting: the picture doesn’t always move by exactly the value you chose, so print the test again and make another small adjustment.
The test print is only for lining up, so its colours don’t look like a normal print. Feed & Cut feeds the paper and cuts it, which is handy for clearing the test prints.
This guide is from Booth Junkie, photo booth software for Windows that has supplied the photo booth industry for 10 years. It runs enclosed booths, selfie pods and magic mirror booths with a Canon DSLR or a webcam, prints to any Windows printer, and sends photos to guests by WhatsApp, SMS and email.