
This screen only appears in a workflow with an AI Selection step. See AI Selection: Letting Guests Choose Their AI Style to add one.
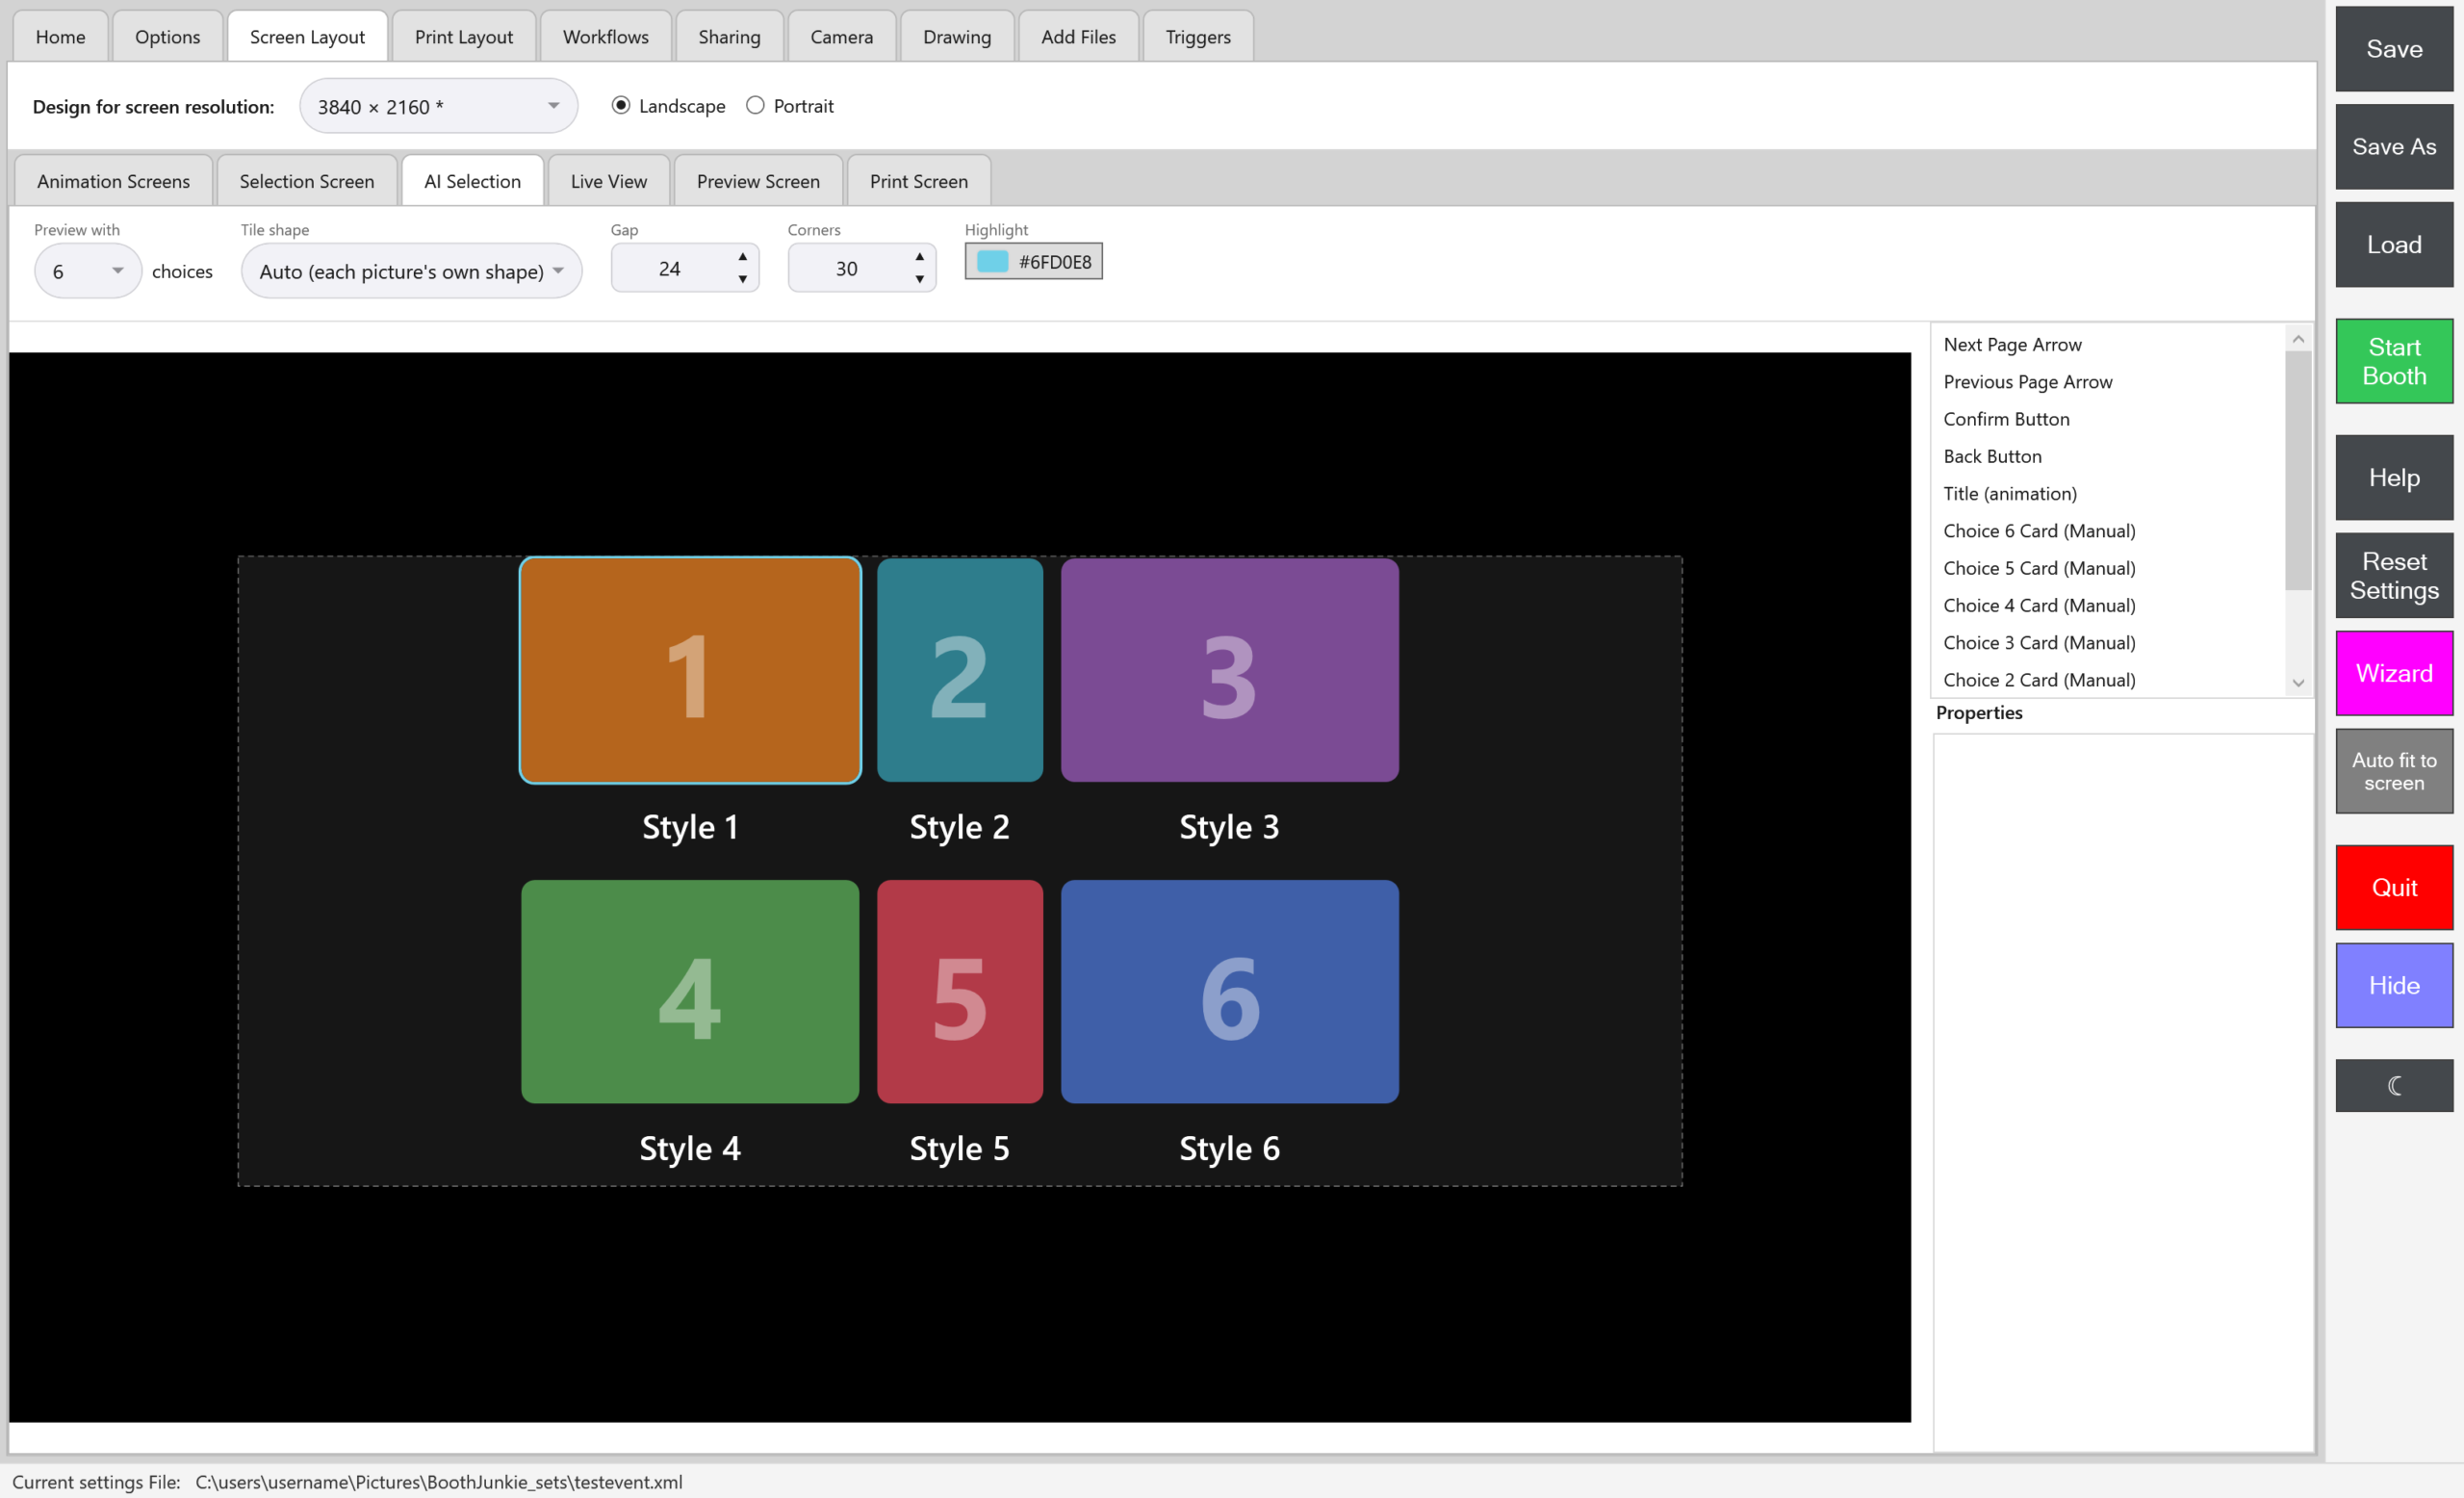
The elements
The list on the right holds the screen’s elements. Select one to place it, size it and pick its animation in Properties, just as on the other Screen Layout tabs. See The Screen Layout Editor.
| Element | What it is |
|---|---|
| Title (animation) | The heading. Booth Junkie’s own “Choose your style” animation is used until you pick another. |
| Tile Area | Where the styles are shown, and how guests move through them. See The AI Selection Tile Area: Grid, Swipe and Manual Layouts. |
| Back Button | Takes the guest back to the screen before. |
| Confirm Button | Off unless you switch it on. See below. |
| Previous Page Arrow and Next Page Arrow | Turn the page when there are more styles than fit on one. |
| Choice 1 Card (Manual) to Choice 6 Card (Manual) | Only for the Manual layout, and off until you switch them on. |
The title, the buttons and the arrows play animations from the booth’s animations folder, like the rest of the booth’s screens. Booth Junkie supplies its own until you pick others in Asset, and you can add your own videos on the Add Files tab.
Auto fit to screen places every element for the screen size you’re designing for. It does this on every Screen Layout tab, not just this one, so anything you’ve placed by hand on the other tabs moves too.
Preview with … choices only changes how many sample tiles the preview shows, so you can see how 1, 6 or 24 styles would fit. It doesn’t change what your guests see.
The look of the tiles
These settings above the preview apply to every tile:
| Setting | What it does |
|---|---|
| Tile shape | Auto (each picture’s own shape), the default, gives each tile the shape of its own picture, all at the same height, and shows the whole picture. Match the photos gives every tile the shape of the booth’s photos and shows the whole picture. Portrait, Landscape and Square give every tile that shape. |
| Picture | Shown for Portrait, Landscape and Square. Fill the tile crops each picture to fill its tile; Show the whole picture shows all of it. |
| Gap | The space between the tiles. |
| Corners | How rounded the tiles’ corners are. |
| Highlight | The colour round a tile when it’s tapped. |
A tile showing an animation always has square corners.
Back, Confirm and Skip
Switch Back Button and Confirm Button on or off with Enabled in Properties. Skip appears only when the step allows it: tick Let the guest skip in its Configure AI Selection window.
Confirm stops a stray tap from choosing a style. Some touch overlays now and then register a tap that the guest didn’t make, which would otherwise choose a style and move on.
| Confirm | What a guest does |
|---|---|
| Off (the default) | Taps a style once to choose it. |
| On | Taps a style to highlight it, then taps Confirm to choose it. A tap on another style moves the highlight. In the Swipe layout, Confirm chooses the card in the middle. |
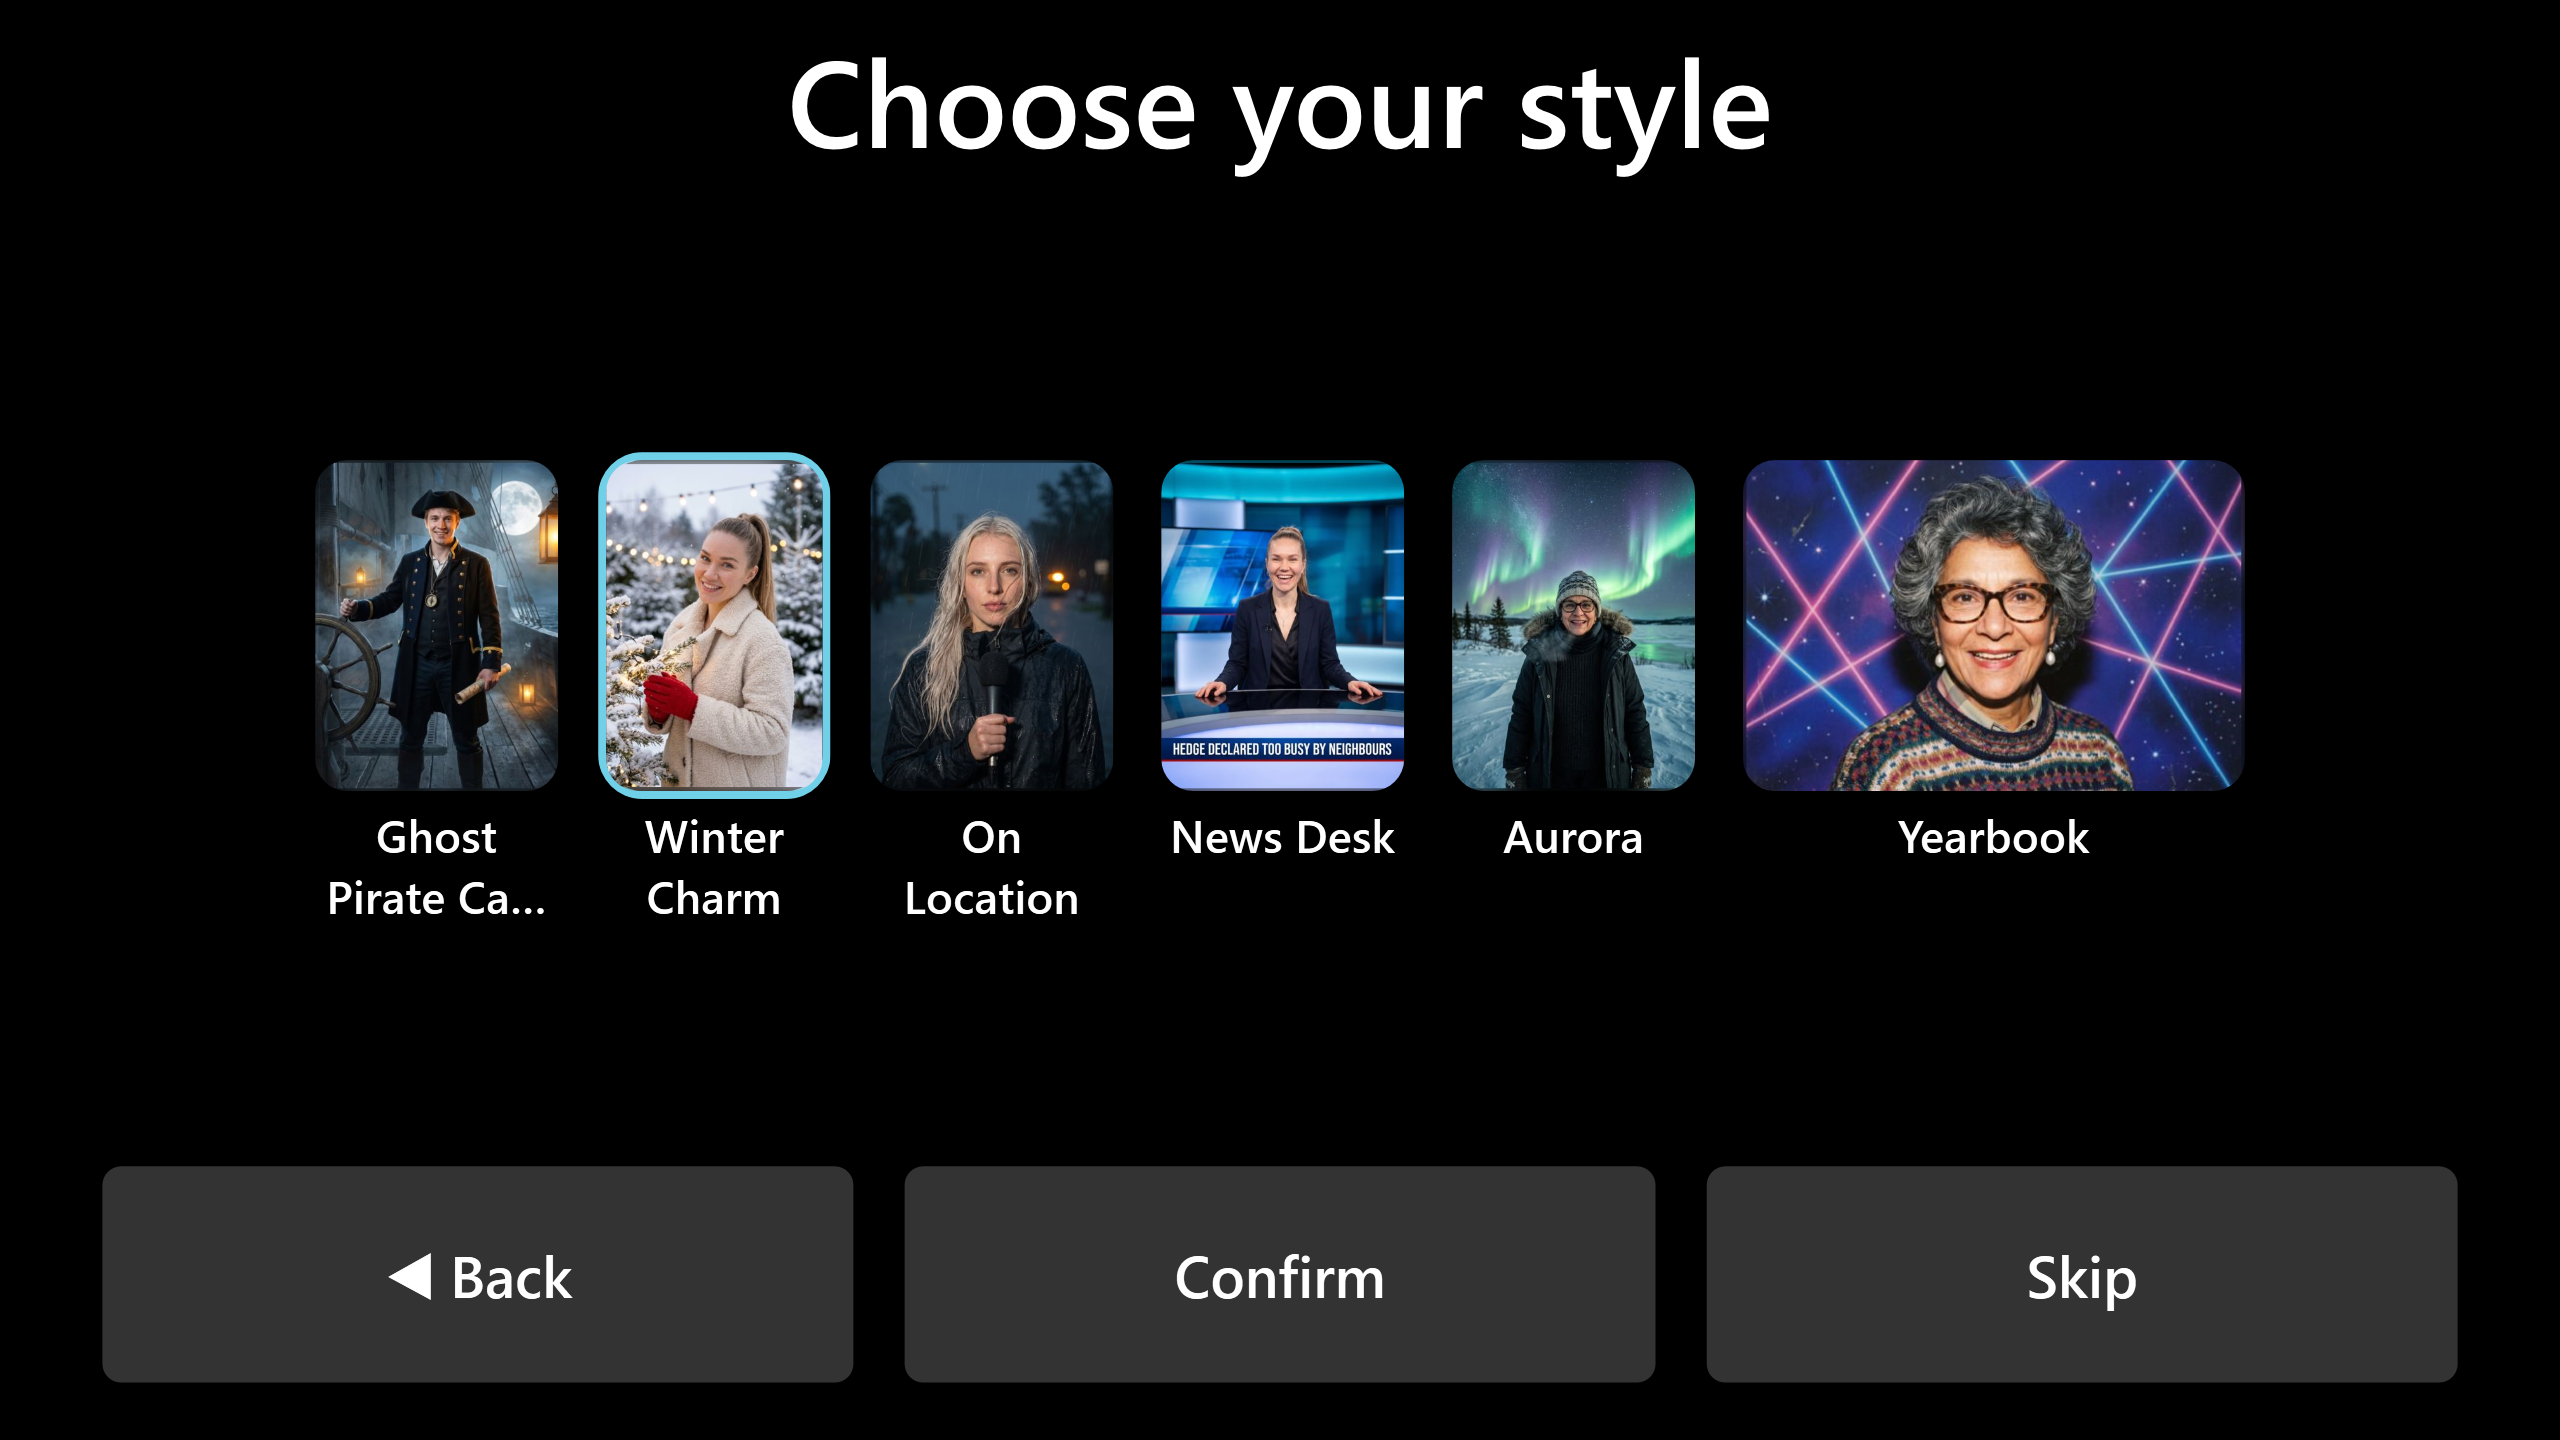
Whichever of Back, Confirm and Skip are showing are made the same size and set out as one evenly spaced, centred row. This happens while Back and Confirm are where Booth Junkie put them. If you move or resize one yourself, it stays exactly where you put it, and the others aren’t arranged round it. Auto fit to screen sets them out again, along with every element on the other Screen Layout tabs.
This guide is from Booth Junkie, photo booth software for Windows that has supplied the photo booth industry for 10 years. It runs enclosed booths, selfie pods and magic mirror booths with a Canon DSLR or a webcam, prints to any Windows printer, and sends photos to guests by WhatsApp, SMS and email.