
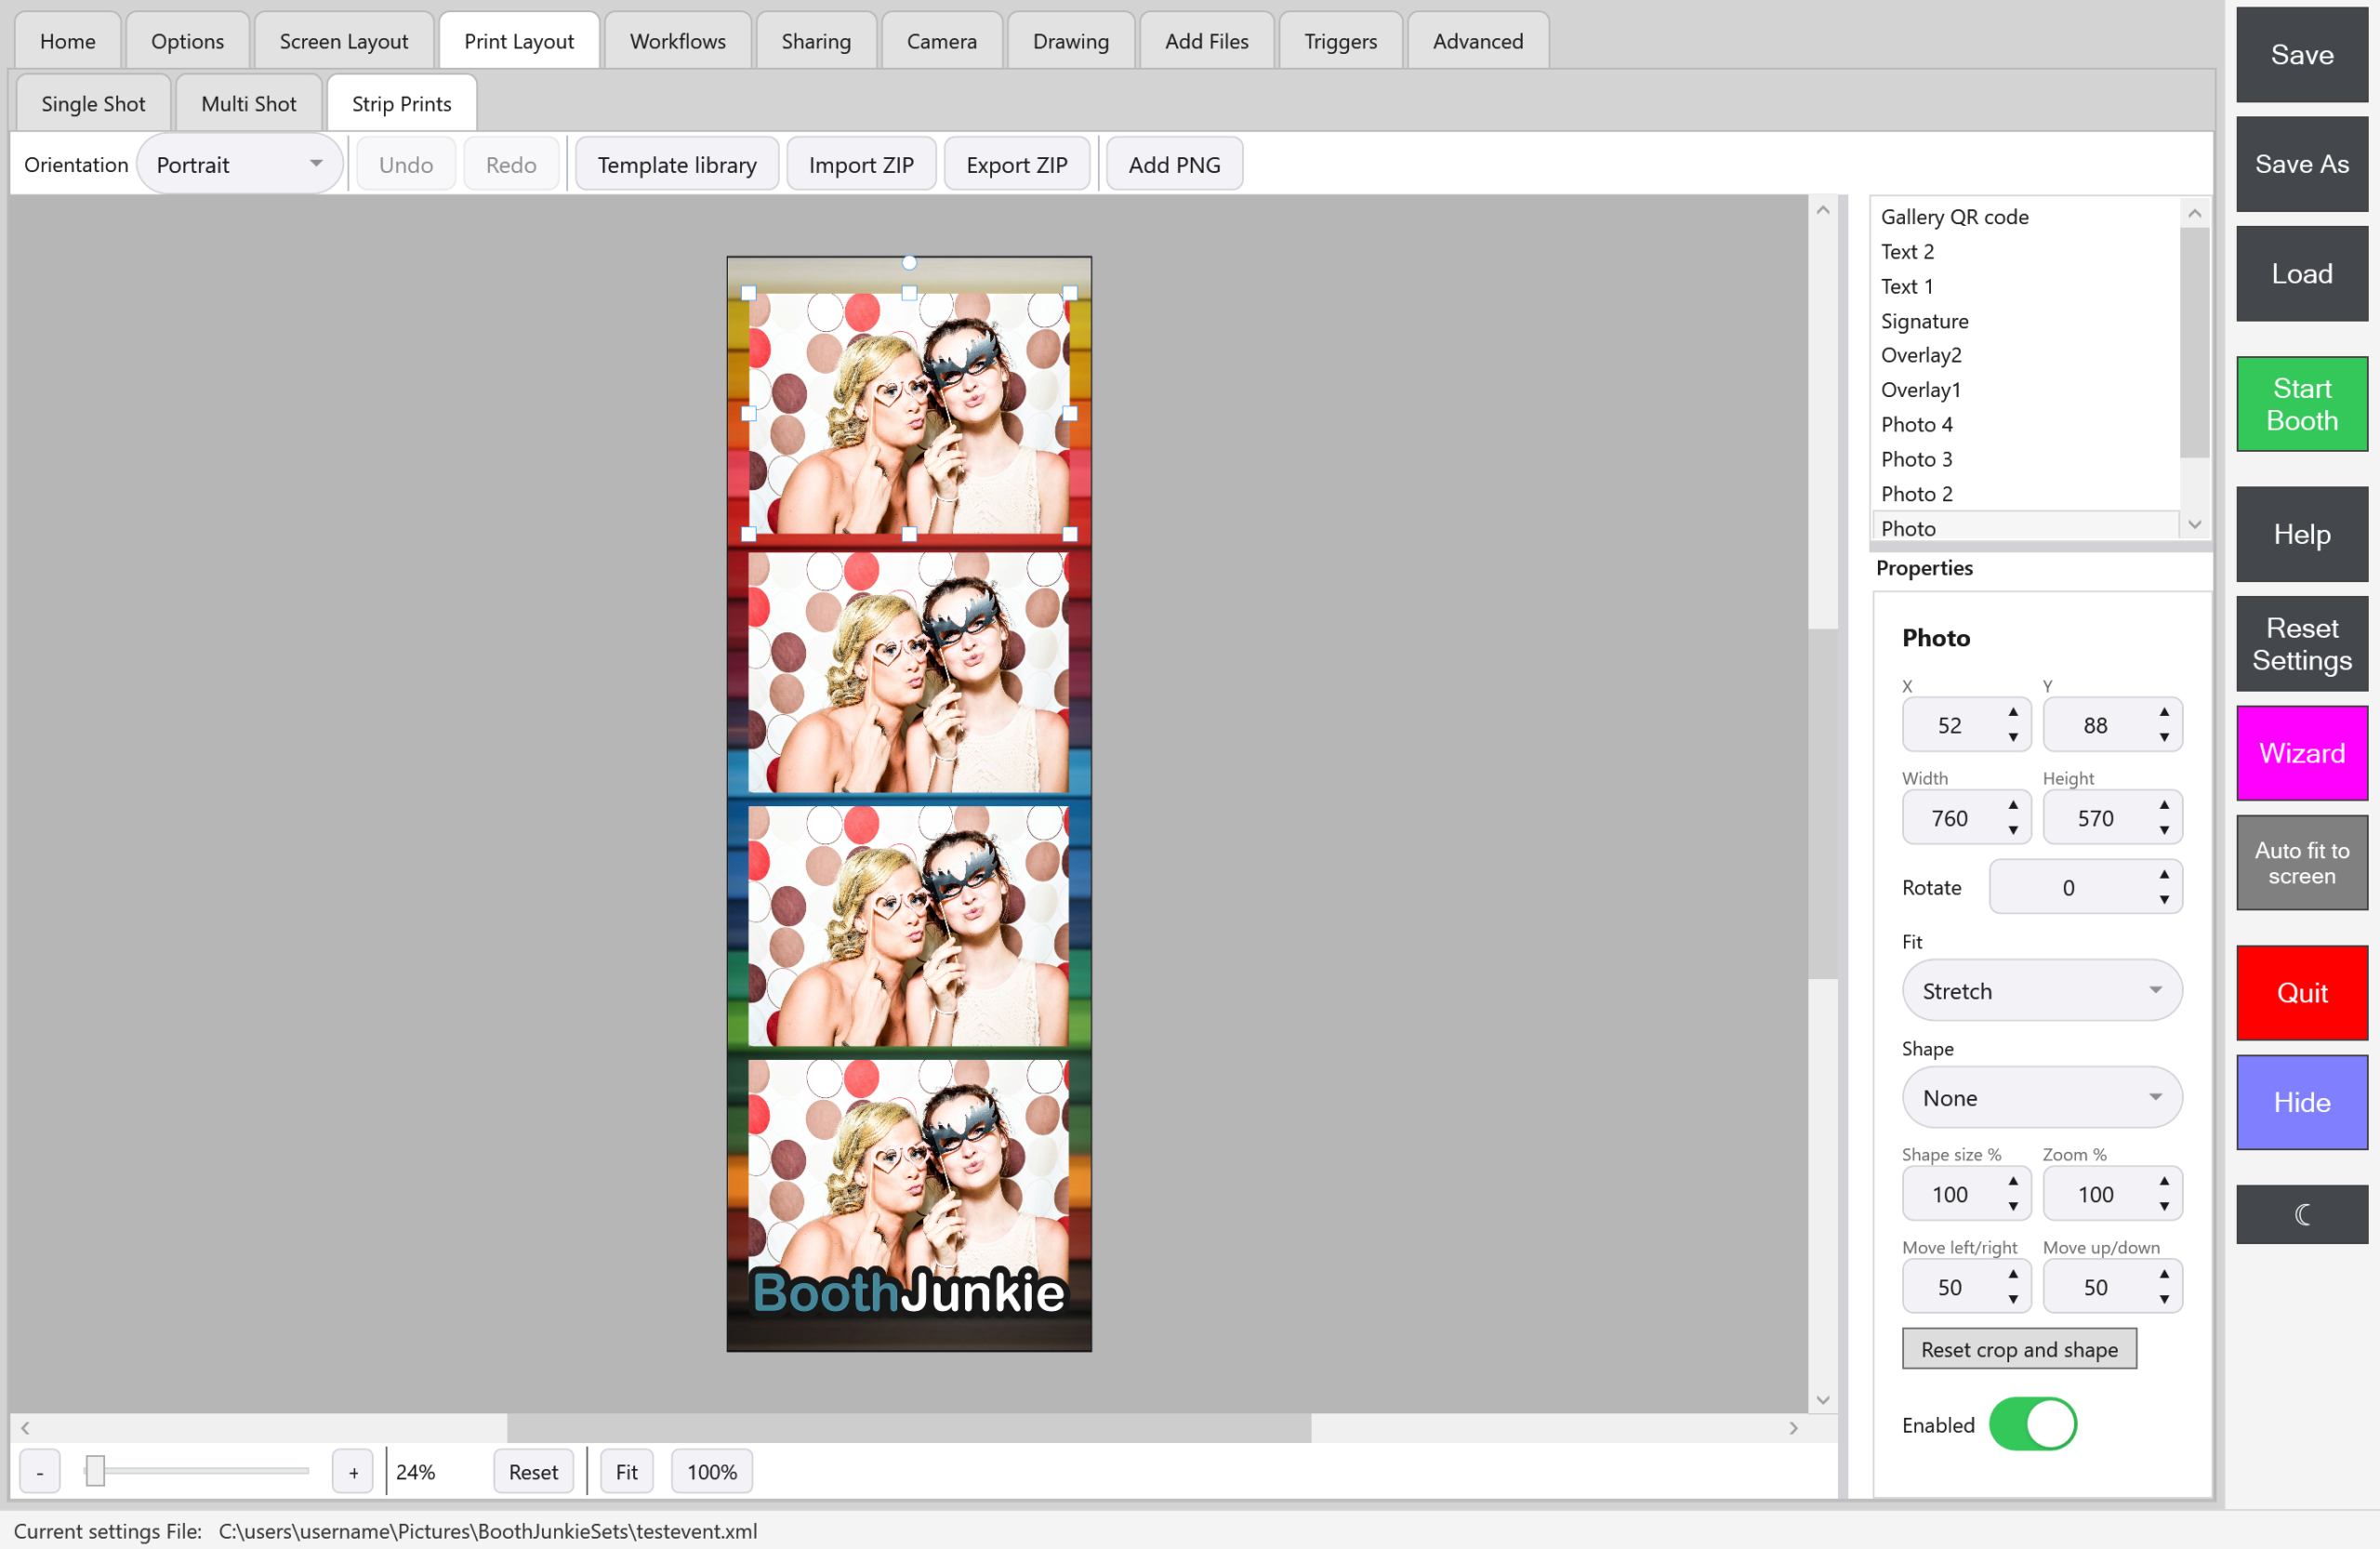
What makes a layout “Strip Prints”
A Strip Prints template can use up to four photo slots (Photo to Photo 4), the same as Multi Shot. The real difference is the shape: a Strip Prints canvas is always a fixed narrow strip, half the width of a Single Shot or Multi Shot print at the same height (a 1:3 ratio, the shape of a 2×6 strip).
Good to know: The strip shape is fixed
This isn’t something you set yourself — the Strip Prints canvas is always that narrow proportion, whichever way round you orient it. The only layout choice you make is Portrait or Landscape from the Print Layout editor; the strip proportions themselves stay fixed either way.
How the photos get chosen
The same rule applies here as on Multi Shot: there’s no screen where a guest picks their favourite photos out of a longer sequence. Photos fill the strip in the order they were captured — first photo into the first slot, and so on, up to the four slots a strip can hold. If the matching Strip Print Workflow captures more photos than the template has slots, the extra ones won’t appear on the print.
Important: Keep the strip and the workflow in step
Design the strip with as many photo slots as the Strip Print Workflow captures photos. See The Strip Print Workflow for setting the exact number of photos.
The same goes for a ready-made design from the Template library button on this tab (installing one needs an active Premium). When you select a template whose number of photo windows doesn’t match the number of photos your Strip Print Workflow takes, the library tells you so before you install it. See Using the Template Library.
Designing the layout itself
Positioning the photo slots, adding a background and overlays, resizing and rotating layers, and using the snap guides all work the same way as the rest of the Print Layout editor. See Building a Print Layout Template for the full walkthrough.
Pairing it with a workflow
Strip Prints’ natural partner is the Strip Print Workflow. See The Strip Print Workflow for how a guest reaches it from the selection screen and how to set the number of photos captured.