
The My saved page
The My saved page keeps workflows you’ve saved yourself, and the Before copy of whatever each load replaced. The newest is at the top.
Your saved workflows are kept on this PC, separately from your settings files, so loading a different settings file doesn’t change them. Export… on a card puts that saved workflow in a file, without pictures or sounds. To take the pictures and sounds as well, use Export Workflow on the workflow’s tab.
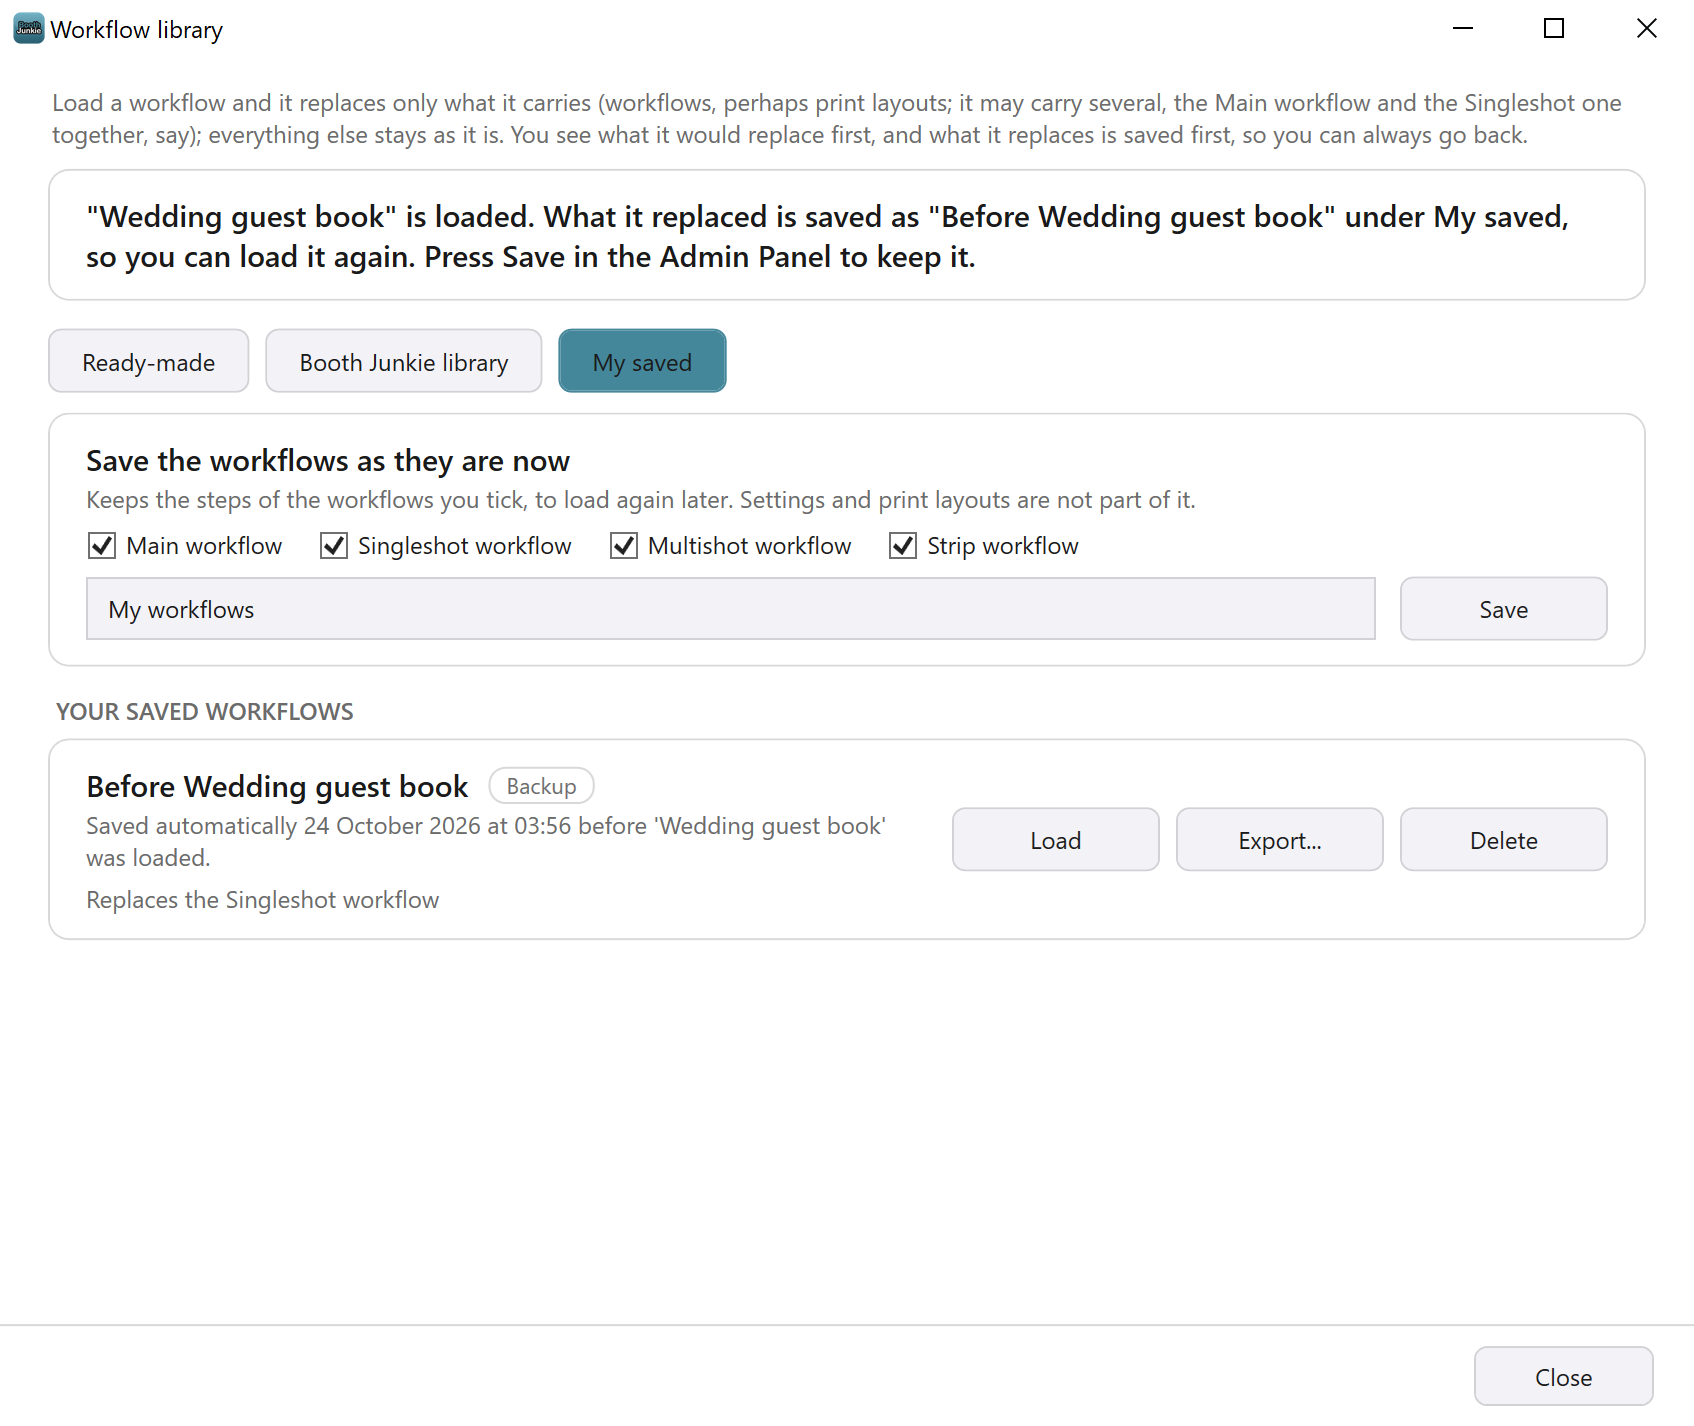
Save the workflows as they are now
-
In the Workflow library window, press My saved.
-
Under Save the workflows as they are now, tick the workflows to keep: Main workflow, Singleshot workflow, Multishot workflow or Strip workflow.
Every workflow that has steps starts ticked. Untick any you don’t want in it.
-
Type a name in the box, up to 60 characters.
The box starts with a name such as My workflows.
-
Press Save, or press Enter.
Result: The window says which workflows it saved, for example “the Main and Singleshot workflows as they are now”. Your workflow is listed first under YOUR SAVED WORKFLOWS, with the day and time it was saved and what it replaces.
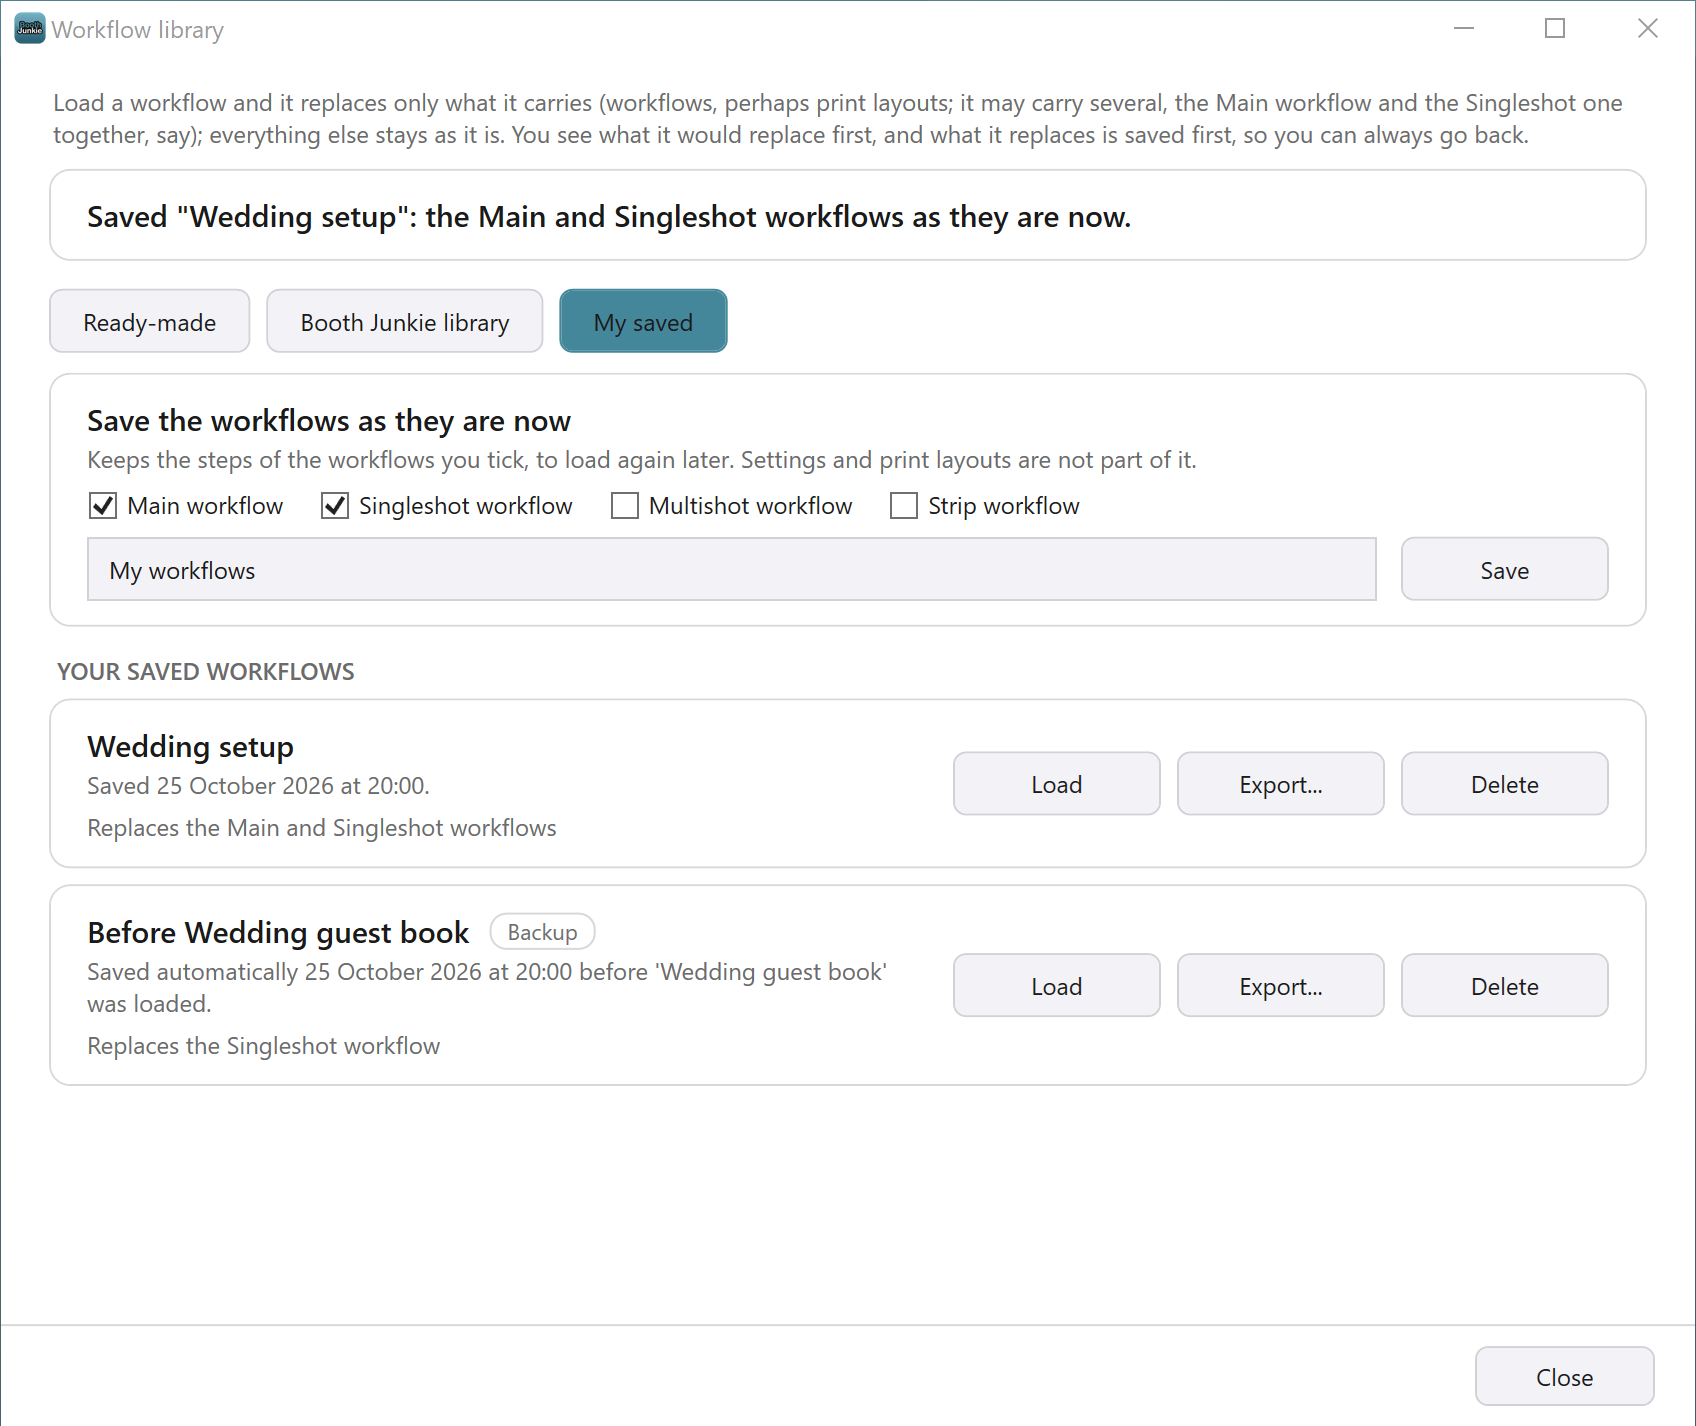
The workflows in this picture are examples.
Save stays greyed out until there’s a name and at least one tick.
It saves the workflows as the Admin Panel shows them now, including changes you haven’t saved in the Admin Panel yet. Saving again under the same name adds a second workflow with that name. It doesn’t replace the first.
With nothing saved, the list says “Nothing saved yet.”
Important: Only the steps are saved
The box itself says it: “Keeps the steps of the workflows you tick, to load again later. Settings and print layouts are not part of it.” The pictures, animations and sounds the steps use aren’t in it either. The steps still name them, and they stay on this PC. To take print layouts, pictures and sounds along with a workflow, use Export Workflow on the workflow’s tab. To keep your workflows together with your print layouts and settings, save your settings. See Saving and Loading Your Settings.
Your saved workflows
Each workflow under YOUR SAVED WORKFLOWS has three buttons:
| Button | What it does |
|---|---|
| Load | Loads it. The window shows what it would replace first, like any other load. |
| Export… | Saves a copy of it as a workflow file, wherever you choose (on a memory stick, say), for Import Workflow on another PC. The window then says where it put it. The copy holds only what the saved workflow holds: its steps, and for a Before copy, any print layouts it kept. No pictures or sounds go in it. |
| Delete | Deletes it. It asks Really delete? first. |
Delete a saved workflow
-
Press Delete on the workflow’s card.
Result: The button changes to Really delete?.
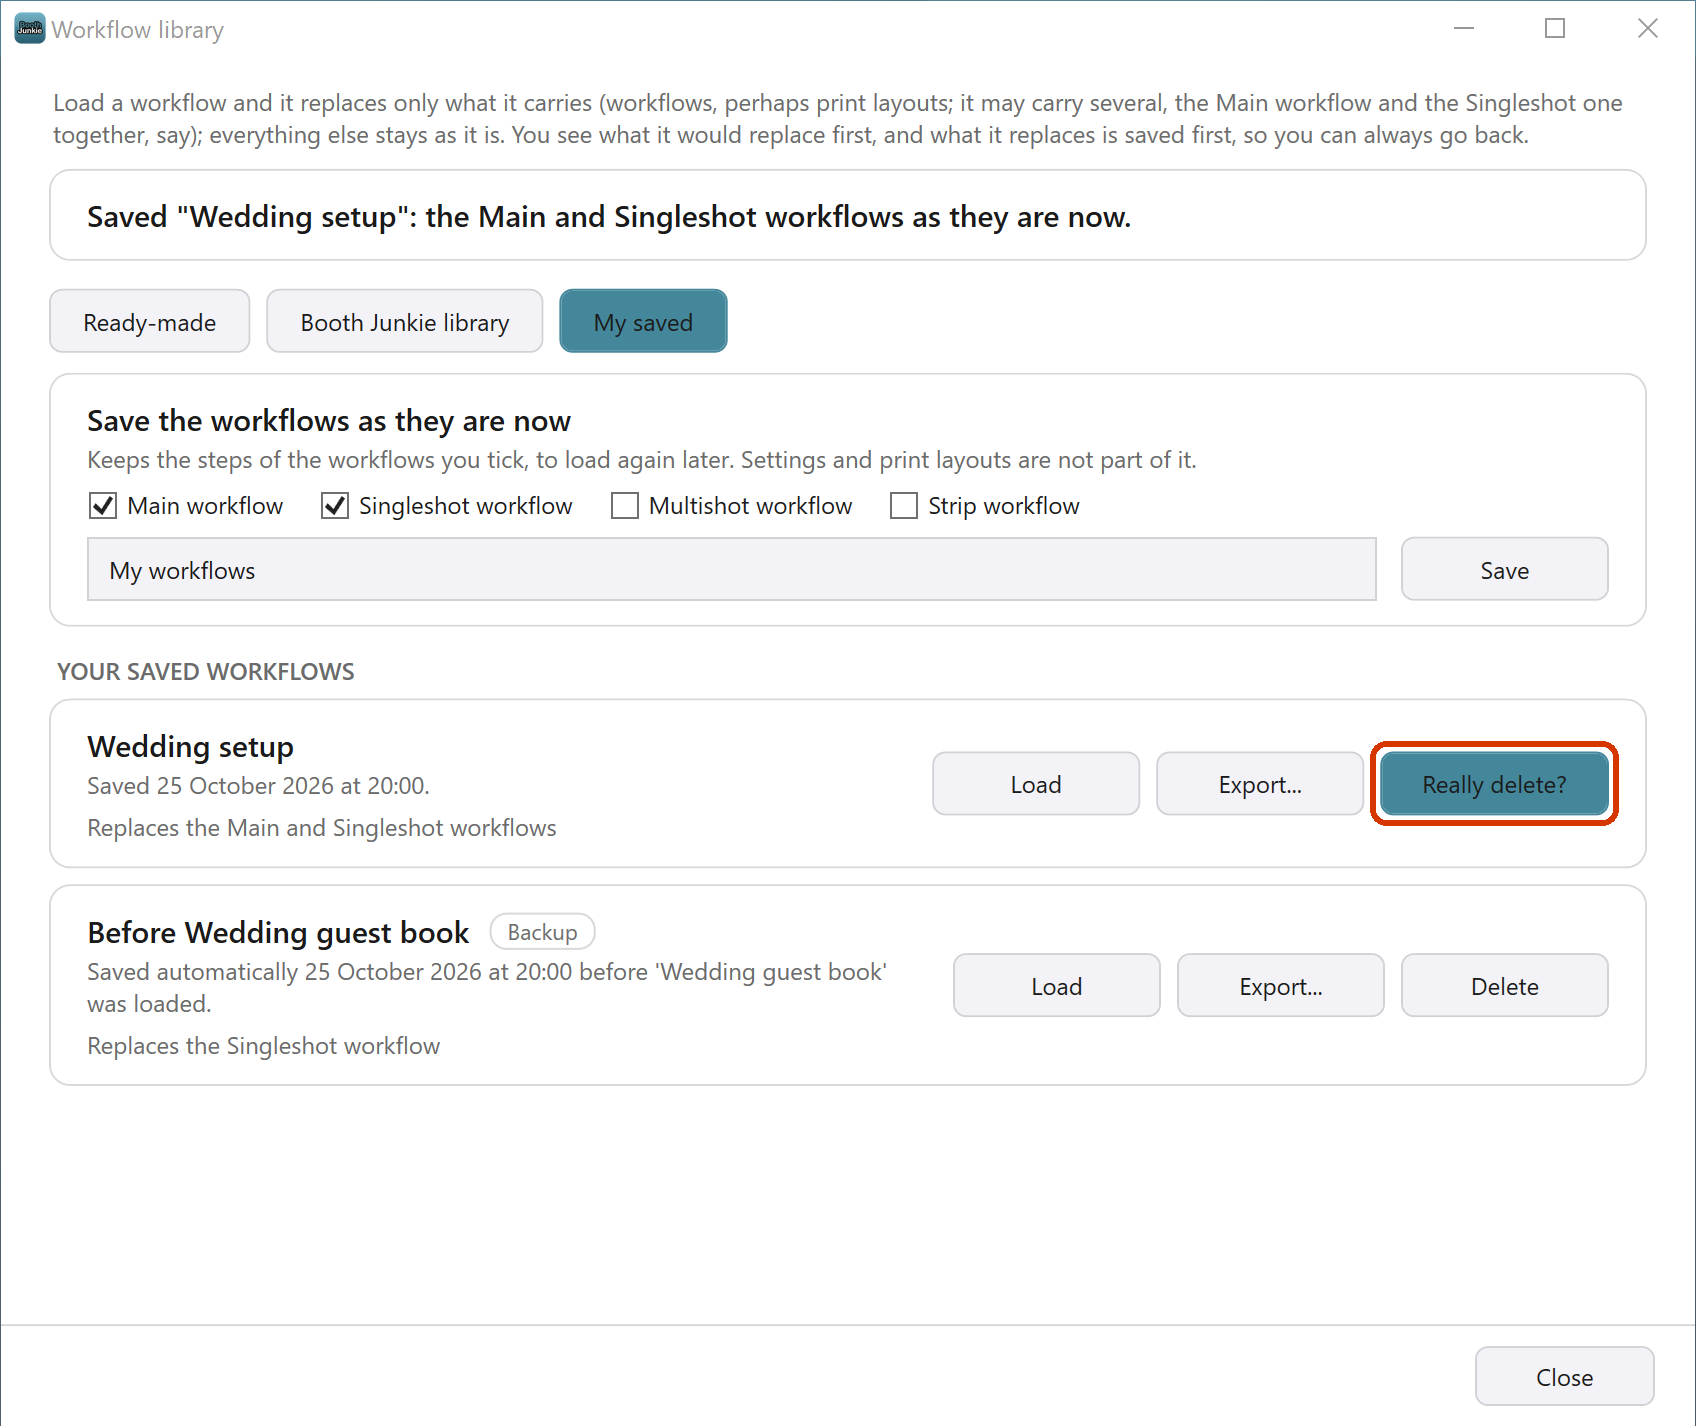
The workflows in this picture are examples. -
Press Really delete?.
Result: The window says “Deleted” with the workflow’s name, and its card is gone.
If you change your mind, don’t press Really delete?. Nothing is deleted until you do. Pressing Delete on another card puts the first one back to Delete.
A deleted workflow can’t be brought back. If you delete a Before copy, you can no longer go back to what it held.
Renaming a saved workflow
A saved workflow can’t be renamed: its card has no Rename button. There’s a way round it, in the box below.
Giving a saved workflow a new name
This loads the saved workflow into the Admin Panel for a while, so do it when you have time to check your workflows afterwards.
- On My saved, press Load on the workflow, then Load it. What it replaces is saved as a Before copy.
- Under Save the workflows as they are now, tick only the workflows its card names after Replaces, and untick the others. Type the new name, and press Save.
- On the old card, press Delete, then Really delete?.
- To put your workflows back as they were before step 1, press Load on the Before copy that step 1 made, then Load it.
- Look over your workflows on their tabs, then press Save in the Admin Panel.
A workflow that had no steps before step 1 isn’t in that Before copy, so it keeps the steps step 1 loaded. Set its rows back to None on its tab if you don’t want them.
Steps 1 and 4 each make a Before copy. Delete the ones you don’t need.
Related articles
- How the Workflow Library Works: Ready-Made, Booth Junkie and Your Own Workflows
- Loading a Workflow: the Preview, Load it and Save
- The Before Copy: Going Back After Loading a Workflow
- The Booth Junkie Library: Workflows Kept on Our Website
- Saving and Loading Your Settings
This guide is from Booth Junkie, photo booth software for Windows that has supplied the photo booth industry for 10 years. It runs enclosed booths, selfie pods and magic mirror booths with a Canon DSLR or a webcam, prints to any Windows printer, and sends photos to guests by WhatsApp, SMS and email.