
For what a Phidget is, the boards Booth Junkie supports and the Phidget light, see Phidget Boards: What They Do and What You Need.
Good to know: Lamps and mains power
A Phidget output only switches small loads, so a lamp, or anything on mains power, needs a relay board. Check your board’s own instructions for what its outputs can switch.
Switch a light or relay from a workflow
Outputs have no settings page. A Phidget step in a workflow switches one output on or off as the guest’s session reaches it. Put an On step before the steps the output should cover, and an Off step for the same Channel after them.
There’s no timer on the step. An output you switch on stays on until a Phidget step for the same Channel switches it off. Going back to the Admin Panel and pressing Start Booth doesn’t switch it off either.
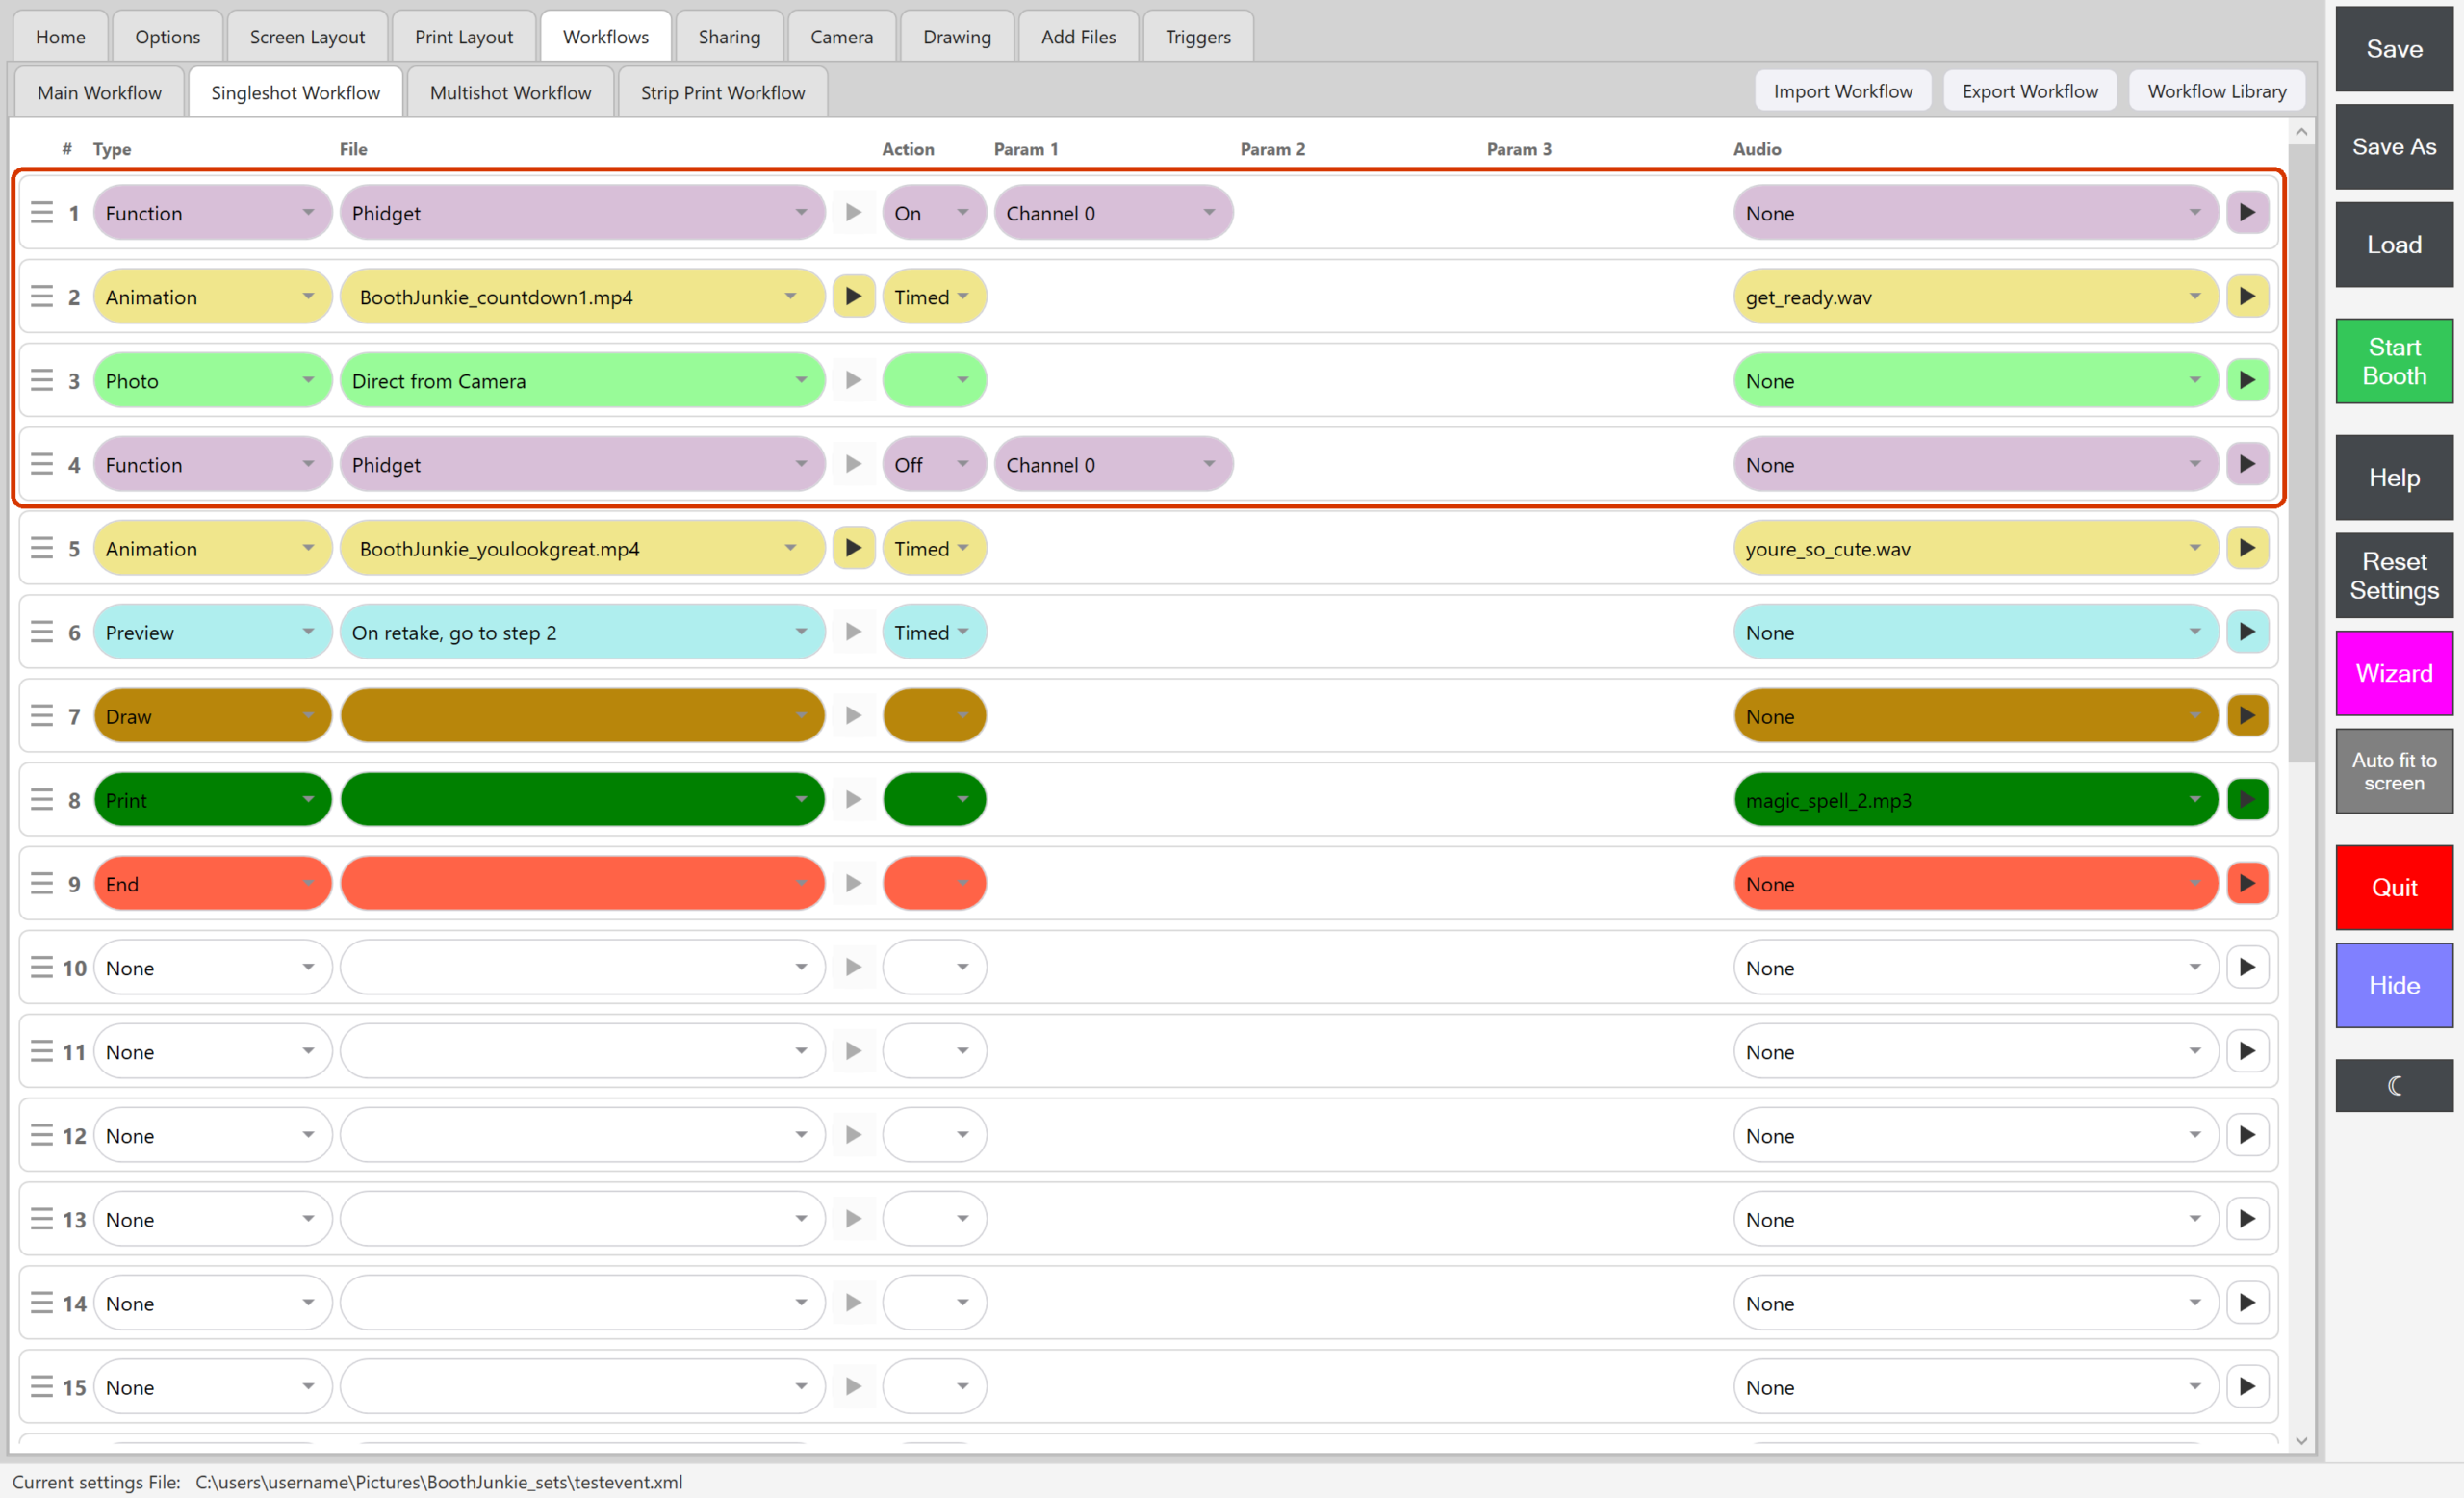
For example, the Singleshot Workflow that comes with Booth Junkie starts with Magic Eye steps. With Phidget steps in place of them, and the Off step moved after the Photo step, a light on Channel 0 is on for the countdown and the photo:
| # | Type | File | Action | Param 1 |
|---|---|---|---|---|
| 1 | Function | Phidget | On | Channel 0 |
| 2 | Animation | BoothJunkie_countdown1.mp4 | Timed | |
| 3 | Photo | Direct from Camera | ||
| 4 | Function | Phidget | Off | Channel 0 |
| 5 | Animation | BoothJunkie_youlookgreat.mp4 | Timed | |
| 6 | Preview | Timed | ||
| 7 | Draw | |||
| 8 | ||||
| 9 | End |
Add a Phidget step to a workflow
-
Go to Admin Panel → Workflows and open the workflow, for example Singleshot Workflow.
-
On the first row whose Type is None, set Type to Function.
-
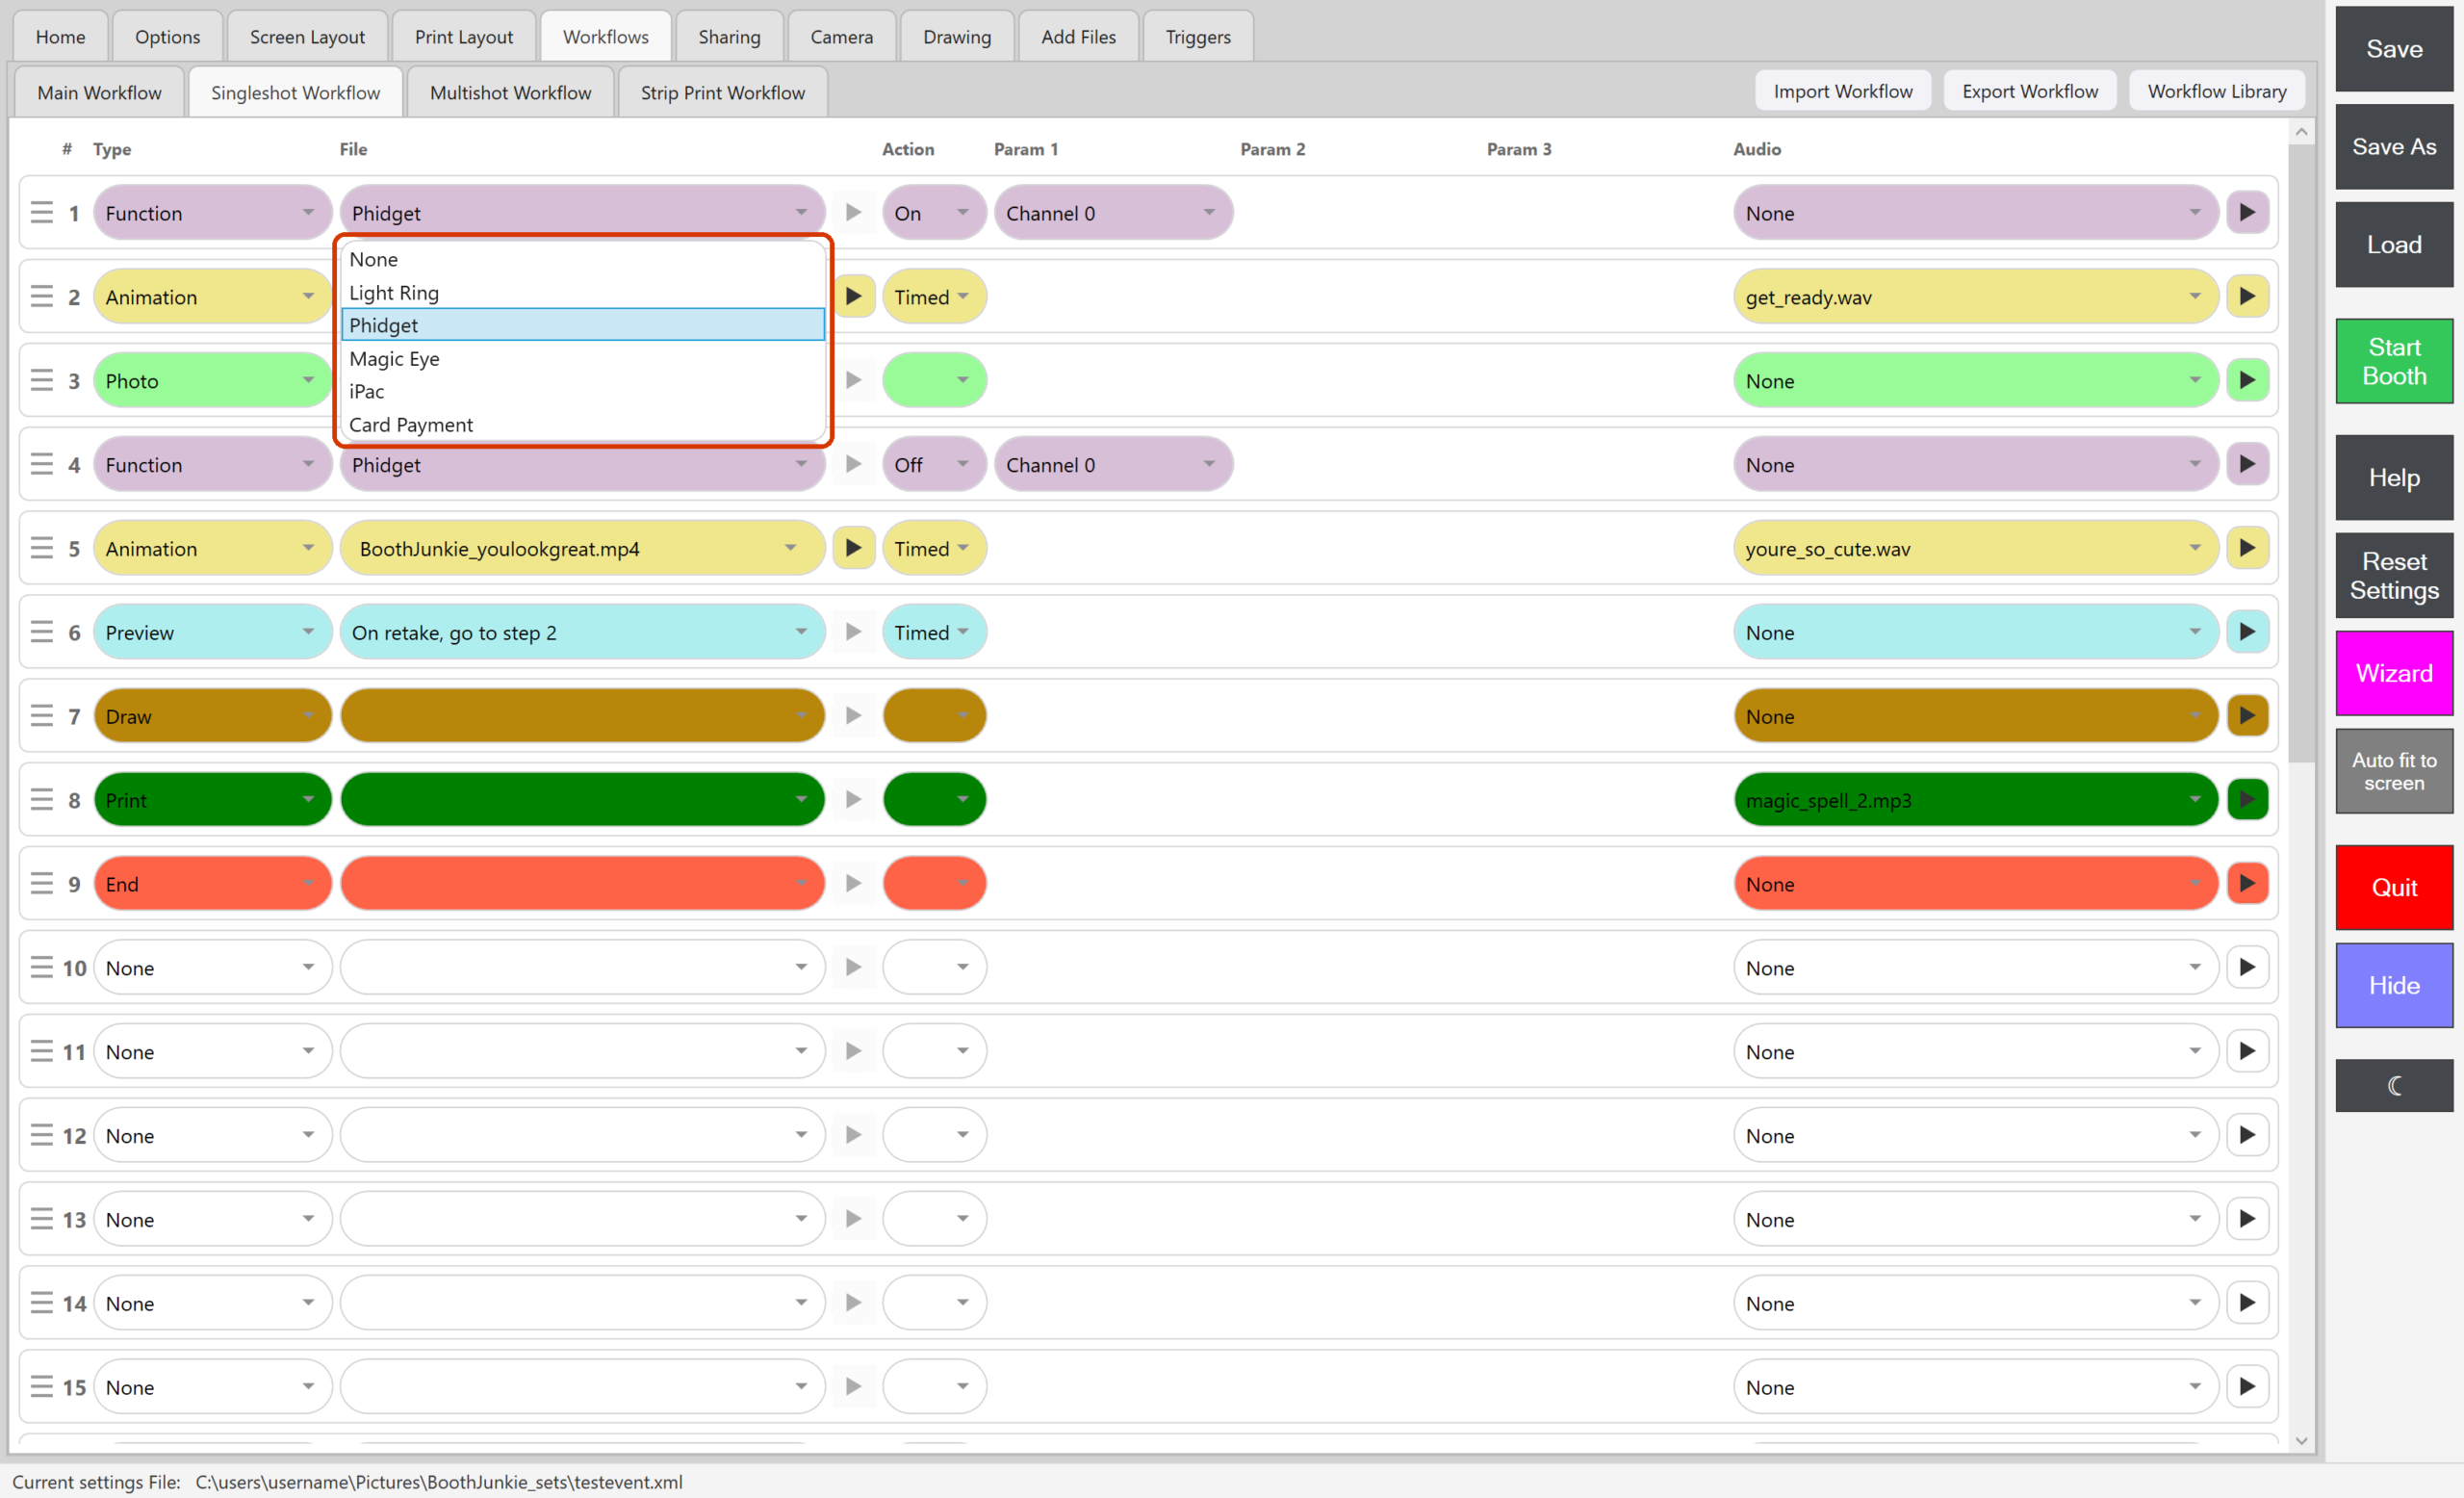
Set File to Phidget.
Result: Action shows On, and a Param 1 list appears. Param 2 and Param 3 stay empty.
Choose Phidget in the File list. -
Choose the Action: On or Off.
-
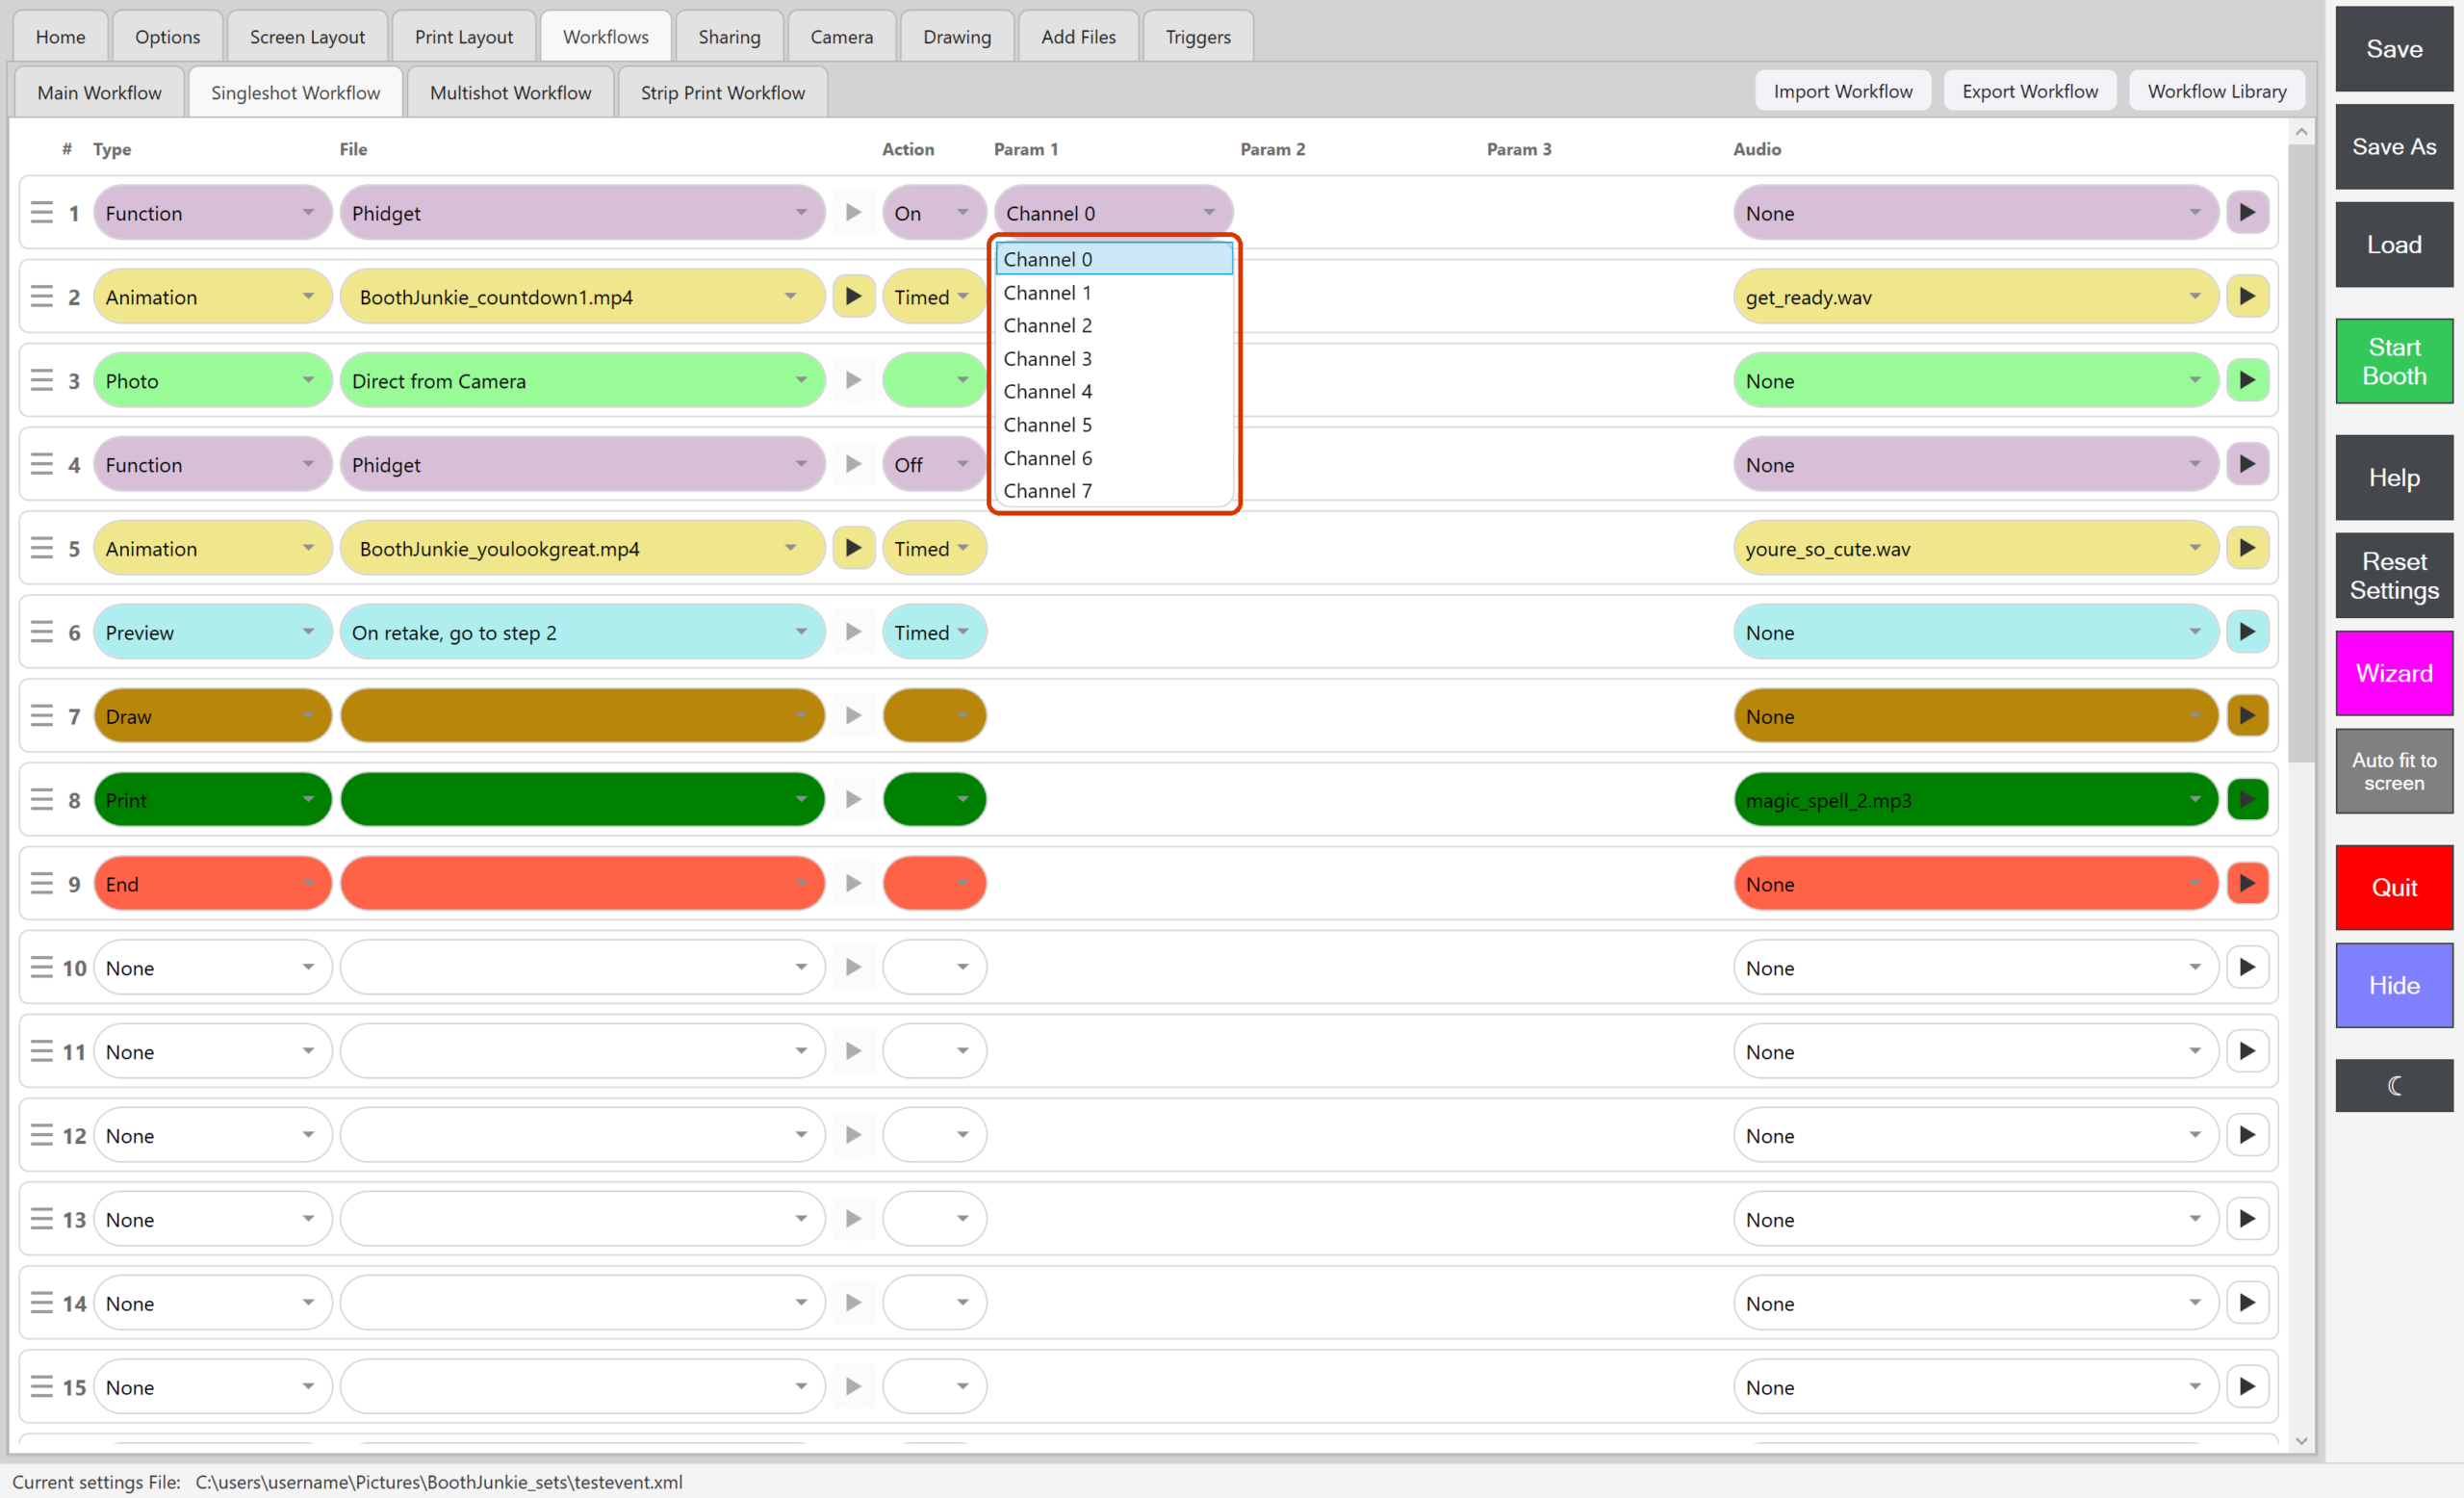
In Param 1, choose the Channel your light or relay is wired to, Channel 0 to Channel 7. If Param 1 is left empty, the step uses Channel 0.
Choose the Channel your light or relay is wired to. -
Leave Audio on None: only Animation steps play a step’s Audio.
-
Drag the row by its handle to where the step should go. The steps renumber to match.
-
Add the matching step further down the workflow, with the other Action and the same Channel.
-
Press Save, then Start Booth.
Result: When the guest’s session reaches the step, the output switches, and the workflow moves straight on.
The File list also has Light Ring, Magic Eye, iPac and Card Payment. They’re other kinds of Function step, and this article doesn’t cover them.
How a Phidget step behaves
- A Phidget step has no screen of its own.
- The booth waits until the output has switched, then moves on, so a light is on before the next step starts. This normally takes a moment, and never more than 5 seconds.
- If the Phidget, or that Channel, isn’t there, the step is skipped and the session carries on. A missing Phidget never holds a guest up.
- Just after Booth Junkie opens, a Phidget step can wait a few seconds while the Phidget is found.
- A Phidget that’s unplugged and plugged back in is used again at the next Phidget step.
- If two boards both have an output with that number, the one with the lower serial number is used.
Tip: Start every guest with the output off
If a session ends before its Off step, for example with Restart Session, the output stays on. To start every guest with it off, put an Off step for that Channel first in the Main Workflow, before the touch-to-start video.
VINT Hub ports used as outputs
A board plugged into the hub comes before the hub’s own ports. With a relay board on the hub, Channel 2 means the relay board’s output 2, not hub port 2.
On a VINT Hub, a port can be an input or an output, not both, so give inputs and outputs different port numbers. For what happens to a hub port once a Phidget step has switched it, and how the Channel numbers work, see VINT Hub ports and How the numbers work in Phidget Boards: What They Do and What You Need.
Example: a button starts each session, and a light comes on for the photo
This puts an input and an output together. It uses an InterfaceKit, where Input 0 and Channel 0 are separate. On a VINT Hub, use different ports, for example Input 0 and Channel 1. For the input line, see Phidget Inputs: Buttons and Switches That Run Commands. For a step that waits for an event, see Events 1 to 5: Steps That Wait for a Button, Keyfob or Shortcut.
-
On Admin Panel → Workflows → Main Workflow, set the first step’s Action (the touch-to-start video) to Event 1.
-
On Admin Panel → Triggers → Phidget Inputs, add a line: Input 0, Pulses 1, Command to run Event 1.
-
On Admin Panel → Workflows → Singleshot Workflow, add a Phidget step with Action On and Channel 0 before the countdown, and one with Action Off and Channel 0 after the Photo step.
-
Press Save, then Start Booth.
Result: The touch-to-start video loops until the operator presses the button. Then the guest chooses a shot type, and for a Singleshot the light comes on for the countdown and the photo, and goes off afterwards.
If something goes wrong
| What you see | What to do |
|---|---|
| An output doesn’t switch | Check the Channel: a board’s own outputs come before hub ports, and a hub has no Channel 6 or Channel 7. On a VINT Hub, check that no Phidget Inputs line uses the same port. Check the Phidget light is green, then press Save and Start Booth. |
| An output stays on after a guest | The session ended before its Off step. Put an Off step for that Channel first in the Main Workflow. |
For the Phidget light, and a Phidget that drops out during an event, see If something goes wrong in Phidget Boards: What They Do and What You Need.
Related articles
- Phidget Boards: What They Do and What You Need
- Phidget Inputs: Buttons and Switches That Run Commands
- Events 1 to 5: Steps That Wait for a Button, Keyfob or Shortcut
- Setting Up a Keyfob
- Keyboard Shortcuts: Triggering Booth Functions from a Keyboard
- The General Tab: Event Name, Rotation, and Licence Info
- Main Workflow vs. Shot-Type Workflows
- The Animation Step: Videos Between Everything Else
- The Live View Step: Keeping Guests in Frame Between Shots
- Saving and Loading Your Settings
- Preventing Windows From Powering Down Your Booth’s USB Devices
This guide is from Booth Junkie, photo booth software for Windows that has supplied the photo booth industry for 10 years. It runs enclosed booths, selfie pods and magic mirror booths with a Canon DSLR or a webcam, prints to any Windows printer, and sends photos to guests by WhatsApp, SMS and email.