
For the Phidget boards that can fire an event, see Phidget Boards: What They Do and What You Need.
How a step moves on
Every Animation and Live View step on the Workflows tab has an Action, which sets how the step moves on:
| Action | How the step moves on |
|---|---|
| Touch | The video loops until the guest taps the screen. |
| Timed | The video plays once, then the step moves on by itself. |
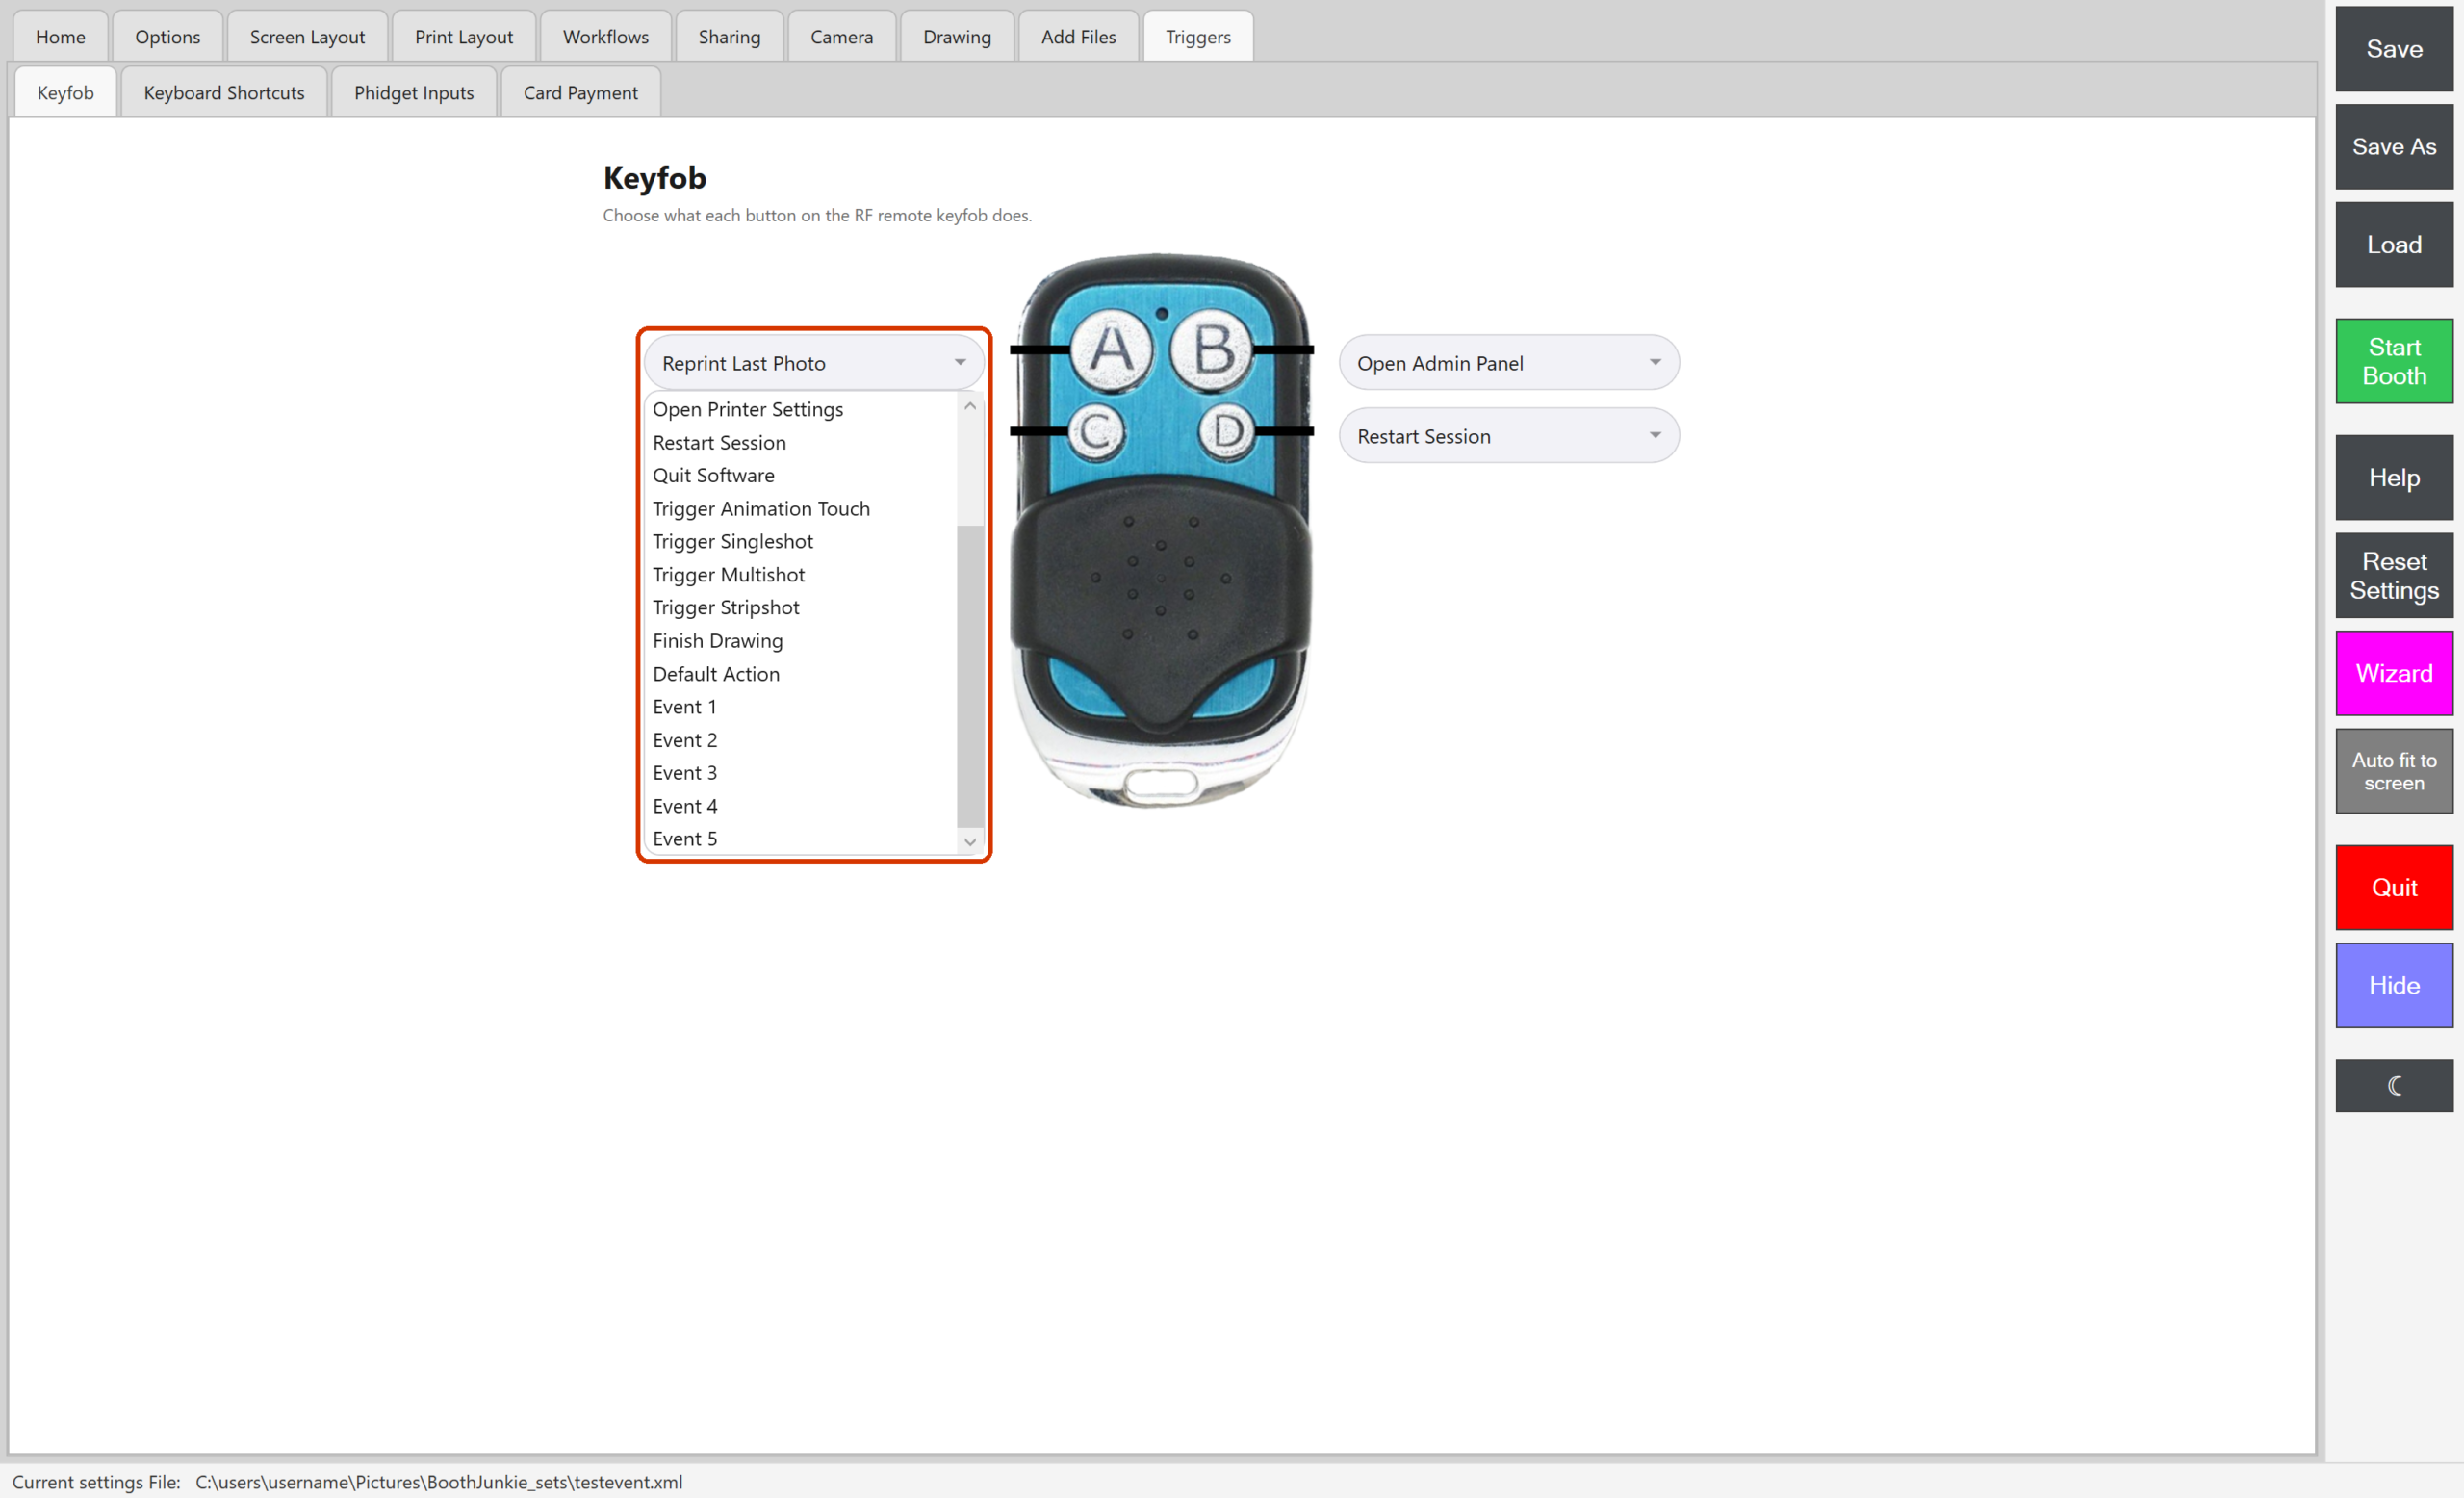
| Event 1 to Event 5 | The video loops, and taps on the screen are ignored. The step moves on only when that event is fired. |
Selection steps offer only Touch, and Preview steps only Timed.
- Default Action and Trigger Animation Touch count as taps, so they don’t move on a step that’s waiting for an event. Only that event does.
- An event is offered to the step that’s showing. An event fired when no step is waiting for it is dropped, not kept for later.
- A step that waits for an event and has no video still waits for its event.
Make a step wait for an event
-
Go to Admin Panel → Workflows and open the workflow you want.
-
On the Animation or Live View step, open the Action list and choose an event, for example Event 1.
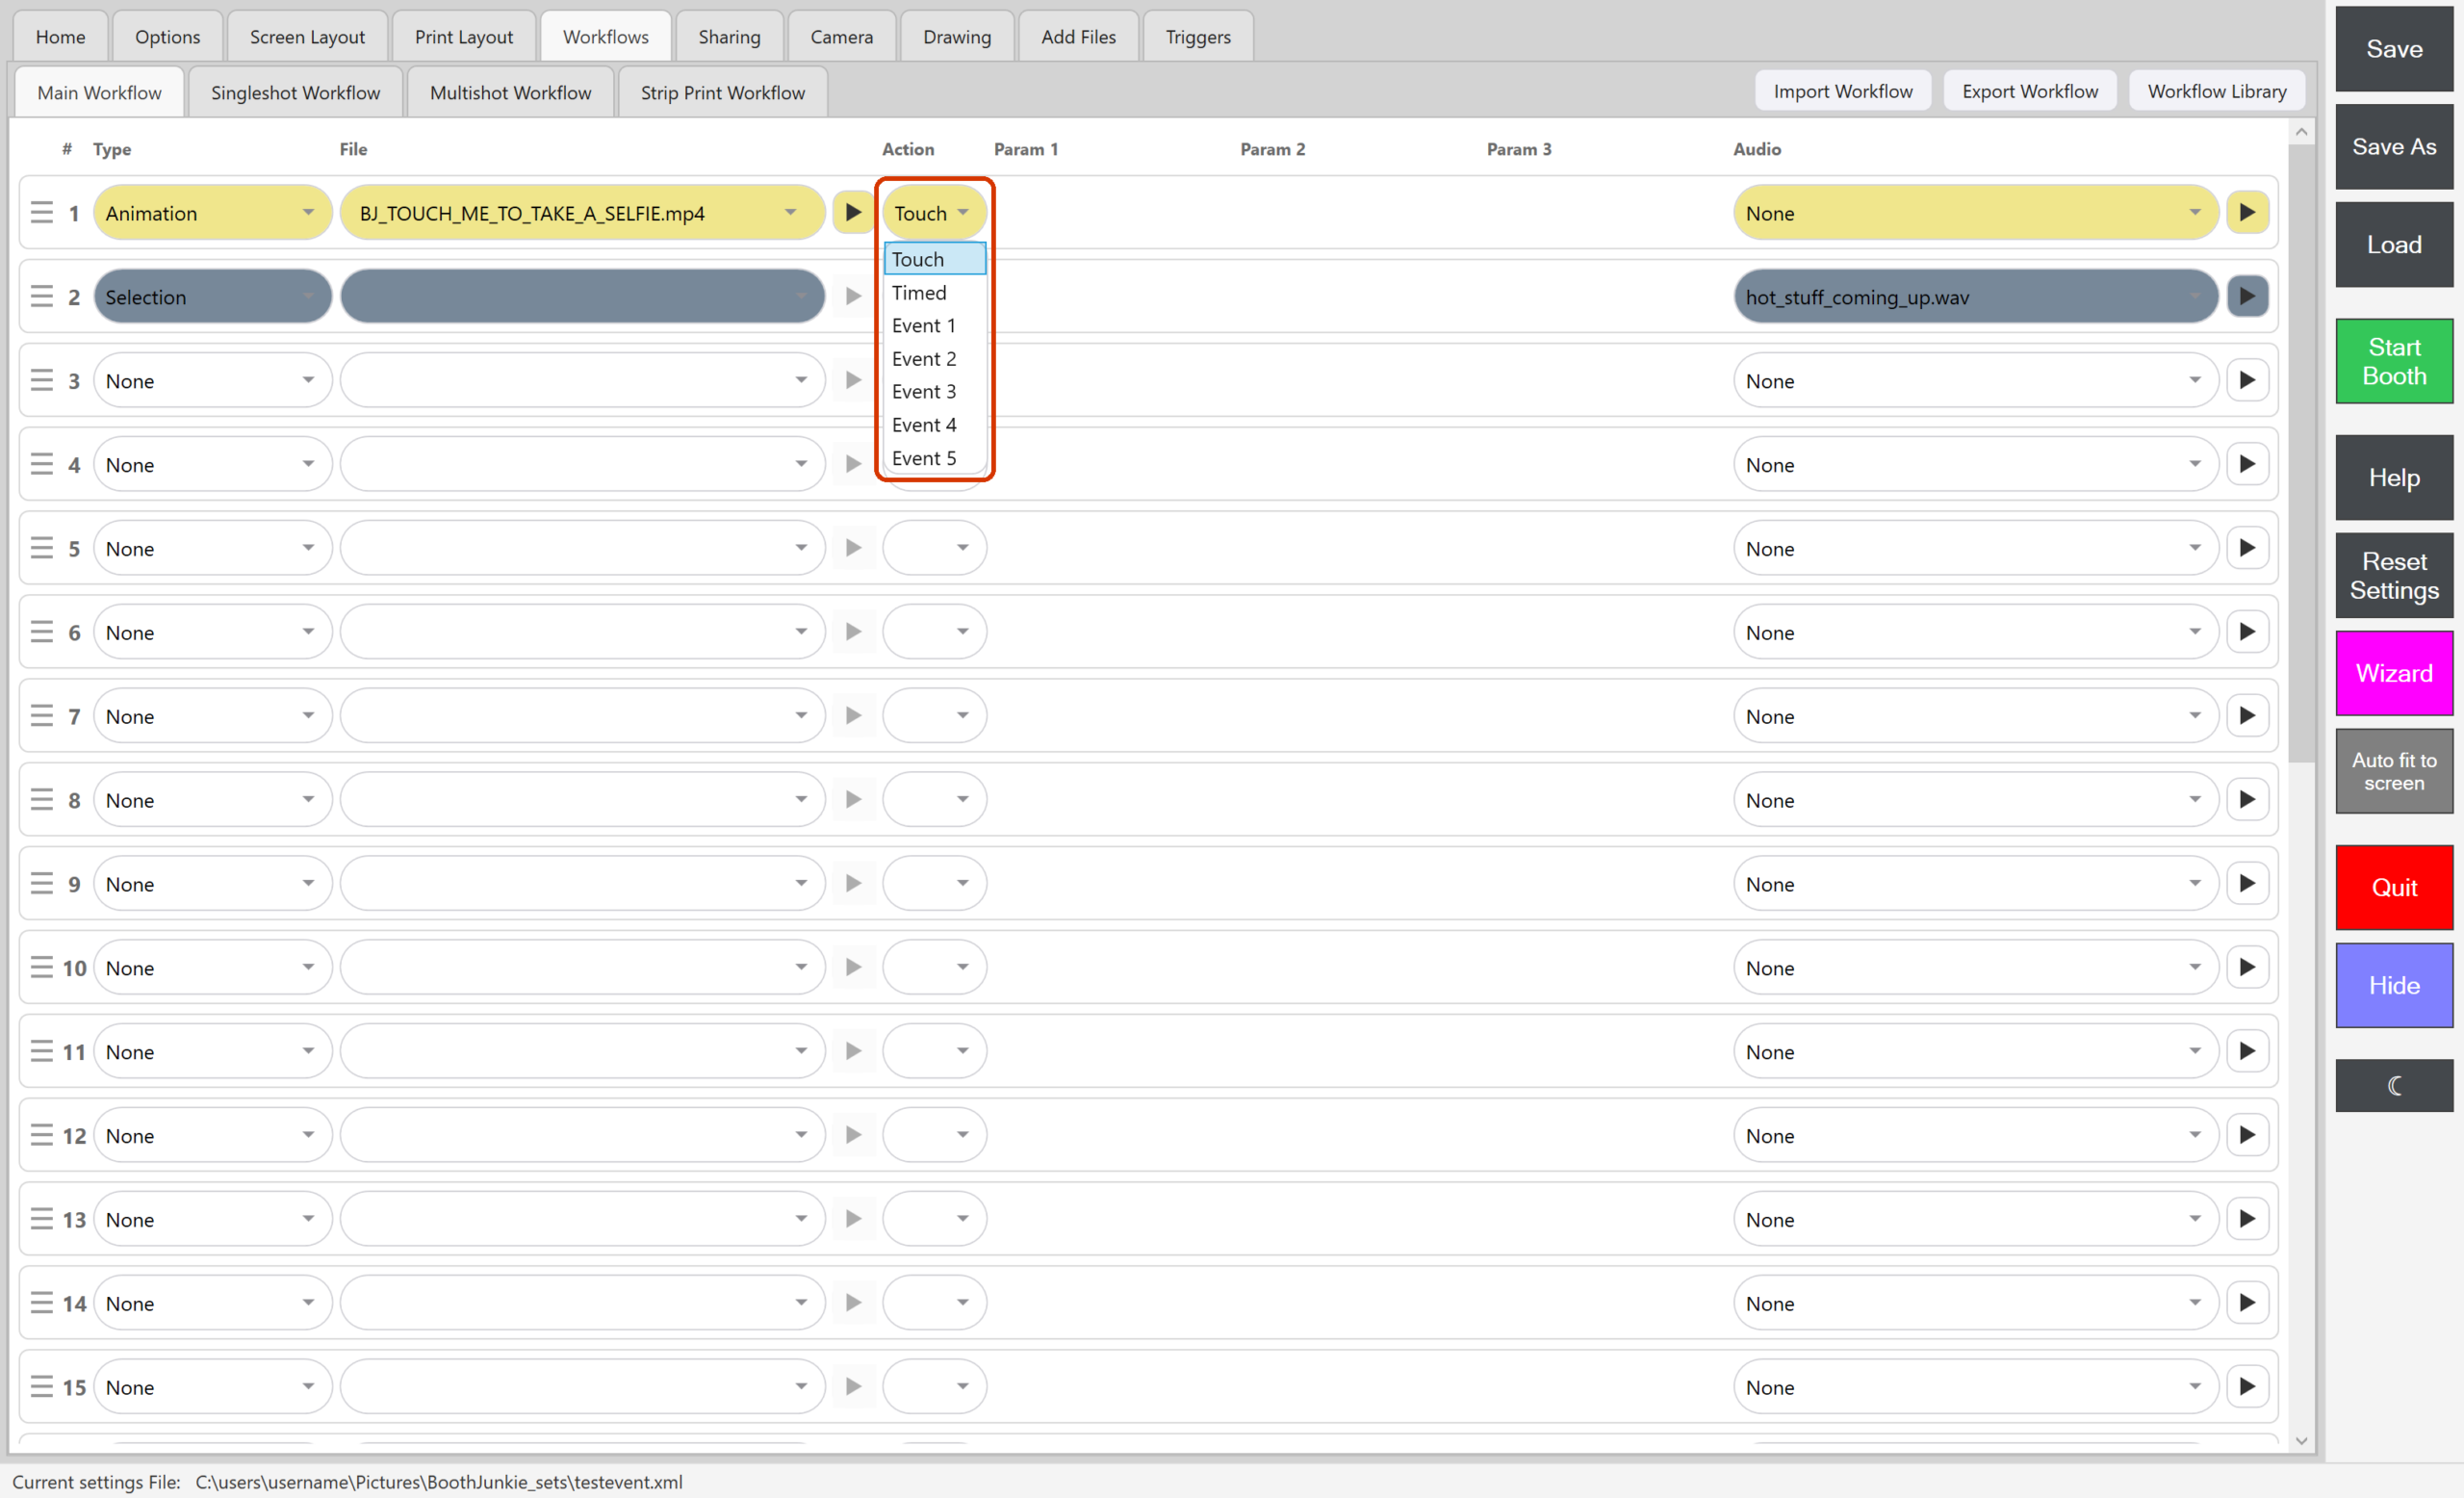
Choose the event in the step’s Action list. -
Set up something to fire that event: a Phidget input line, a Keyfob button or a keyboard shortcut (see the next section).
-
Press Save, then Start Booth.
Result: When the booth reaches that step, its video loops until the event is fired, then the workflow moves on.
What can fire an event
| Where | What to set |
|---|---|
| Triggers → Phidget Inputs | A line whose Command to run is Event 1 to Event 5. See Phidget Inputs: Buttons and Switches That Run Commands. |
| Triggers → Keyfob | A button set to Event 1 to Event 5. See Setting Up a Keyfob. |
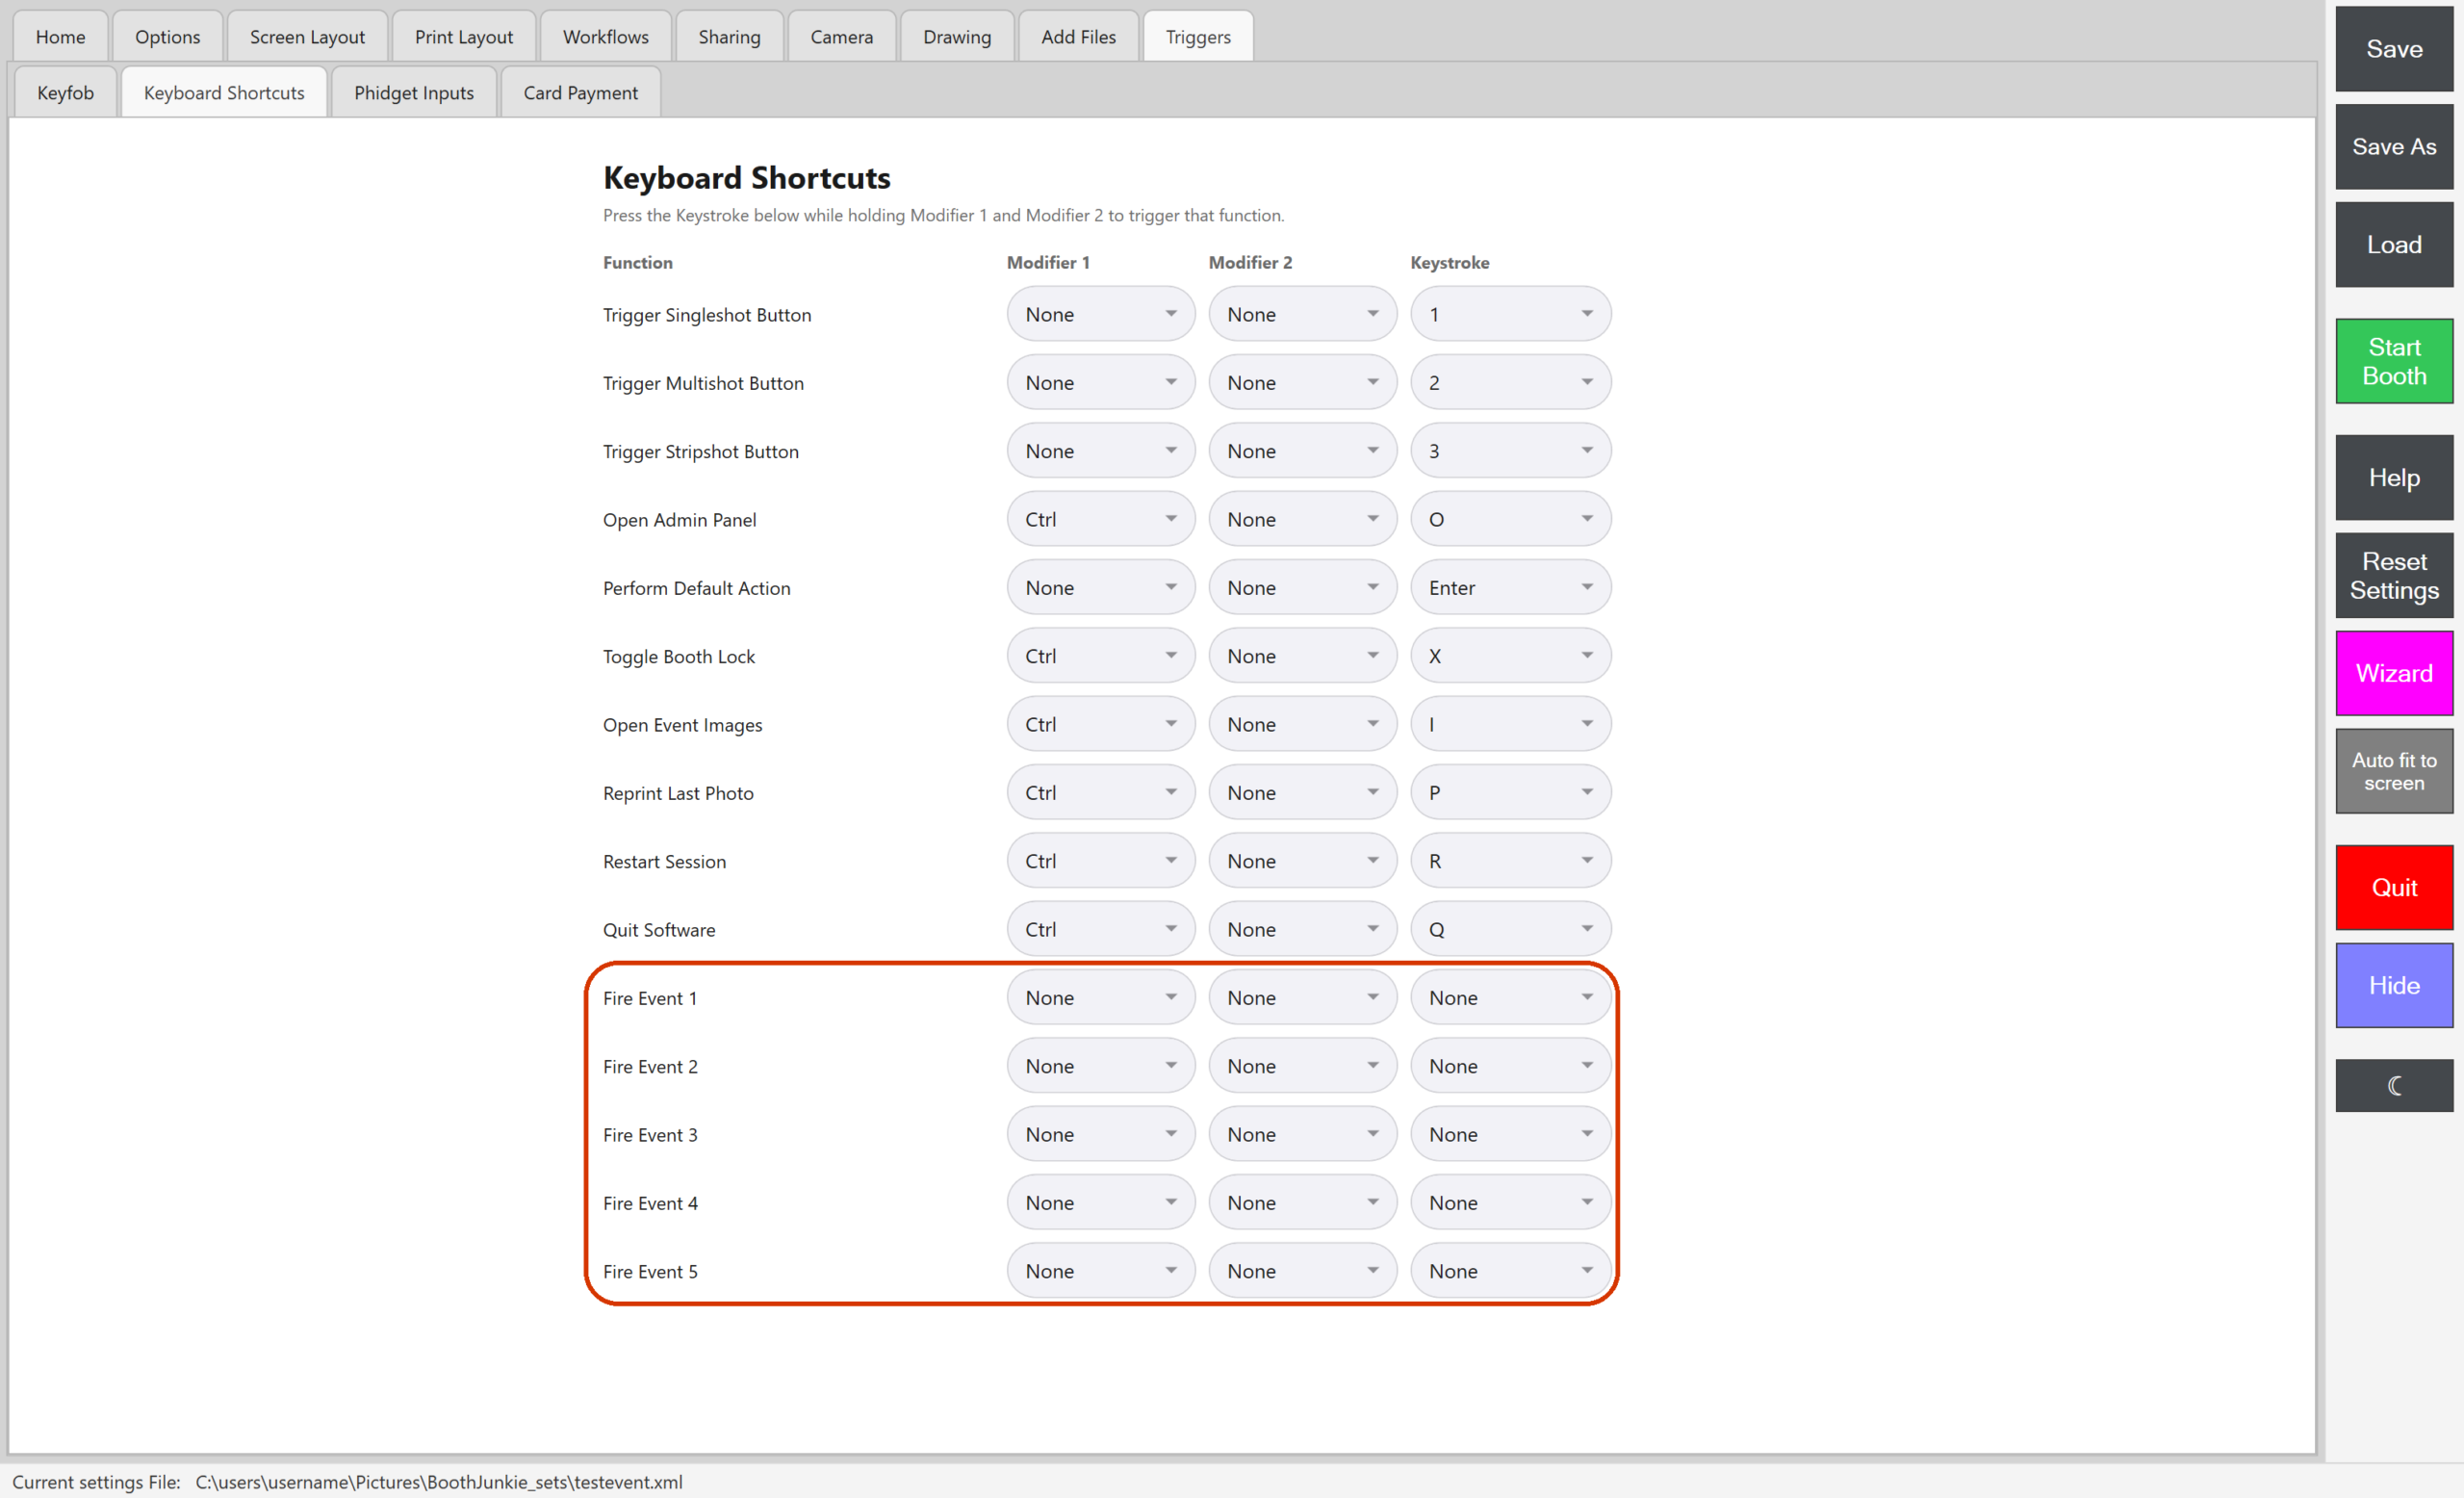
| Triggers → Keyboard Shortcuts | A key for Fire Event 1 to Fire Event 5. They start with no key. See Keyboard Shortcuts: Triggering Booth Functions from a Keyboard. |
Tip: Let the operator start each session
Set the first step of the Main Workflow (the touch-to-start video) to Event 1, and give Fire Event 1 a key, or wire a push button to a Phidget input set to Event 1. Taps on the screen are ignored, and the booth moves on to the Selection screen only when you press the key or the button.
For a worked example, with a Phidget button that starts each session and a light that comes on for the photo, see Example: a button starts each session, and a light comes on for the photo in Phidget Outputs: Switching Lights and Relays from a Workflow.
If something goes wrong
| What you see | What to do |
|---|---|
| A step that waits for an event doesn’t move on | Check that the step’s Action is that event, and that your line, button or key fires the same event. Default Action doesn’t move it on. An event fired before the step was showing is dropped, so fire it again. |
Related articles
- Phidget Boards: What They Do and What You Need
- Phidget Inputs: Buttons and Switches That Run Commands
- Phidget Outputs: Switching Lights and Relays from a Workflow
- Setting Up a Keyfob
- Keyboard Shortcuts: Triggering Booth Functions from a Keyboard
- The General Tab: Event Name, Rotation, and Licence Info
- Main Workflow vs. Shot-Type Workflows
- The Animation Step: Videos Between Everything Else
- The Live View Step: Keeping Guests in Frame Between Shots
- Saving and Loading Your Settings
- Preventing Windows From Powering Down Your Booth’s USB Devices
This guide is from Booth Junkie, photo booth software for Windows that has supplied the photo booth industry for 10 years. It runs enclosed booths, selfie pods and magic mirror booths with a Canon DSLR or a webcam, prints to any Windows printer, and sends photos to guests by WhatsApp, SMS and email.