
What goes in the file
Only what you tick goes in: any of the four workflows (Main, Singleshot, Multishot and Strip), with everything set on their steps, the print layouts you tick, as they are on the Print Layout tab now, and the pictures, animations and sounds the steps use.
Settings never go in, so everything on the Options, Screen Layout, Sharing, Camera, Drawing and Triggers tabs stays as each PC has it. Nor do the pictures and sounds that come with Booth Junkie, because every PC already has them, or guests’ photos and answers. A font that is only installed in Windows needs installing on the other PC too.
Workflow files are new in Booth Junkie 10, so both PCs need version 10, and ideally the same version: a file exported on a newer version won’t load on an older one.
Export a workflow
-
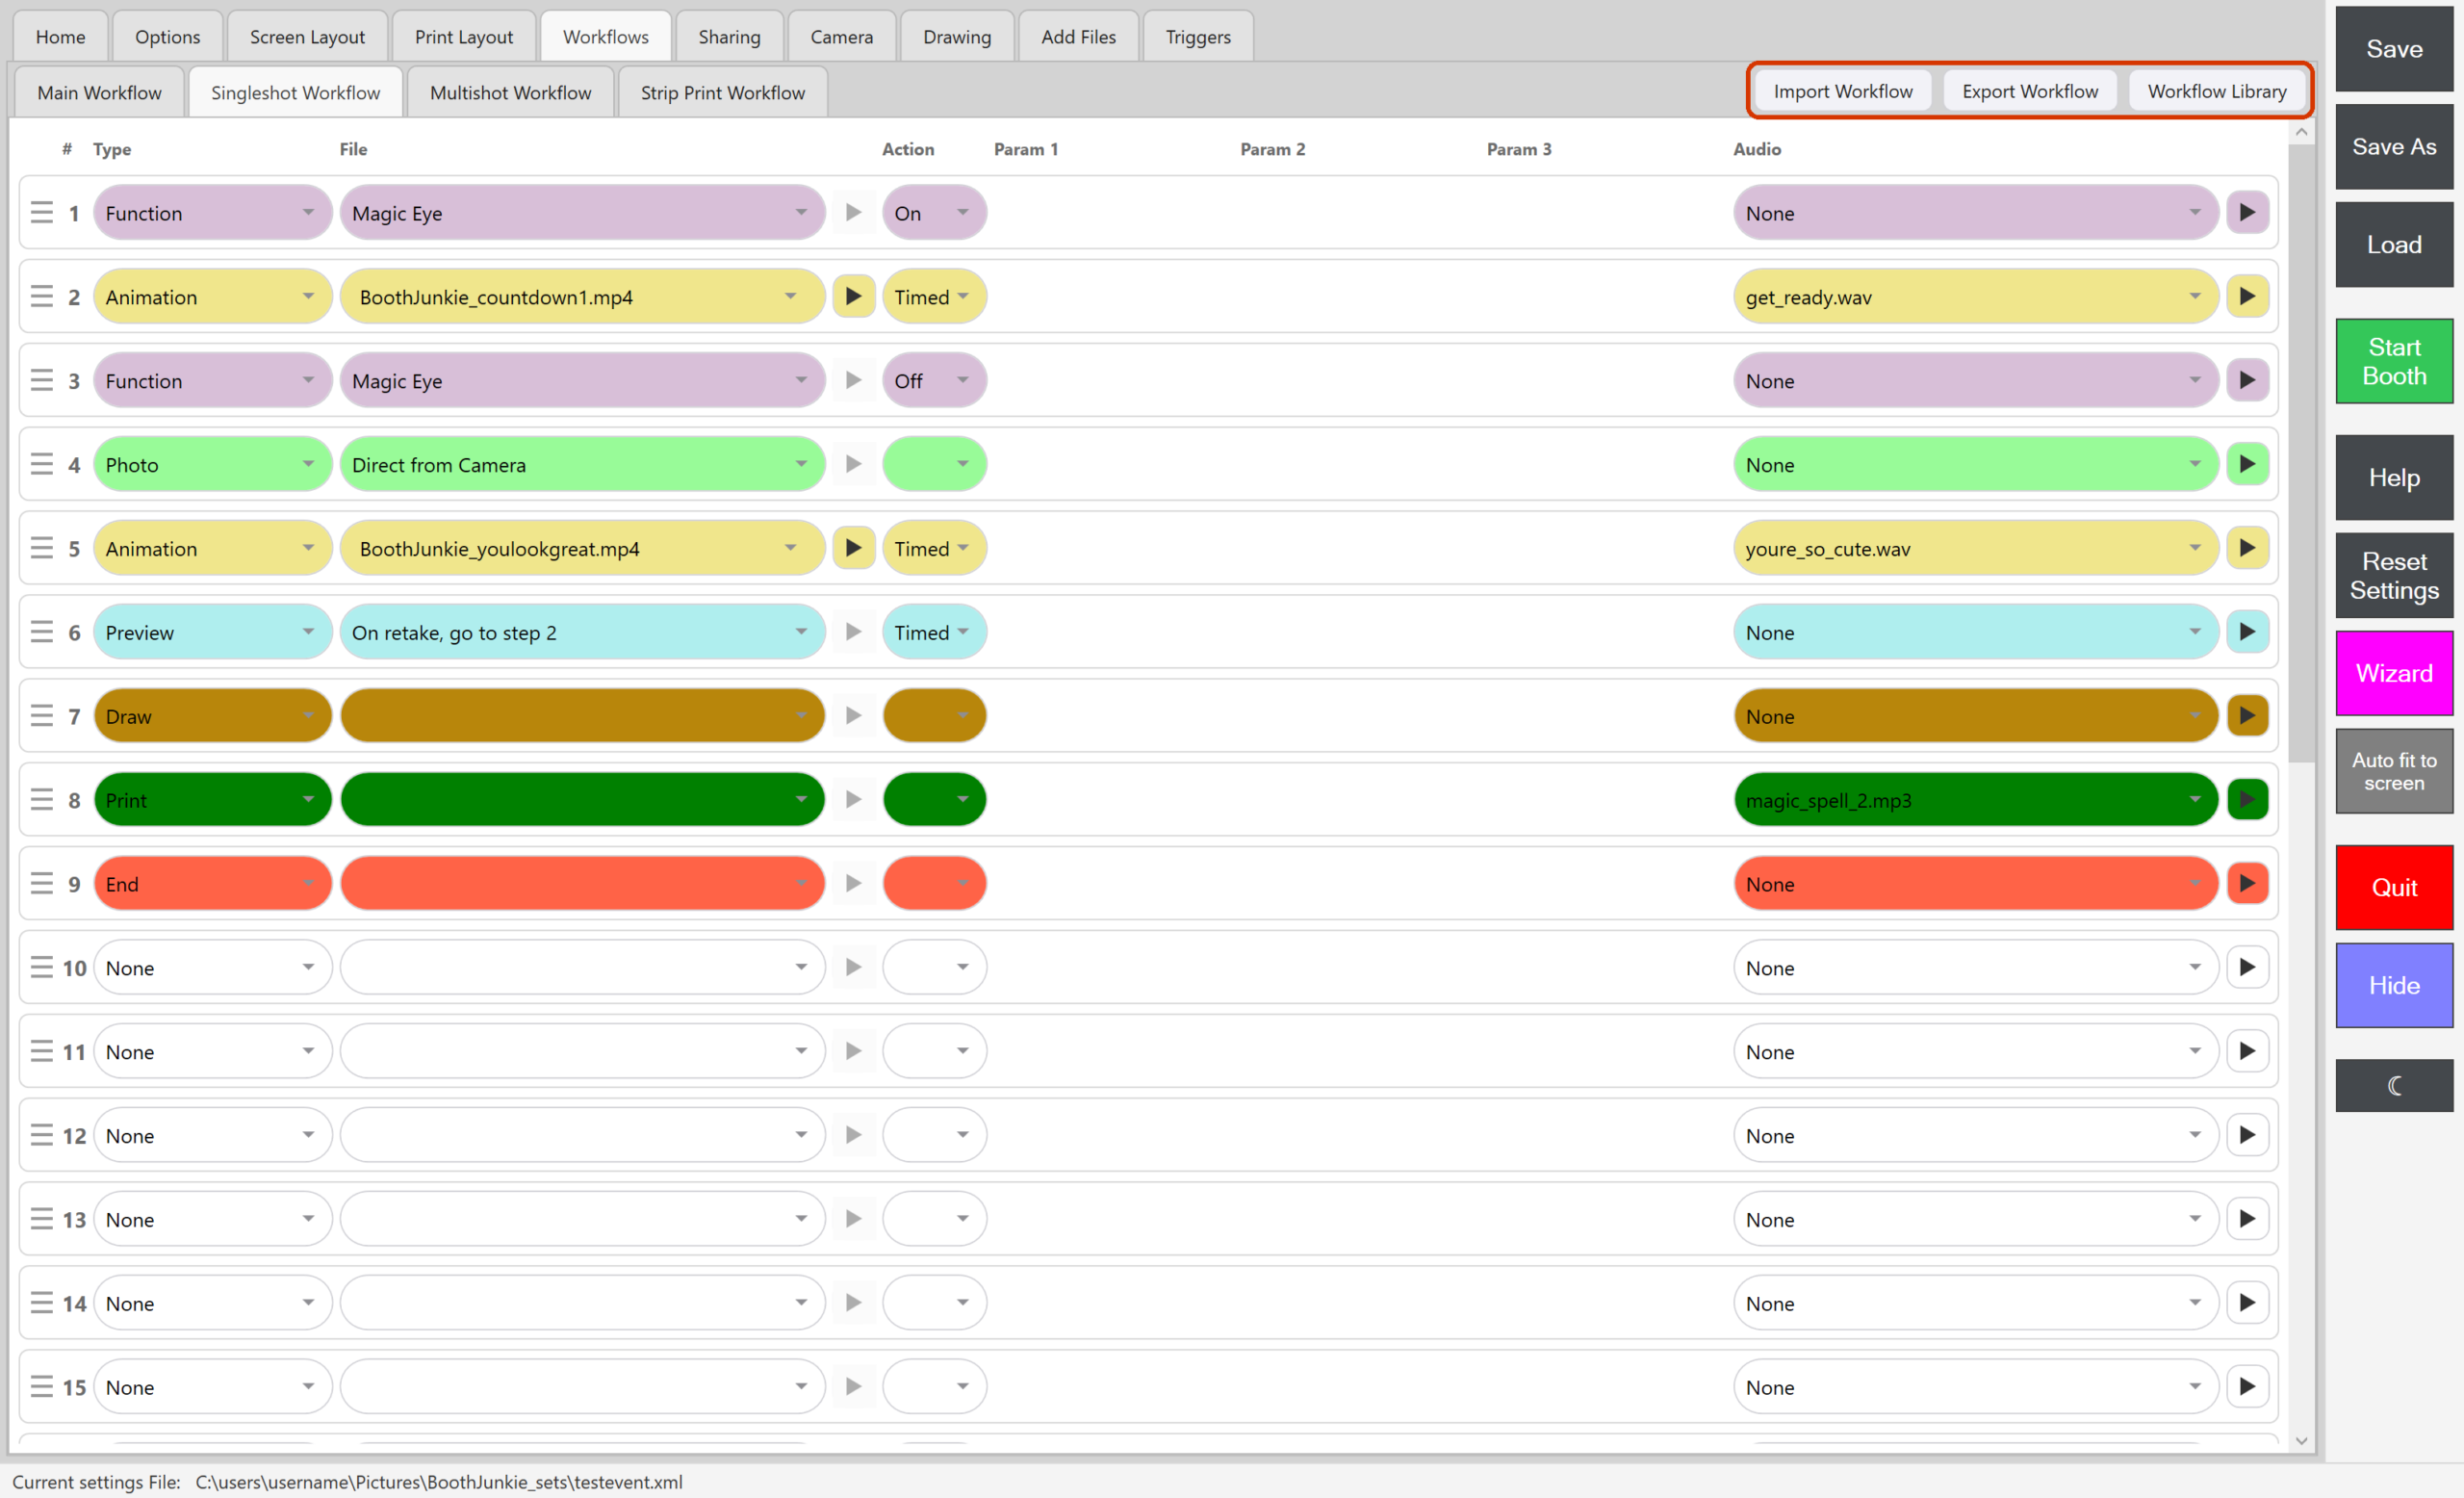
Under Admin Panel → Workflows, open the tab of the workflow you want to take, and press Export Workflow.
-
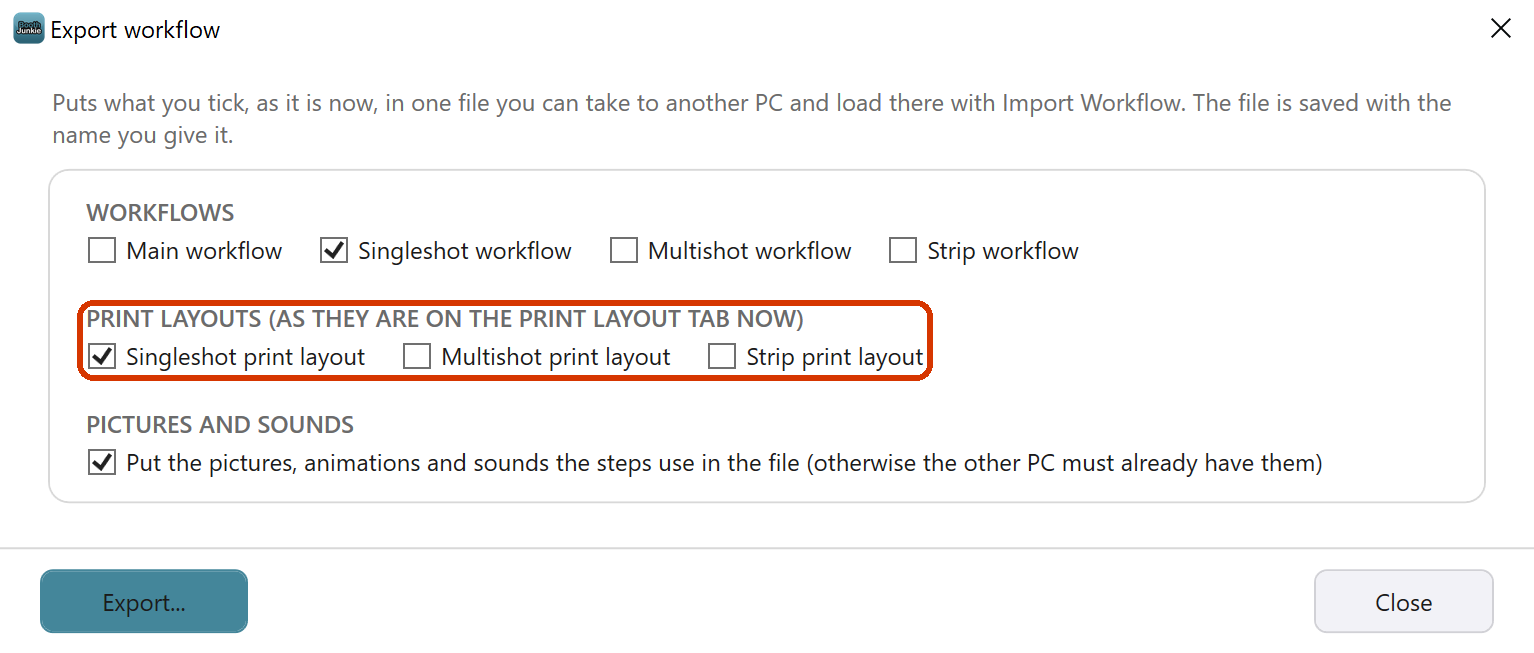
Tick the workflows you want in the file, and the print layouts to go with them. If the workflow prints the guest’s name, tick its print layout too, because the
{NAME}text is part of the print layout. Leave PICTURES AND SOUNDS ticked. -
Press Export…, choose where to save the file, for example on a memory stick, and give it a name.
Result: The window says what it exported, and where.
The file’s name is what the other PC calls the workflow, so name it after what it does, for example wedding-guest-book. A picture, animation or sound only arrives on the other PC if that PC has no file of the same name, so give your own files names of their own.
Import a workflow file
-
On the other PC, Load the settings file you want the workflow in, or stay on the one you’re using. See Saving and Loading Your Settings.
-
Under Admin Panel → Workflows, press Import Workflow, choose the file, and press Open. Any of the tabs will do: each workflow in the file goes to its own tab.
Result: The Workflow library window shows what loading the file would replace, add and need. Nothing has changed yet.
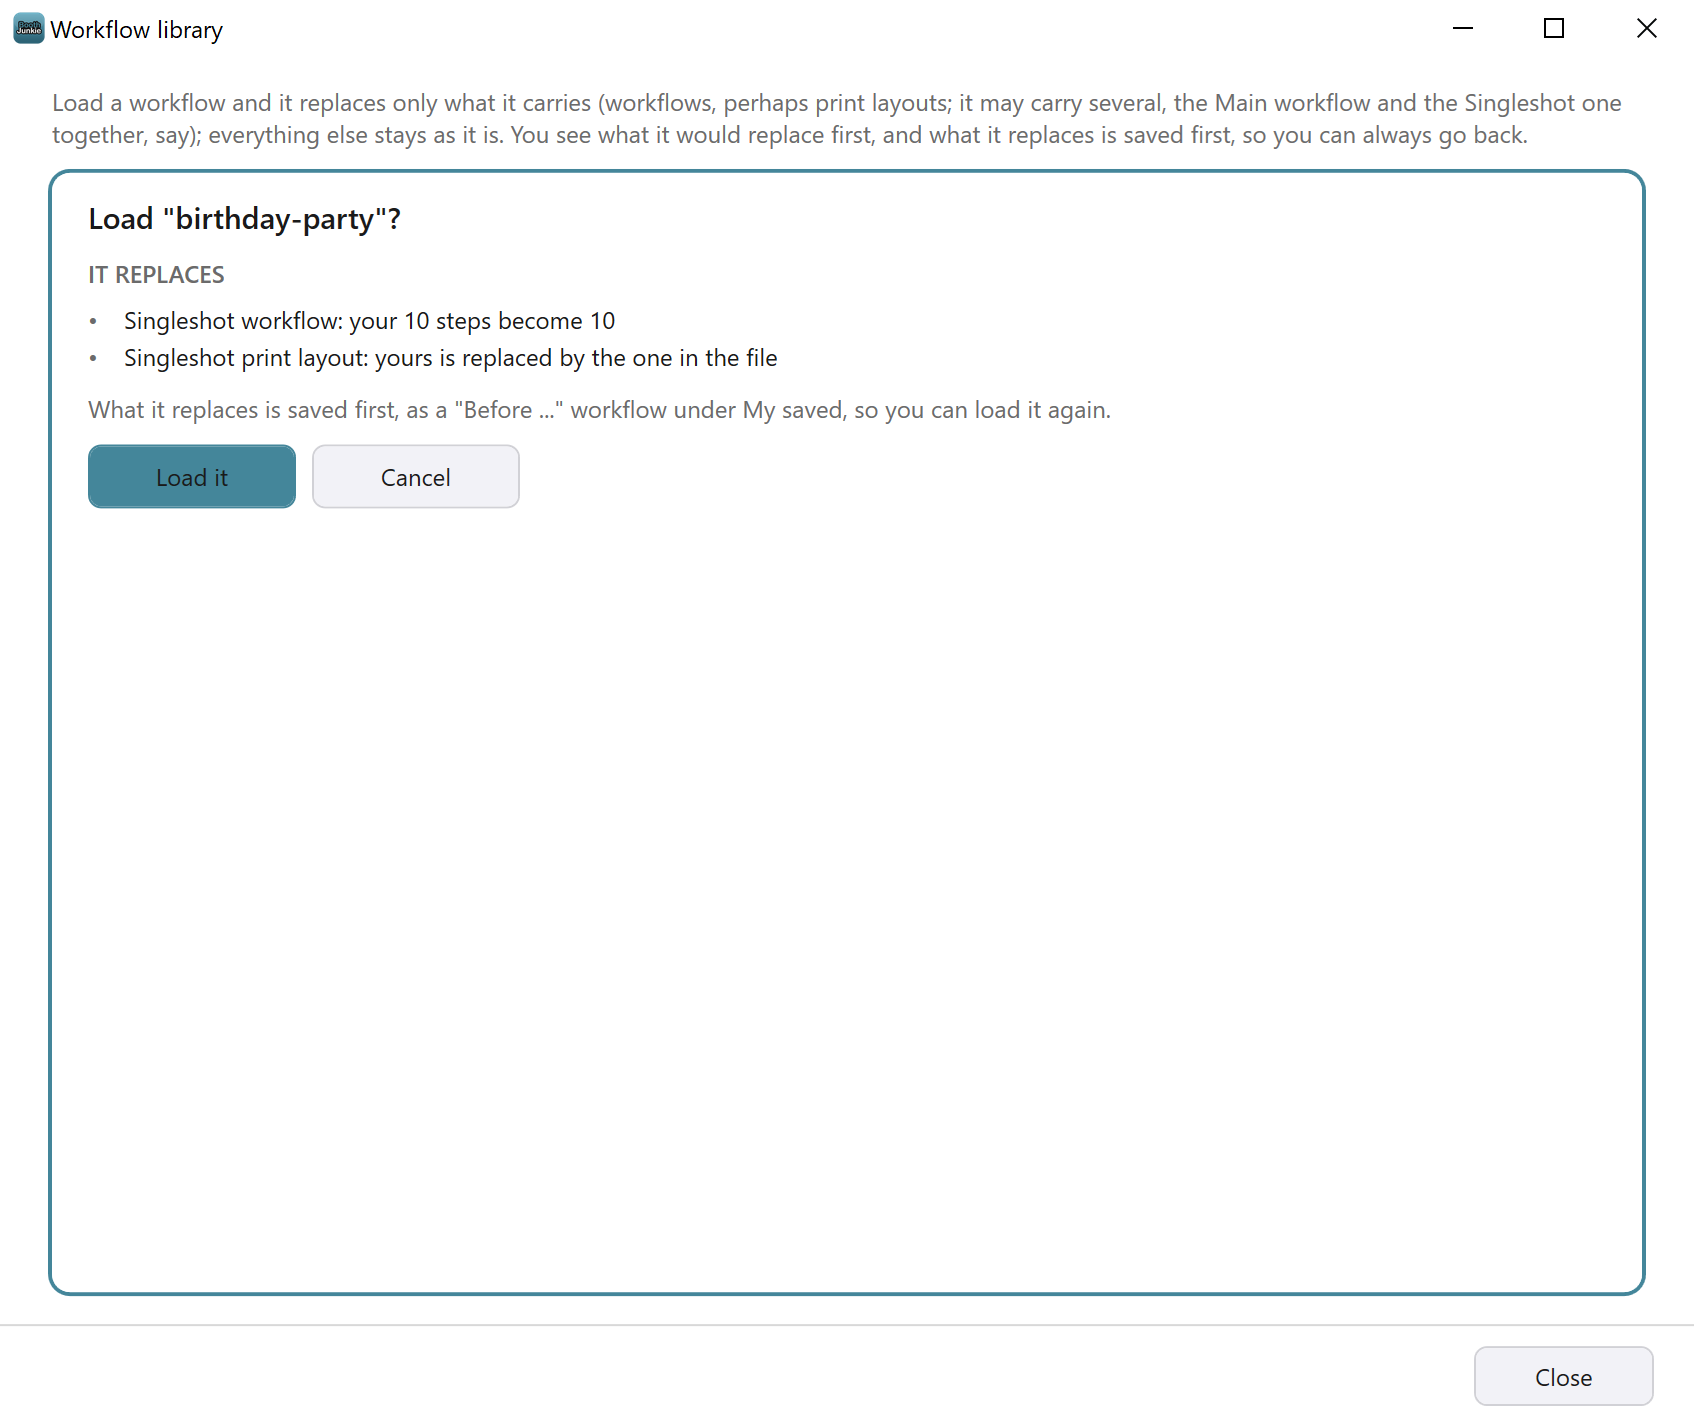
The file in this picture is an example. -
Press Load it, or Cancel to leave everything as it is.
Result: What the file replaces is saved first, as a Before copy under My saved, then the file is loaded. Anything you should look at is listed under A few things to check.
-
Close the window, look over the workflow and its print layout, and press Save in the Admin Panel.
To undo an import, load its Before copy from My saved. See The Before Copy: Going Back After Loading a Workflow. Pictures and sounds you already have are never replaced, and nothing is ever deleted.
On the other PC
None of the other PC’s hardware or settings travel with the file, so set them up there:
- A Card Payment step needs that PC’s card reader, set up on Triggers → Card Payment. The step’s price travels as a number, and that PC charges it in the currency chosen there.
- A Phidget step needs that PC’s Phidget, and Phidget inputs are set up on Triggers → Phidget Inputs. See Phidget Boards: What They Do and What You Need.
- A step that waits for Event 1 to Event 5 needs that PC’s Keyfob, Phidget input or keyboard shortcut to send it.
- Any other hardware a step uses, such as the Light Ring, must be connected to that PC.
Then try the workflow with Start Booth before the event.
Premium: AI steps and Template Library artwork
Exporting and importing works with any licence. An AI Processing step needs an active Premium and AI credits on the PC that runs it. A print layout from the Template Library only shows its own artwork while there’s an active Premium.
Tip: Copy a workflow into another settings file
The same buttons copy a workflow and its print layout into another settings file on the same PC: export it, Load the other settings file, import it, and press Save.
Related articles
- How the Workflow Library Works: Ready-Made, Booth Junkie and Your Own Workflows
- The Before Copy: Going Back After Loading a Workflow
- Saving and Loading Your Settings
- Main Workflow vs. Shot-Type Workflows
This guide is from Booth Junkie, photo booth software for Windows that has supplied the photo booth industry for 10 years. It runs enclosed booths, selfie pods and magic mirror booths with a Canon DSLR or a webcam, prints to any Windows printer, and sends photos to guests by WhatsApp, SMS and email.